
I’m somewhat crafty, with an affinity for DIY projects. I’ve always loved succulents and have been dying to make my own wreath with mini terracotta pots! This past weekend, I finally had the opportunity to do so when we were taking down some old shrubs outside our house. I’m definitely pleased with the results!

The best part about this project is that it’s super easy and inexpensive. You don’t need much more than terra cotta pots, glue, string, moss or floral wire, scissors, and succulent plants from your local nursery or garden center. Oh, and a wreath of course.
Here are some step-by-step instructions on how to make your very own terracotta succulent wreath.
Homemade Terracotta Succulent Wreath
Supplies you’ll need:
- 18 Inch Grapevine Wreath
- 10-12 Small Terracotta Pots, Dollar Tree
- 3 Faux Succulents, Dollar Tree
- Reindeer Moss
- Regular Moss
- White Bird
- Hot Glue Sticks
Terracotta pots are easy to come by, and they’re the perfect size for a succulent wreath. This project is really easy to put together – even if you’ve never made one before!
It’s time to bring out the plants, it’s Spring! There is nothing better than decorating your front door with flowers and plants. But if you are like me, you don’t have much of a green thumb or a lot of space for gardening. That doesn’t mean that you can’t plant anything at all though! With just a few supplies from your local craft store, you can make this cute mini-terracotta pot wreath that will be perfect for any springtime get-together.
Start out by prepping your supplies. Layout all of the pots you want on the wreath in a design that works best for you (I used 10 total), spacing them enough to allow one strip of hot glue per pot. Next using your hot glue gun, attach strips of hot glue to the terracotta pots and press each firmly onto the wreath form.
Once all of the pots are attached, decide which ones you want to have succulents or moss in them. To make the moss look like it’s coming out of the pot, use hot glue on one side and then place the moss inside of the planters.
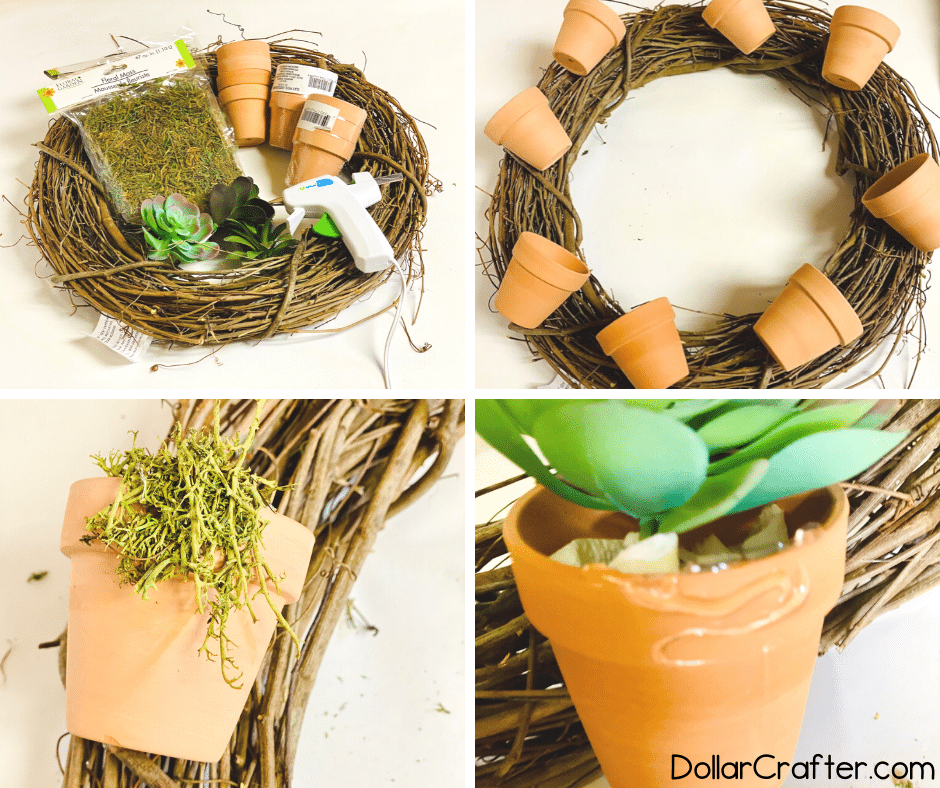
Add the succulents to some of the pots and then fill around it with moss and add some glue to the side so the moss looks like it is coming out of the pots.
Decide where you would like to place the white bird, and hot glue it into place.
After the glue has dried, hang your wreath and enjoy!
How to Make a Terracotta Succulent Wreath
Ready to get crafting? You will find the full tutorial below!
Terracotta Succulent Wreath

What if I told you that you could turn a terracotta pot into an adorable succulent wreath with just a few supplies? And all for less than $10! Well, now you can because it's true!
Materials
- 18 Inch Grapevine Wreath
- 10-12 Small Terracotta Pots, Dollar Tree
- 3 Faux Succulents, Dollar Tree
- Reindeer Moss
- Regular Moss
- White Bird
- Hot Glue Sticks
Tools
- Hot Glue Gun
Instructions
- Gather your supplies.
- Start by laying out all of your terra cotta pots onto the wreath to see which way you would like them to lay once glued. I used 10 pots.
- Next using your hot glue gun, add strips of hot glue to the terracotta pots and then press them firmly onto the wreath.
- Once all of the pots are on the wreath, decide which ones you would like to have moss or succulents in.
- To make the moss look like it is coming out of the pot, add some hot glue to the side and then add the moss on top, don’t press too firmly or you might burn your fingers.
- Add the succulents to some of the pots and then fill around it with moss and add some glue to the side so the moss looks like it is coming out of the pots.
- Decide where you would like to place the white bird, and hot glue it into place.
- After the glue has dried, hang your wreath and enjoy!
Notes
For more unique wreath crafts visit Dollar Crafter.com
More Fun Wreaths You Will Love!


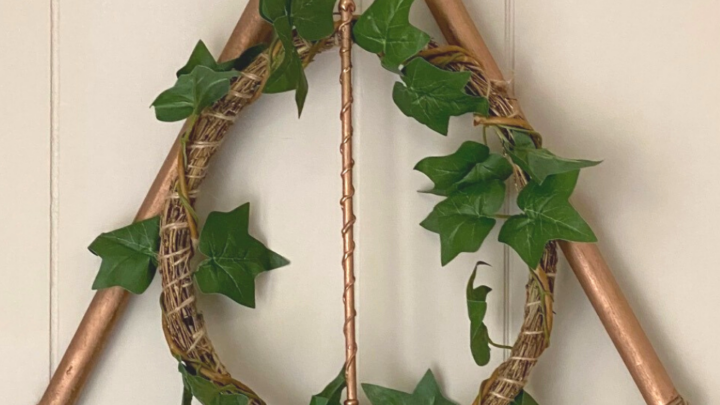
Harry Potter Deathly Hallows Wreath
This Harry Potter Deathly Hallows Wreath is perfect for any fan of the series or anyone looking to give their home some magical flair. Hang this on your door to show off your love of all things Harry potter!

Homemade Clothespin Magnolia Wreath
This beautiful DIY magnolia clothespin wreath looks great from year round and requires next-to-no skill, making it perfect for any beginner.

Homemade Hello Spring Embroidery Hoop Wreath
This charming and affordable embroidery hoop wreath is a fun way to welcome Spring on a budget!

Hello Summer Watermelon Wreath
Bright, simple, and fun! This homemade Hello Summer Watermelon Wreath is the perfect way to welcome summer!

Homemade Mardi Gras Wreath
Mardi Gras is right around the corner and we have a fun wreath that you can make for under $10 that will brighten up your door!

DIY Tie Dyed Welcome Grapevine Wreath
Brighten your door with this beautiful tie dyed Welcome grapevine wreath. This simple DIY wreath tutorial includes the Welcome SVG craft file!

Homemade Easter Lilly Grapevine Wreath
Create a beautiful homemade Easter Lilly Wreath with items you can easily find at your local Dollar Tree!

Homemade Cherry Blossom Hoop Wreath
This simple yet elegant homemade cherry blossom hoop wreath will bring a bright burst of spring color to your home décor!

DIY Carrot Wreath
This DIY Carrot Wreath is a super simple and fun way to add a dash of color to your front door or wall for Spring.
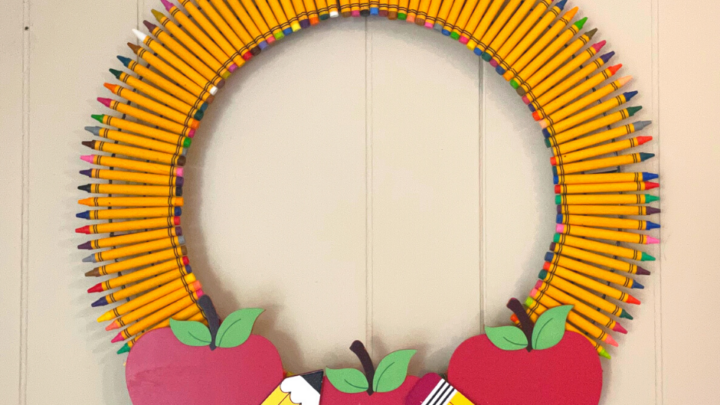
DIY Teacher Crayon Wreath: The Coolest Back to School Gift
The DIY Crayon Wreath is the perfect DIY gift for any teacher. It's a fun, easy and inexpensive way to say "Happy Back-to-School!"


Please Save This to Pinterest
Your shares are how this site grows and I am sincerely grateful. Know a friend who’d like this? Please share it on Facebook or save it to your favorite crafts board on Pinterest.