
Seed bombs are small clusters packed with wildflower seeds that can transform neglected areas into colorful pollinator habitats. Are you ready to make your garden beautiful?
Gardening can be a very rewarding hobby. The benefits are plentiful- you get to eat healthier food, you reduce your carbon footprint by eliminating the need for produce from halfway around the world, and it’s therapeutic.
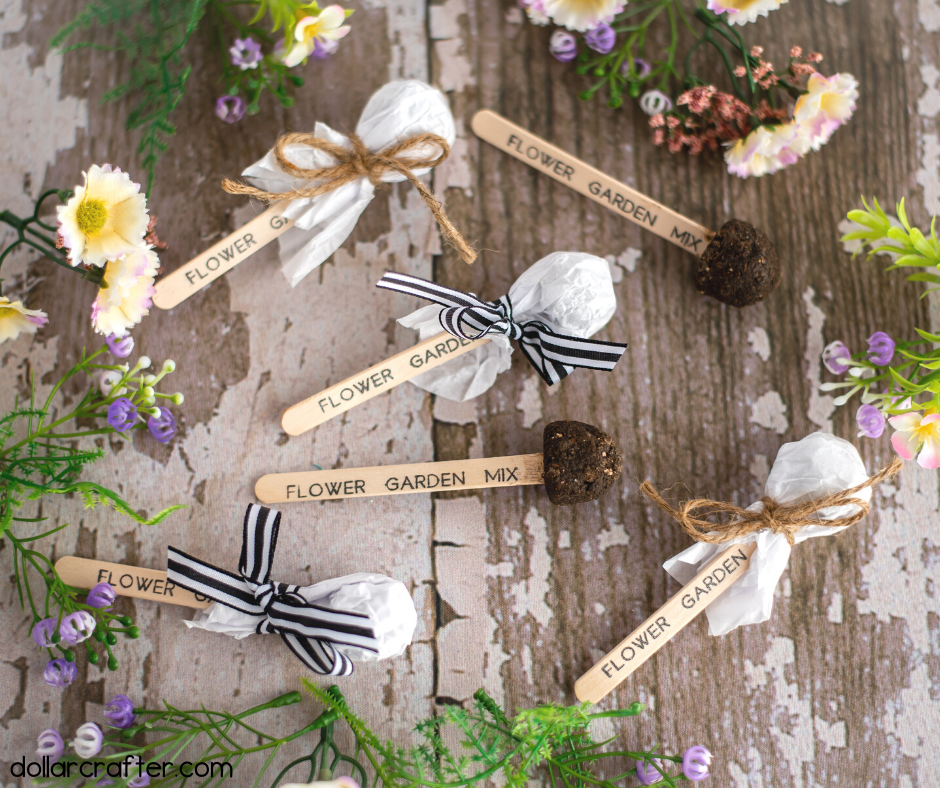
Homemade Seed Pops
Seed bombs are the perfect gift for people who really love plants. People can make them themselves and they’re so easy to do! All you need is a handful of supplies, and a little bit of time.
Why you should plant seed bombs:
- You can use your own soil or compost.
- It’s a quick and easy way to get started gardening.
- You’ll feel closer to nature than ever before!
Supplies needed:
- Planting seeds
- Water
- Soil or compost (about 1/2 cup)
- Craft sticks
- Bentonite clay (about 1/2 cup)
- Tissue paper
- Ribbon or twine
- Pen
- Circle or any shape silicone mold
- Measuring Spoons
- Cricut compatible pen
- Painters tape
- Scissors
- Cricut
- Standard grip map
Let’s dig in!
Tips for Making DIY Seed Pops

In a large mixing bowl add soil or compost of your choice. In the same mixing bowl, add bentonite clay. The dirt/clay mixture should be a 1:1 ratio.
Add your seeds. Be sure not to overdo it on the seeds to avoid crowding.
Slowly add water. The texture of the mixture will start to form into a solid, like putty or play-doh. On your Cricut, evenly line up the craft sticks on the vertical lines of the mat, skipping a line in between. This will help you know where to line up the text on the stick. Use painter’s tape to hold the sticks in place on the mat and move the star wheels to both ends of the machine.

Leave about 1/2 an inch from the bottom of the stick to accommodate for the depth of the “pop.”Load the Cricut pen into clamp A. In Design Space, using the text feature choose a writable font to create the seed markers/pop stick. We used the font “Slim Extreme”.

Measure the length of the craft stick and adjust the size of the text to fit evenly on the stick. At the top of the toolbar, select the text layer and underline type change from “cut” to “draw.” Select make it.
When prompted to the mat preview screen, select the snap mat feature. Line up the mat and once it turns green it will snap a photo of the mat. Now you will be able to see exactly where the text needs to be on the craft sticks on the mat. Move the text on top the top, middle of the sticks.

Hit continue and adjust the material to heavy chipboard then press go. If after the first pass the writing is not dark enough repeat with another pass. It may take 2-3 passings for the writing to appear boldly on the craft sticks. Insert the seed markers (craft sticks) into the mold. Allow to dry and harden 24-48 hours.
Very carefully wiggle and remove them from the mold. Cut tissue paper and wrap around the finished seed pop. Cut off twine or ribbon to secure and give as gifts themselves or add as embellishments to packages.
How to Make Seed Pops at Home
Ready to get crafting? You will find the full tutorial below!
DIY Seed Pops

Materials
- Planting seeds
- Water
- Soil or compost (about 1/2 cup)
- Craft sticks
- Bentonite clay (about 1/2 cup)
- Tissue paper
- Ribbon or twine
- Pen
- Circle or any shape silicon mold
- Measuring Spoons
- Cricut compatible pen
- Painters tape
Tools
- Scissors
- Cricut
- Standard grip map
Instructions
- In a large mixing bowl add soil or compost of your choice (I’m using regular top soil). Using a tablespoon measure out the amount of soil used (4 tablespoons).
- In the same mixing bowl, add bentonite clay (about 4 tablespoons). The dirt/clay mixture should be a 1:1 ratio.
- Add your seeds. Be sure not to over do it on the seeds to avoid crowding.
- Slowly add water. The texture of the mixture will start to form into a solid like putty or play doh.
- On your Cricut, evenly line up the craft sticks on the vertical lines of the mat, skipping a line in between. This will help you know where to line up the text on the stick. Use painters tape to hold the sticks in place on the mat and move the star wheels to both ends of the machine. Leave about 1/2 an inch from the bottom of the stick to accommodate for the depth of the “pop.”
- Load the Cricut pen into clamp A. In design space, using the text feature choose a writable font to create the seed markers/pop stick. We used the font "Slim Extreme".
- Measure the length of the craft stick and adjust the size of the text to fit evenly on the stick.
- At the top of the tool bar, select the text layer and under line type change from “cut” to “draw.”
- Select make it. When prompted to the mat preview screen, select the snap mat feature.
- Line up the mat and once it turns green it will snap a photo of the mat. Now you will be able to see exactly where the text needs to be on the craft sticks on the mat. Move the text on top the top, middle of the sticks.
- Hit continue and adjust the material to heavy chipboard then press go.
- If after the first pass the writing is not dark enough repeat with another pass. It may take 2-3 passings for the writing to appear boldly on the craft sticks.
- Insert the seed markers (craft sticks) to the mold.
- Allow to dry and harden 24-48 hours. Very carefully wiggle and remove them from the mold.
- Cut tissue paper and wrap around the finished seed pop. Cut off twine or ribbon to secure and give as gifts themselves or add as embellishments to packages.
Notes
For more fun craft ideas visit DollarCrafter.com
Please Save This to Pinterest
Your shares are how this site grows and I am sincerely grateful. Know a friend who’d like this? Please share it on Facebook or save it to your favorite crafts board on Pinterest.
How many does this usually make?