
Are you ready to get creative and make some adorable clay gnomes? You can use these little guys to decorate a garden or put them on your front porch. You can turn them into magnets or have them hang out on the bookshelf.
They’re super easy to make, and they’re perfect for kids of all ages. Follow the steps below to get started.

My kids are obsessssssed with gnomes. I think they’re cute, but I don’t understand how everyone fell in love with them, LOL. These mini clay gnomes are going in my garden as garden markers. Yes, they’re tiny, but my garden is small too. 😉
Homemade Clay Gnomes
Supplies needed:
- Parchment paper
- Baking sheet
- Polymer clay in grey, white, tan, and colors of choice for hats
- Mod podge
I used this polymer clay pack when I first started working with clay. I like it a lot, and it comes in a wide variety of colors.
Start this project with a clean surface, or you’re going to get dirt, dust, and other ickies onto your gnomes, and that wouldn’t be much fun.
It would be cute to make miniature clay mushrooms or other fairies and mystical creatures. If you buy a variety pack of clay, you’ll have everything you need to get started. 🙂
Can you paint polymer clay?
You can paint polymer clay! If you only have white clay, you can use this paint and make your gnomes any colors you’d like. They’d look super cute popping out of this succulent wreath!
How to Make Clay Gnomes
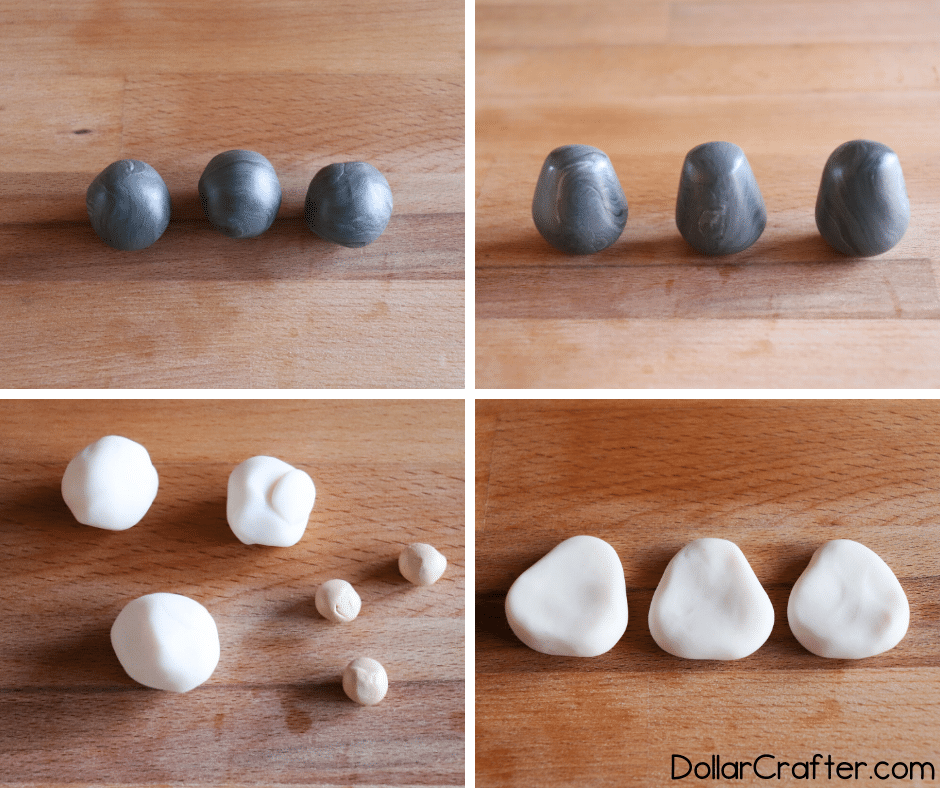
To make a gnome, you need a roll of clay. So first, roll the grey clay into the shape of a cylinder that tapers at the top.
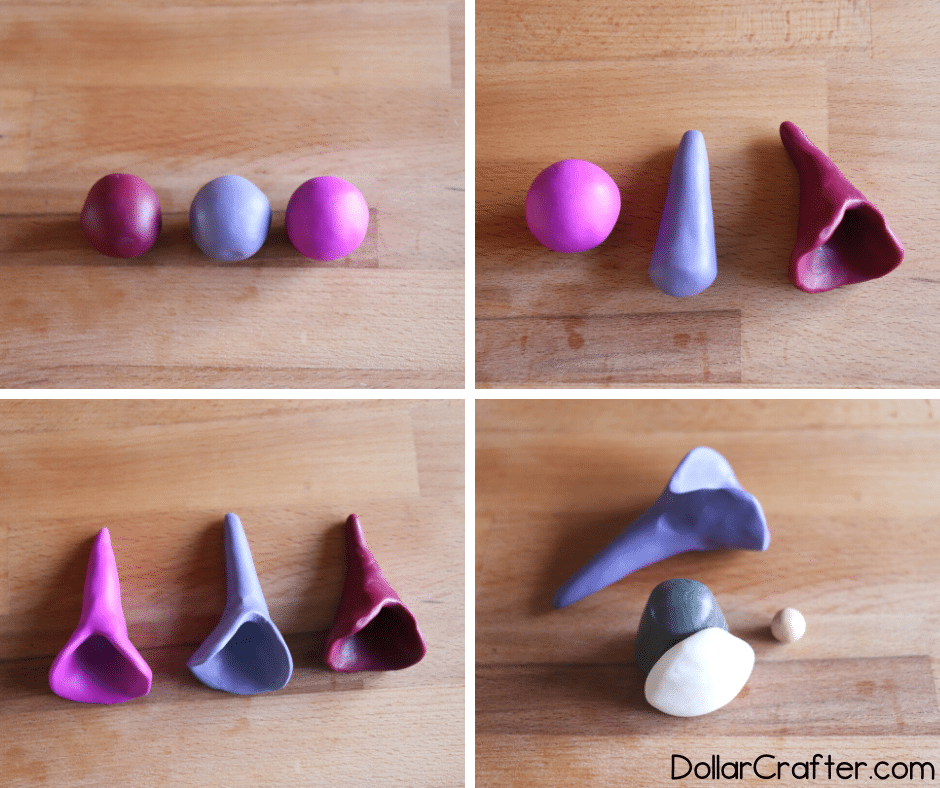
Roll the colorful clay into a ball and press it over your grey cylinder to form a hat.
Form white clay into triangles for the beard and nose, and then attach them to the body.
I like this clay tool kit from Amazon to help me cut and score the clay.
Put the hat over the beard and body. Press in the nose and score lines into the beard with clay. Bake as directed on package, then seal with mod podge when it’s cool.
Here’s a complete guide to sealing polymer clay if you haven’t worked with it before.
Ready to get crafting? You will find the full tutorial below!
Clay Gnomes

Materials
- Parchment paper
- Baking sheet
- Polymer clay in grey, white, tan, and colors of choice for hats
- Modge podge
Tools
- Paint Brush
- Clay cutting and piercing tools
- Oven
Instructions
- For each gnome roll a grey 6cm ball for the body, 5 cm colorful ball for the hat, 4 cm white ball for the beard and 1 cm tan ball for the nose.
- Form the grey ball into a cylinder shape that slightly tapers at the top.
- Form the colored ball into a hat that is tapered at the top and open at the bottom to fit around the grey body.
- Form the white clay into a triangle shape with rounded edges. Press this to the bottom front of the body.
- Layer the hat over the beard and body.
- Press the tan nose into the center of the body, over the beard and below the hat.
- Score lines into the beard using a clay tool.
- Bake as directed on the package.
- When the clay cools, seal with mod podge.
Notes
For more fun crafts visit DollarCrafter.com
Please Save This to Pinterest
Your shares are how this site grows, and I am sincerely grateful. Know a friend who’d like this? Please share it on Facebook or save it to your favorite crafts board on Pinterest.
These little gnomes are so cute!!!