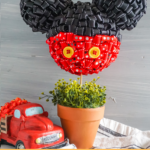
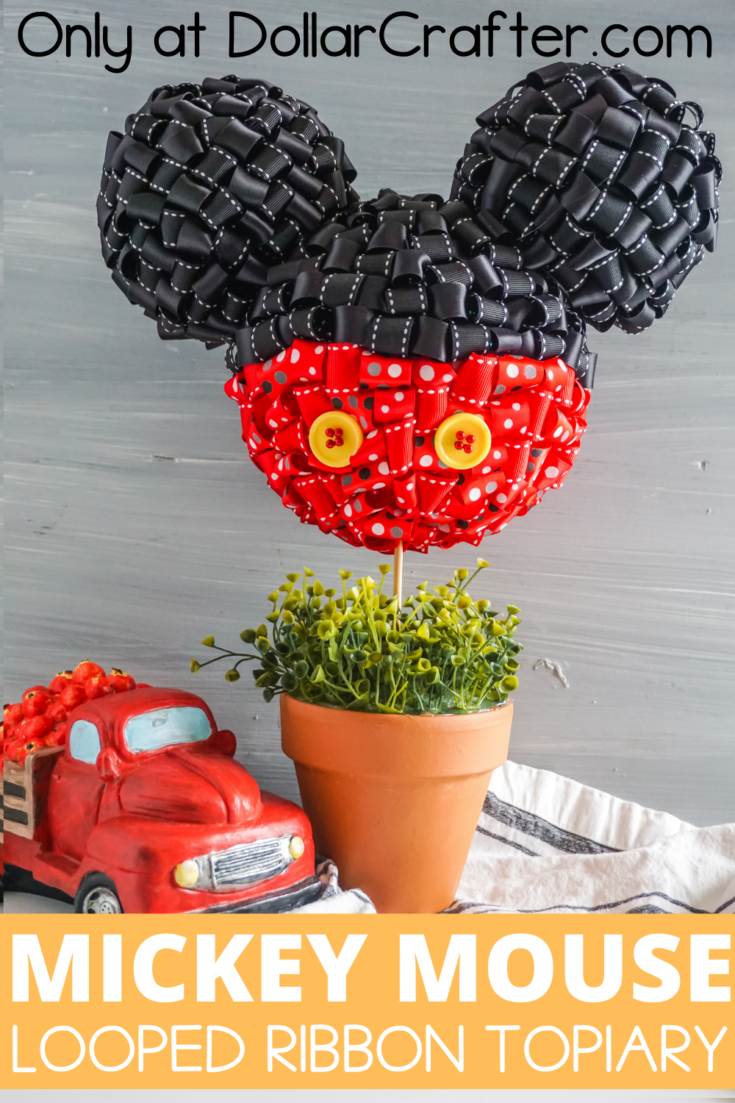
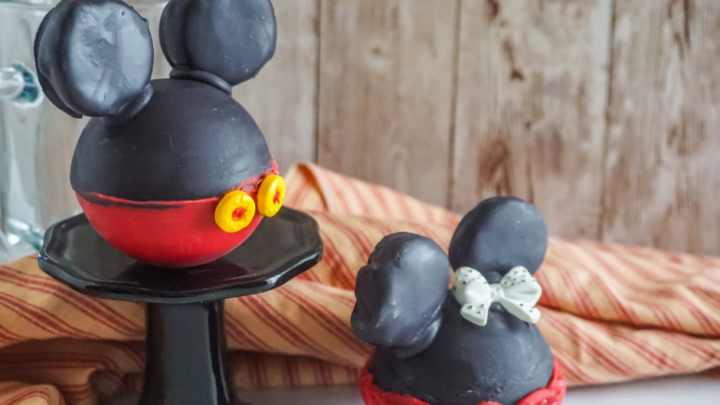
This Mickey Mouse Ribbon Topiary has to be one of my favorite crafts yet! It’s so cute, and despite the intricate look, it doesn’t take toooo long to make. I actually found it relaxing.
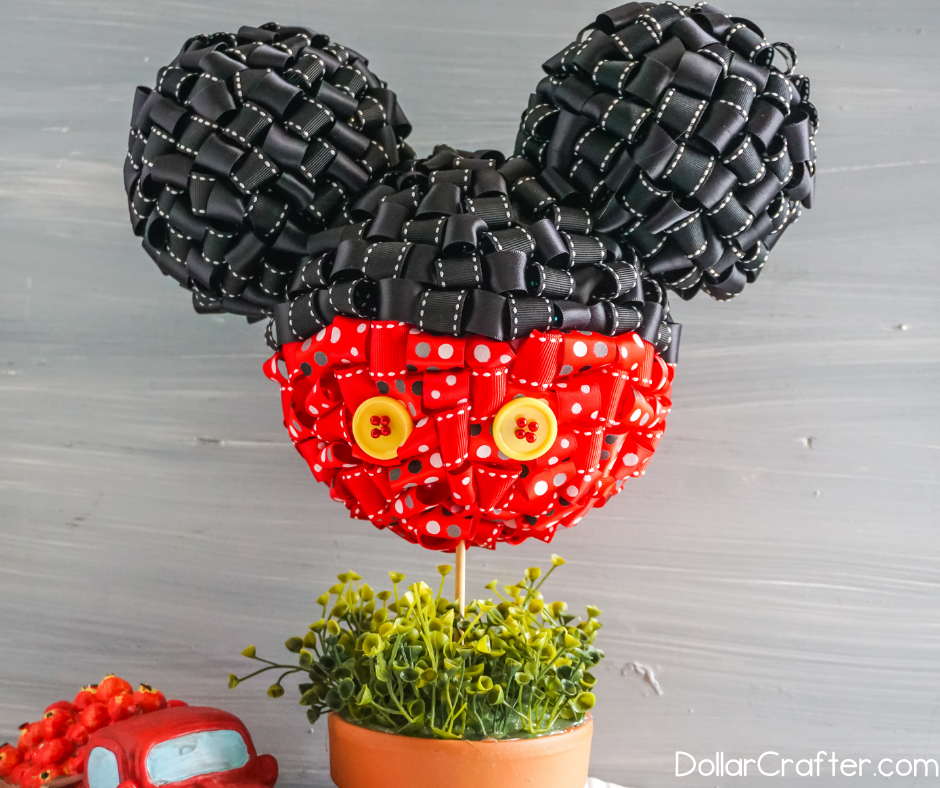
Homemade Mickey Mouse Topiary
This adorable Mickey Mouse topiary is a perfect addition to your Disney decor or would be absolutely adorable to add to a homemade gift basket. This would even be super cute to add as a centerpiece to a Disney themed birthday. The options of what you can do with this ribbon topiary are endless!
Supplies:
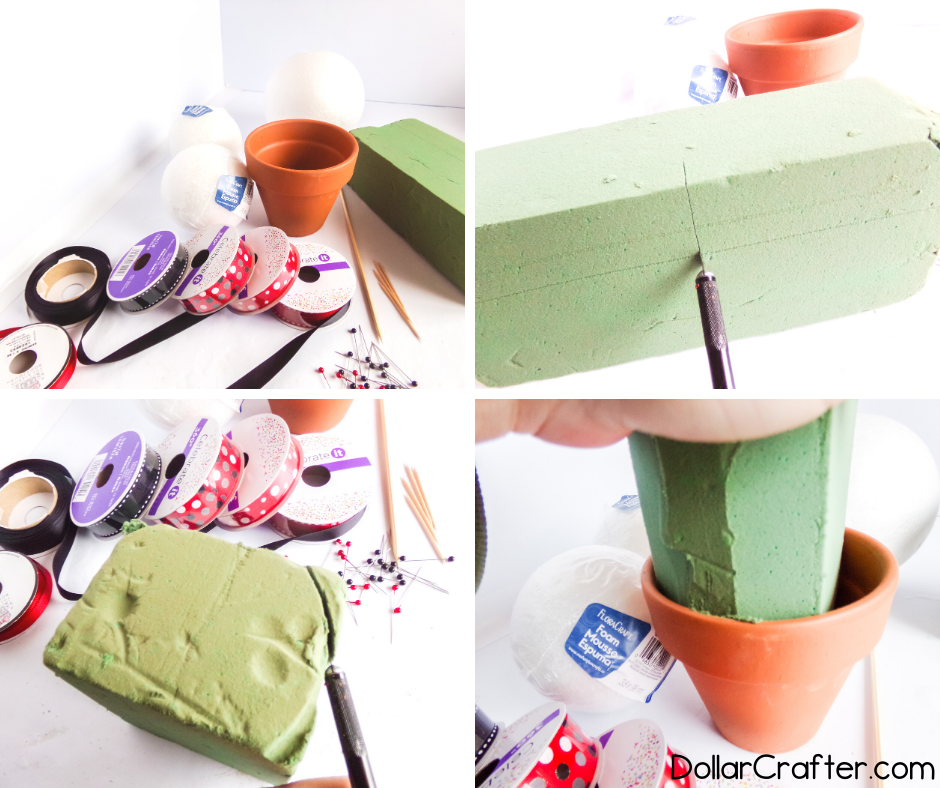
- 2 – 3-inch Foam Balls
- 1 – 5-inch Foam Ball
- 1 – ¼-inch Dowel
- 4 Toothpicks
- 1 – 4-inch Terra Cotta Pot
- Foam to Fill the Terra Cotta Pot (about ⅓ green foam brick)
- Faux Greenery Plants to Cover Foam in Pot
- 12 yds ½-inch Red Ribbon
- 12 yds ½-inch Black Ribbon
- 2 – ½-inch Yellow Buttons
- 100-150 Sewing Pins
If you are a Mickey Mouse fan please check out these easy DIY Rope Coasters For Mickey Mouse Lovers.
Tips for Making Your First Ribbon Topiary
Be sure to follow the directions closely while making this Mickey Mouse Ribbon Topiary. There are a bunch of little tips, like hot gluing the end of the toothpick to make sure it doesn’t push in any further, that will be extremely helpful in making your first topiary out of ribbon.
One of the most important things you can do while creating your topiary is to make sure all of the pins are pressed all the way into the foam ball. This will ensure that the ribbons are secured firmly.
Also, overlap the ribbon to make a loop. You’ll need to slightly overlap the ends of the ribbon to make a loop. If you skip this tip, the ends of your looped ribbons will separate and you will have a floppy piece that sticks out all weird.
Take your time.
You will be pinning a lot of ribbon loops while making this craft! But, be patient – it will pay off. The last thing you want is a bunch of spaces in Mickey’s head because you went too fast!
Take it one loop at a time. 🙂
Saving Money on Crafts
You can gather most of these supplies at the dollar store, or find them on clearance at stores like JoAnn’s and Michael’s. I’m all about affordable crafting! You can even use a recycled terracotta pot!
Ribbon Making Craft Questions:
You can use any ribbon you’d like, but using a stiffer ribbon like grosgrain will help your ribbons retain their shape.
Older kids can definitely help with this craft! Due to the sharp pins and small parts, be careful with little ones around.
How to Make a Ribbon Topiary
The full instructions to make the Mickey topiary are below. 🙂
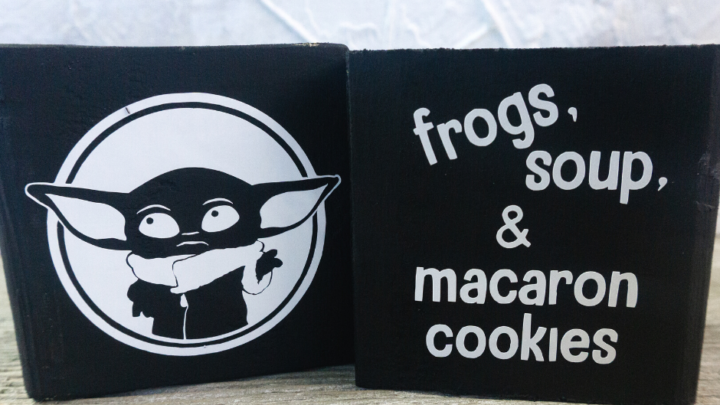
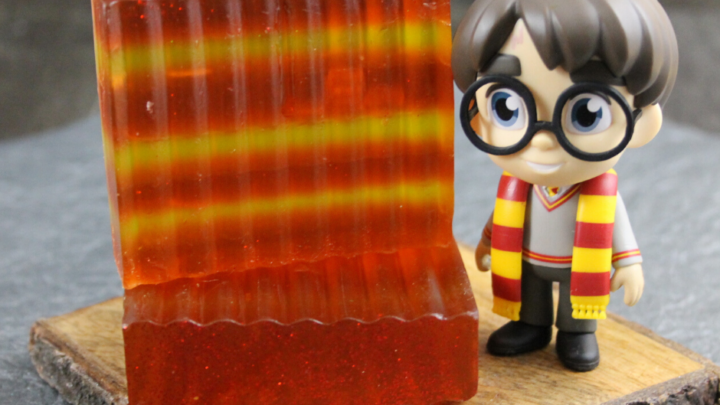
Have fun with it, and mix it up! You can create all kinds of characters as ribbon topiaries. Try Mickey and Minnie, or how about Star Wars or Harry Potter? I’d love to see what you come up with!
Ribbon Mickey Topiary
Materials
- 2 - 3-inch Foam Balls
- 1 - 5-inch Foam Ball
- 1 - ¼-inch Dowel
- 4 Toothpicks
- 1 - 4-inch Terra Cotta Pot
- Foam to Fill the Terra Cotta Pot (about ⅓ green foam brick)
- Faux Greenery Plants to Cover Foam in Pot
- 12 yds ½-inch Red Ribbon
- 12 yds ½-inch Black Ribbon
- 2 - ½-inch Yellow Buttons
- 100-150 Sewing Pins
Tools
- Scissors
- Ruler
- Craft Knife
- Hot Glue Gun & Glue
Instructions
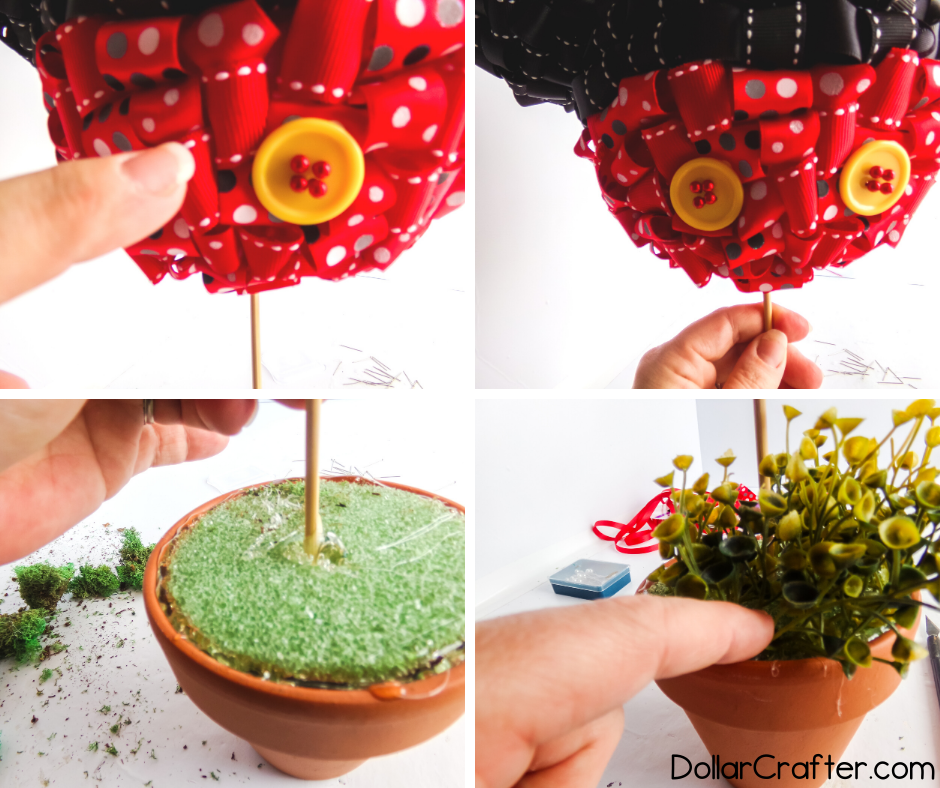
- Cut the foam to fill the terra cotta pot to fit inside the pot. Place the foam into the pot, hot gluing it in place.
- Press the dowel into the foam in the pot, securing the dowel at least 3-inches deep into the foam.
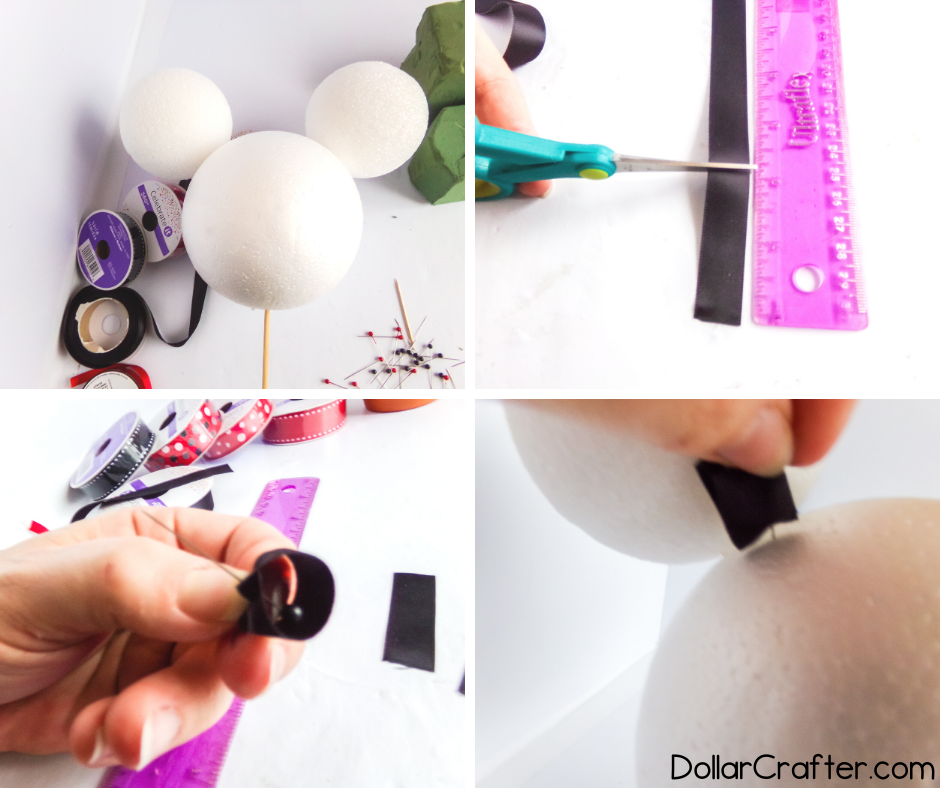
- Slide the larger foam ball onto the dowel, hot gluing it about 2 inches onto the dowel to hold it in place while you work.
- Slide two toothpicks halfway into the large foam ball on either side of the ball, about 5-6 inches apart. Add hot glue to ensure that the toothpick doesn’t go any deeper.
- Press the two smaller balls onto the toothpicks, pressing the small balls all the way to touching the larger one.
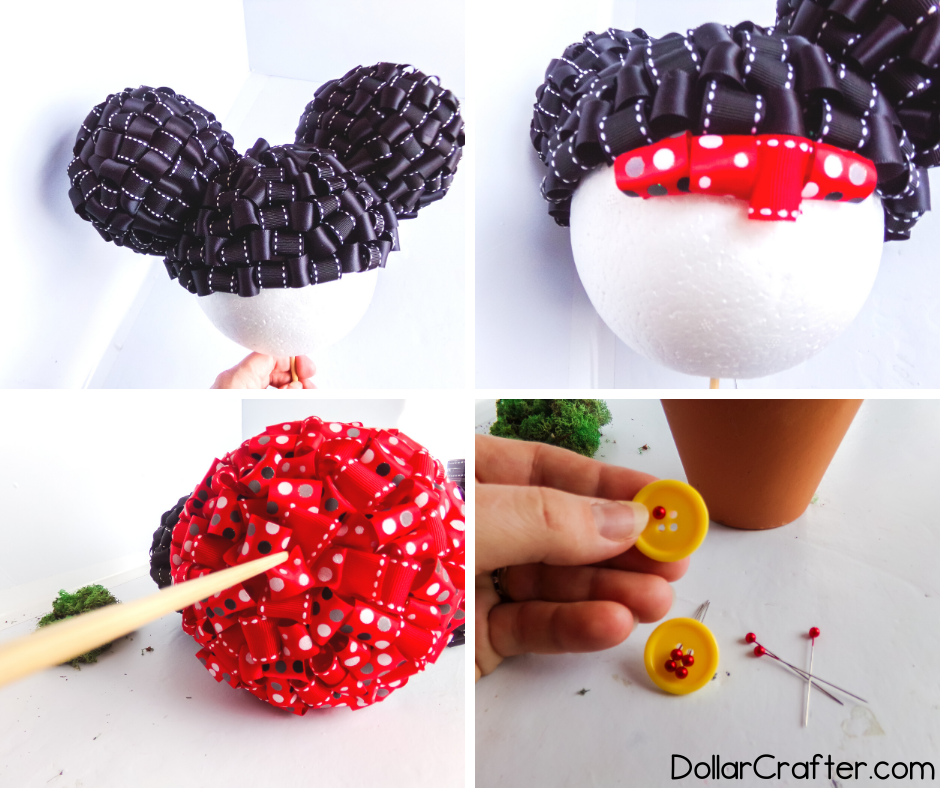
- Cut the black ribbon into 2-inch lengths.
- Roll a 2-inch length of black ribbon into a circle, overlapping the two ends by about ¼-inch.
- From the center of the ribbon loop, slide a pin through the two ends of the ribbon, securing the loop, then press the ribbon loop into the upper half of the large ball or either of the ears. Press the pin all the way into the foam ball to ensure that the ribbons are secure.
- Repeat making the looped black ribbons, filling the entire upper half of the large ball and both of the ears covering the entire surface. I worked across the midline of the large ball in a clean row, then worked up from there, to make my loops semi-organized, but that is not necessary. Make sure all of the pins are pressed all the way into the foam ball, to ensure that the ribbons are secure.
- When the black ribbon covers the entire upper half of the large ball and the two ears, cut the red ribbon into 2-inch lengths.
- Roll a 2-inch length of red ribbon into a circle, overlapping the two ends by about ¼-inch.
- From the center of the ribbon loop, slide a pin through the two ends of the ribbon, securing the loop, then press the ribbon loop into the lower half of the large ball. Press the pin all the way into the foam ball to ensure that the ribbons are secure.
- Repeat making the looped red ribbons, filling the entire lower half of the large ball and covering the entire surface. I worked across the midline of the large ball in a clean row, then worked down from there, to make my loops semi-organized, but that is not necessary. Make sure all of the pins are pressed all the way into the foam ball, to ensure that the ribbons are secure.
- Slide 4 red pins through the holes in your buttons, then press the pins into the bottom half of the large foam ball, about 3-inches apart.
- Hot glue the green faux floral elements onto the top of the foam in the terra cotta pot then enjoy!
Notes
For more fun Disney crafts visit DollarCrafter.com
More Disney Crafts You Will Love

Please Save This to Pinterest
Your shares are how this site grows and I am sincerely grateful. Know a friend who’d like this? Please share it on Facebook or save it to your favorite homemade beauty board on Pinterest.
This was so fun!!