
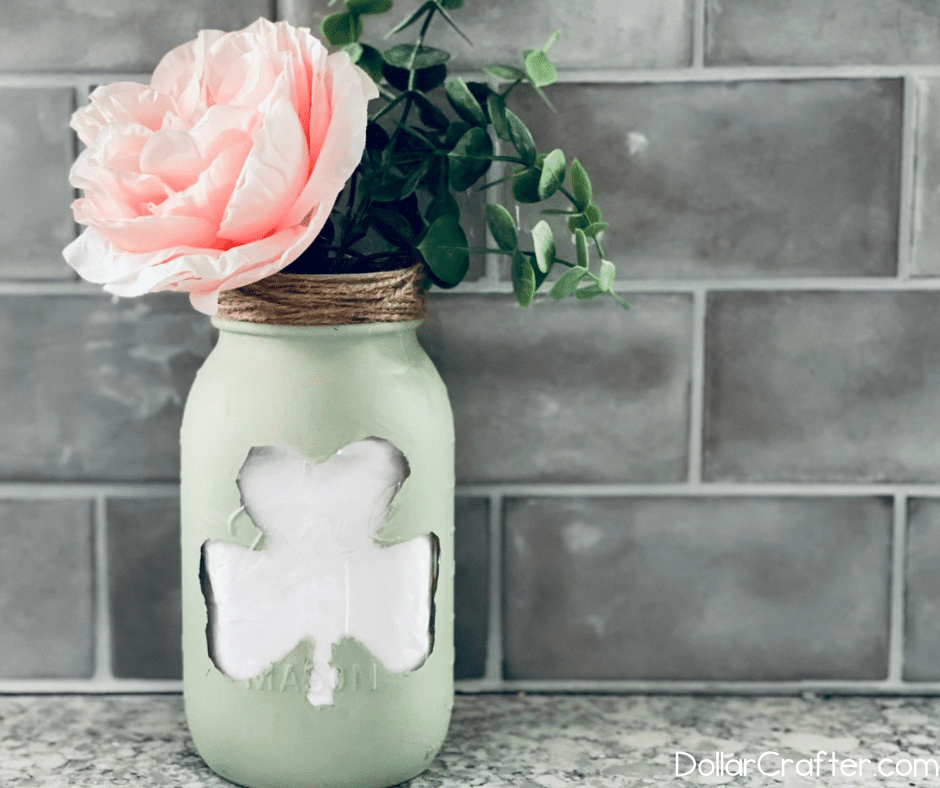
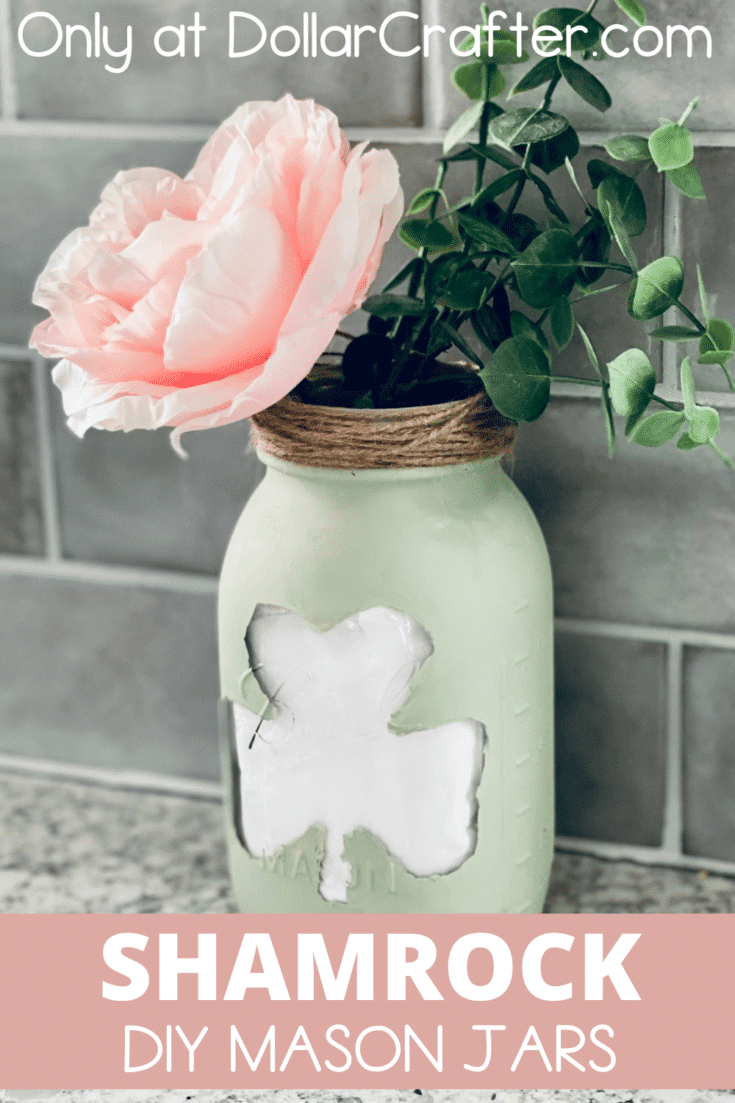
Add a touch of shamrock luck to your farmhouse décor with this simple DIY Painted Shamrock Mason Jar.
DIY Shamrock Mason Jar
This adorable shamrock jar would be perfect to fill with candies as a gift or display as a vase. It would even make a super cute tissue holder! This would also be a super fun craft to make with kids.
Supplies:
- Mason Jar
- Waverly Chalk Paint (celery)
- White Acrylic Paint or White Tissue Paper
- Jute Twine (Dollar Tree)
- Painters Tape
- Foam Shamrock (Dollar Tree)
- Mod Podge
- Paint Brush
Tips for Painting Mason Jars
Before starting to paint your Mason jars make sure you have a nice clean jar to paint on. I would suggest cleaning your jars with rubbing alcohol and allowing that to dry (it will dry very quickly) before you get to work. You can definitely use soapy water to clean your jars, however, using rubbing alcohol will help make sure that any icky residue or oils that may be on the jars are going to get removed really well giving you that clean smooth surface that is ideal for painting jars.
After your project has dried, and before you display your jars, make sure to go the extra mile and apply a sealant. If you are planning to display this mason jar inside a sealant such as Mod Podge will do the job. If you are planning to place your jars outside though, opt for a more protective sealant such as polyacrylic.
Another Mason Jar craft you should try is our DIY Pastel Chalk Mason Jars.
How to Make a Shamrock Painted Mason Jar
Let’s get crafting! Below is our written tutorial.
St. Patrick's Day Shamrock Mason Jar
Materials
- Mason Jar
- Waverly Chalk Paint (celery)
- White Acrylic Paint or White Tissue Paper
- Jute Twine (Dollar Tree)
- Painters Tape
- Foam Shamrock (Dollar Tree)
- Mod Podge
Tools
- Paint Brush
Instructions
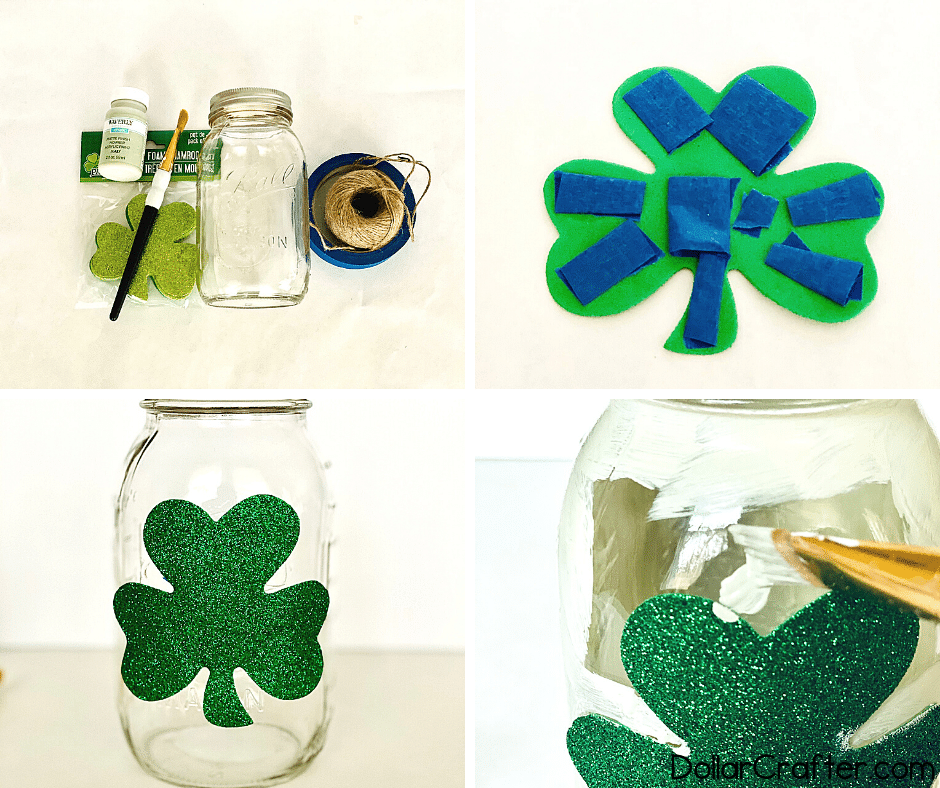
- Clean your mason jar and wipe dry. We recommend using rubbing alcohol to clean your jar.
- Apply the painters tape to the backside of the shamrock in loops.
- Next apply the shamrock to the mason jar
- Paint several coats of the Waverly celery chalk paint allowing a lot of time to dry in between or it won’t cover well. Making sure to cover around the shamrock foam shape
- Once completely dry, remove foam shamrock and apply jute twine around the top of the jar to desired amount.
- Paint the inside of the jar behind the shamrock window white or add tissue paper to the inside of the jar.
- Seal paint with a sealant such as Mod Podge.
- Add decorations and display!
Notes
For more fun mason jar crafts visit DollarCrafter.com
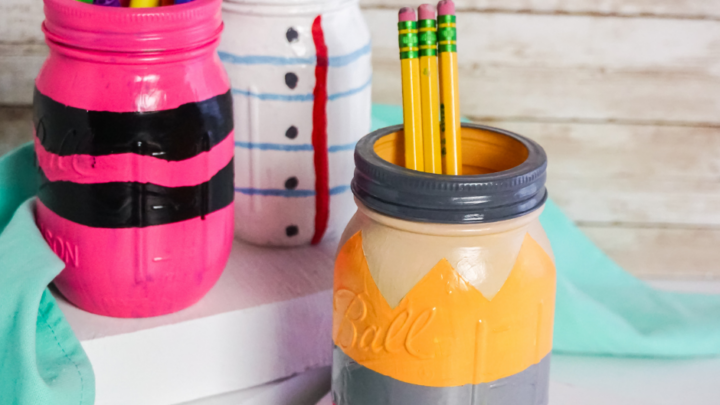
More Mason Jar Crafts You Will Love!

Please Save This to Pinterest
Your shares are how this site grows and I am sincerely grateful. Know a friend who’d like this? Please share it on Facebook or save it to your favorite homemade beauty board on Pinterest.