Create a cute Easter Tray Display with items you can easily find at the dollar store! This DIY Wooden Easter Tray can be made in under 15 minutes and cost you less than $10.
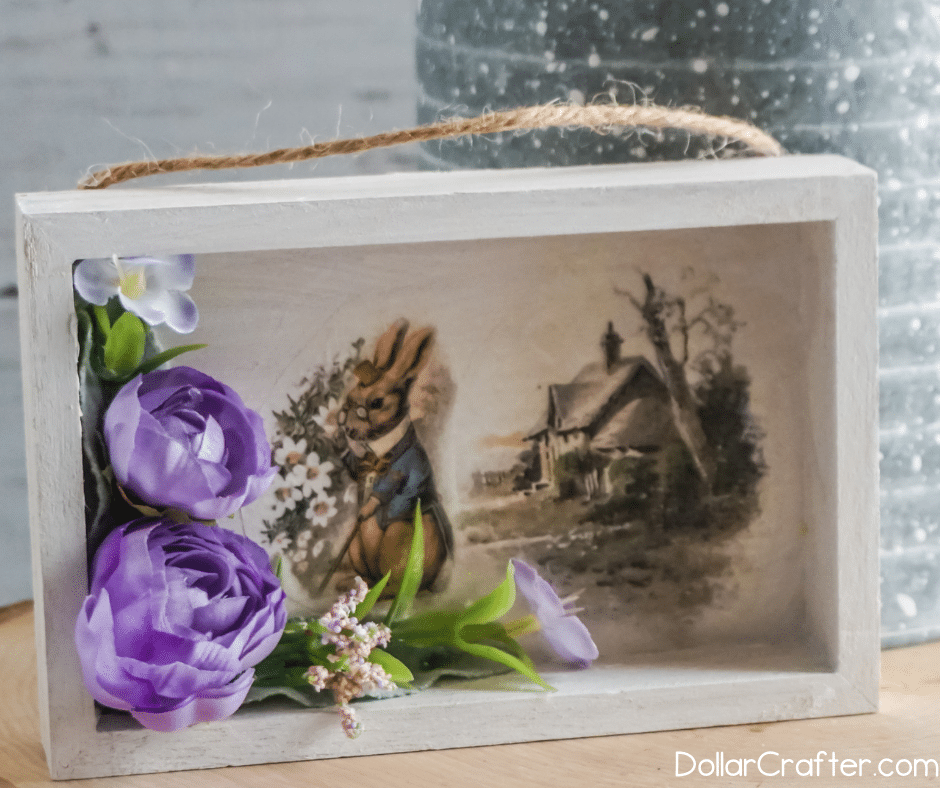
Growing up, I loved the mischievous stories of Peter Rabbit. I had a set of teeny tiny books filled with the various adventures that I would carry with me everywhere. The rice paper decoupage that we used to create this tray reminds me so much of the illustrations from those books and brings back so many fond childhood memories.
Even if you aren’t a Peter Rabbit fan, this homemade wooden tray still makes a beautiful Easter decoration 🙂
This Dollar Tree Tray would look amazing with our DIY Pastel Chalk Mason Jars.
DIY Easter Farmhouse Tray
Supplies Needed:
- Rice Paper Decoupage (we used this)
- Wooden Tray- Dollar Store
- White Acrylic Paint- Dollar Store
- Faux Flowers- Dollar Store
- Hot Glue Gun & Glue
- Mod Podge or other craft sealant (Dollar Tree)
- Paintbrush
Besides the rice paper, we snagged every item used in this craft at Dollar Tree. You could easily swap the rice paper out for another item from Dollar Tree, such as Easter-themed napkins.
We have been having a blast creating Dollar Tree Easter crafts this last month, make sure to swing by and check them all out for more inspiration!
Tips for Working with Rice Paper
First things first…before you craft, make sure you have the right paper. Rice paper is a widely used term, and for this craft, we are not talking about the edible rice paper you use to wrap food. So just throwing that out there….make sure that the rice paper you have is for crafting.
The neat thing about rice paper is that it is almost translucent, making it perfect for Mod Podge crafting. In addition, the texture of the paper gives the print a range of looks that can be accomplished from a sharp, clean outlined cut to a softer feathered look.
For a sharp outline, cut, apply, and then glue on with the Mod Podge. If you want a softer feather look cut, apply, use a wet paintbrush with water to trace around the edges, and then apply Mod Podge.
With our Easter tray, we went with the sharper outlines.
Also, since rice paper is pretty transparent, you want to keep this in mind when choosing the color of your tray. White is a safe choice because it will help the illustrations on the rice paper pop. However, you can opt to skip the paint (apply clear primer) to get a more muted look.
How to Make a Easter Dollar Tree Tray
Ready to get crafting? You will find the full tutorial below!
Easter Dollar Tree Farmhouse Tray

Materials
- 1 4-inch Wood Tray (Dollar Tree)
- 1 Sheet Rice Paper Easter Sheet
- White Acrylic Paint (Dollar Tree)
- Purple Faux Floral (Dollar Tree)
Tools
- Hot Glue Gun & Glue
- Mod Podge or other craft sealant (Dollar Tree)
- Paintbrush
Instructions
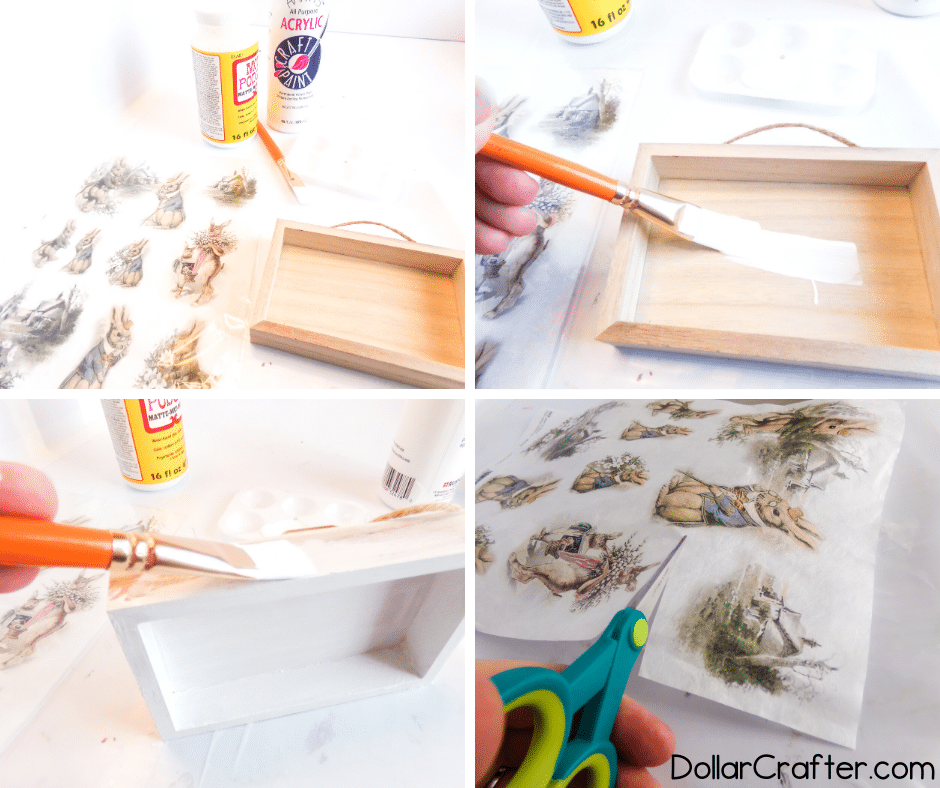
- Paint the wood tray with the white acrylic paint and allow the paint to dry completely.
- Cut out two of the elements on the rice paper Easter sheet and make sure they fit well inside your tray.
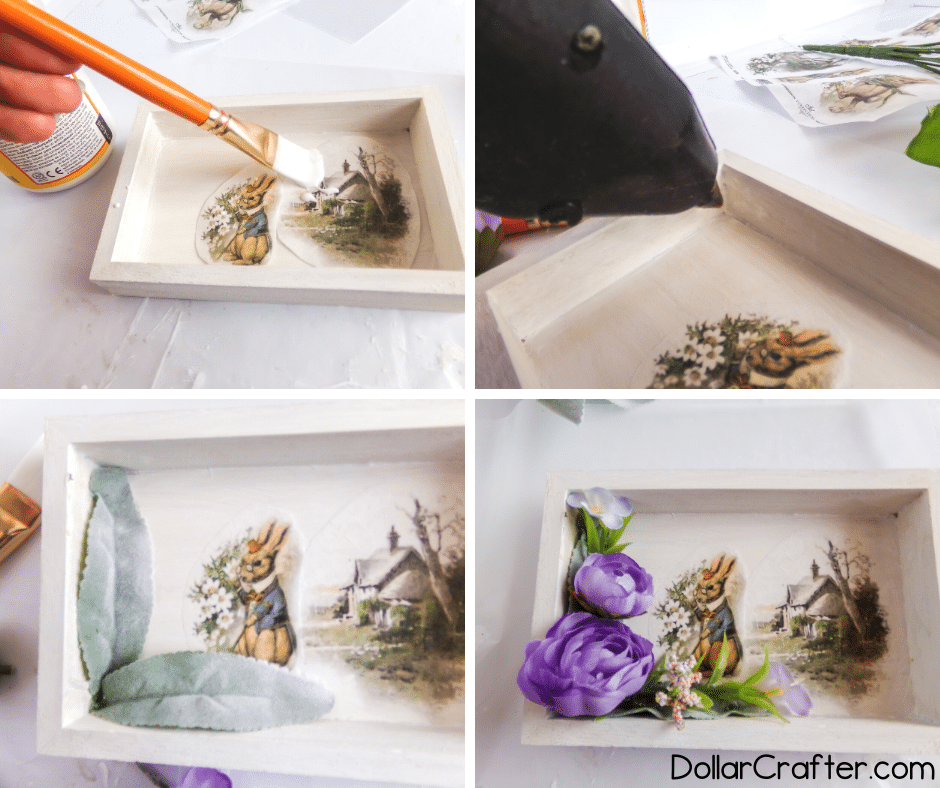
- With your positioning in mind, add a layer of mod podge to the inside of your tray where the rice paper elements will go. Immediately place the rice paper elements on top of the mod podge.
- Apply a second coat of mod podge on top of the rice paper to smooth it over and allow the mod podge to dry completely.
- Tuck the purple faux floral elements into the corner of the wood tray and hot glue them in place. Allow the hot glue to cool completely before tucking it into your farmhouse tiered tray!
Notes
For more beautiful SVG Farmhouse Decor Crafts visit DollarCrafter.com
Please Save This to Pinterest
Your shares are how this site grows, and I am sincerely grateful. Know a friend who’d like this? Please share it on Facebook or save it to your favorite holiday crafts board on Pinterest.

