
Creating these DIY map ornaments is easy. No Cricut required!
While I love my Cricut, I don’t always want to drag it out… or if I’m running low on vinyl and waiting for a refill order, I like to switch it up with different crafts. 🙂
You literally could be the least crafty person you know and could still make this Easy DIY Map Ornament. If you are a craft supply hoarder like myself; you probably have most of these items lying around just waiting to be used.
Supply list:
- Mason Jar Lid/Ring
- Paper Map(printed yourself or from a book)
- String or Floss
- Heart Shaped Candy Sprinkle or Button
- Pencil
- Scissors
- Hot Glue Gun
- Drill
Find all our DIY Christmas Crafts and Ornaments here!
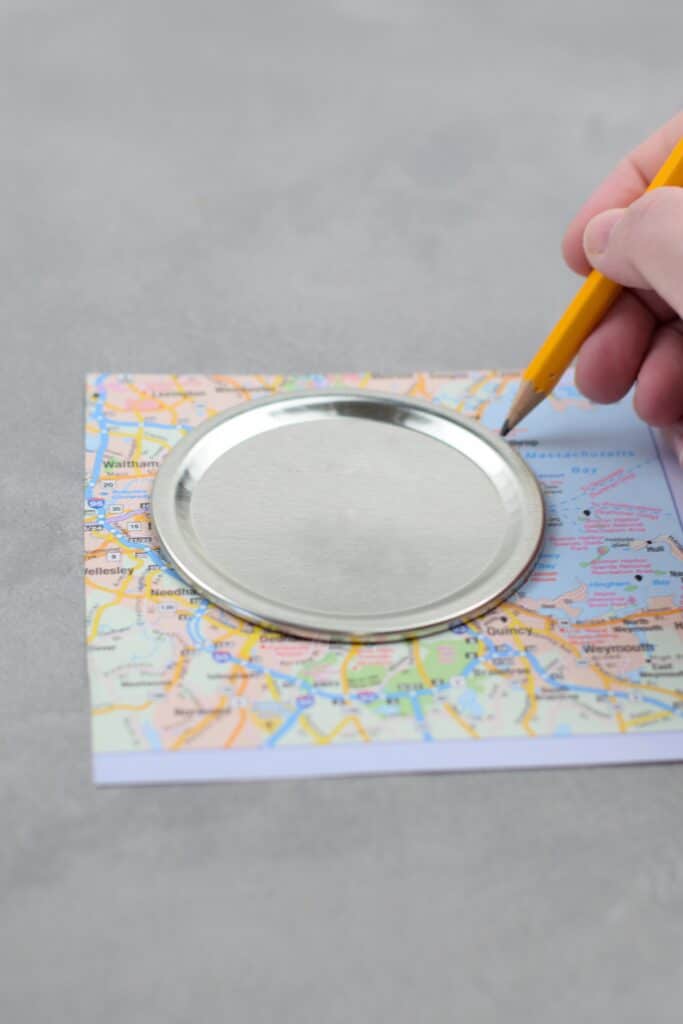
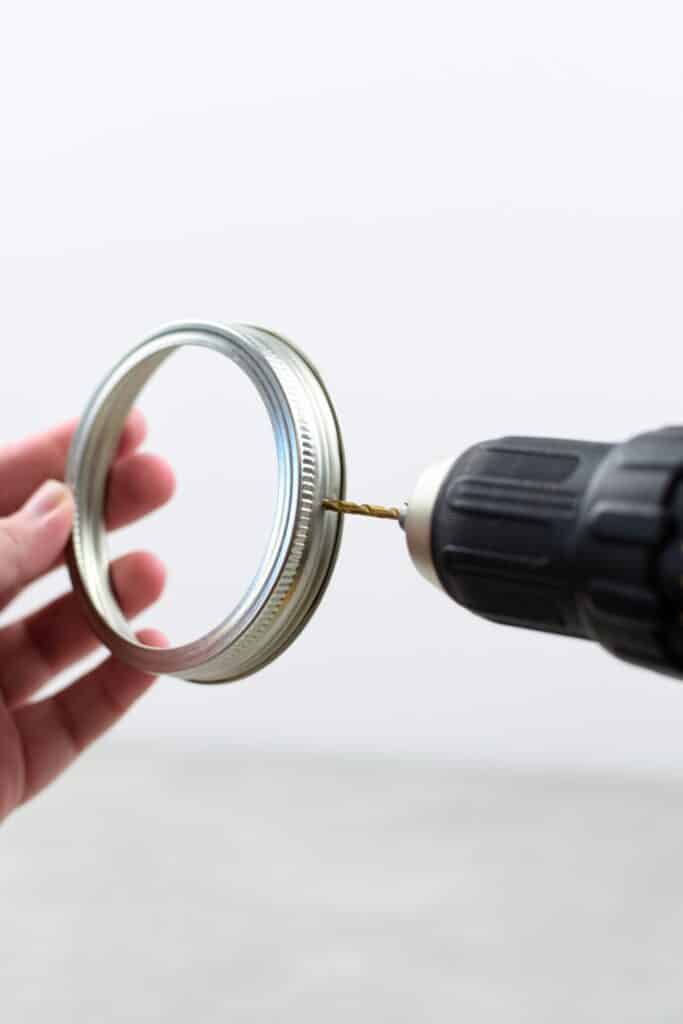
The first thing you will want to do is use your mason jar lid to trace the part of the map you would like to cut out. Next, you will drill a small hole in the lid ring for your string hanger.
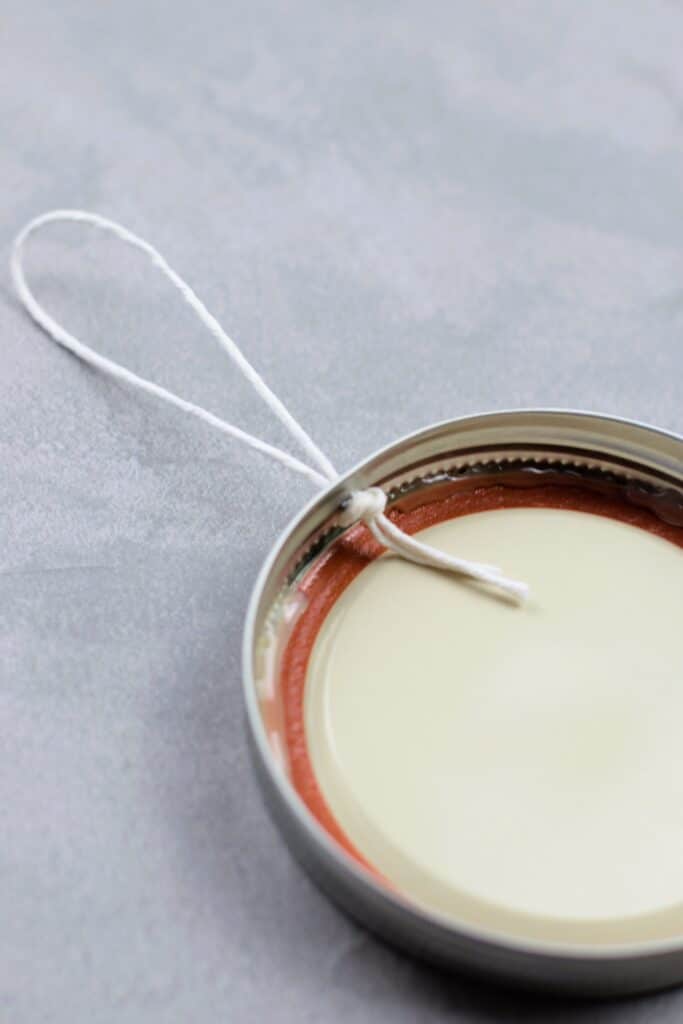
Now you will place the paper map cut out inside the ring and then use the hot glue gun to apply a tiny bit of glue all the way around the ring. Then place the round lid inside the ring. Once it dries, loop your string or floss through the drilled hole and tie it in a knot to create the hanger.
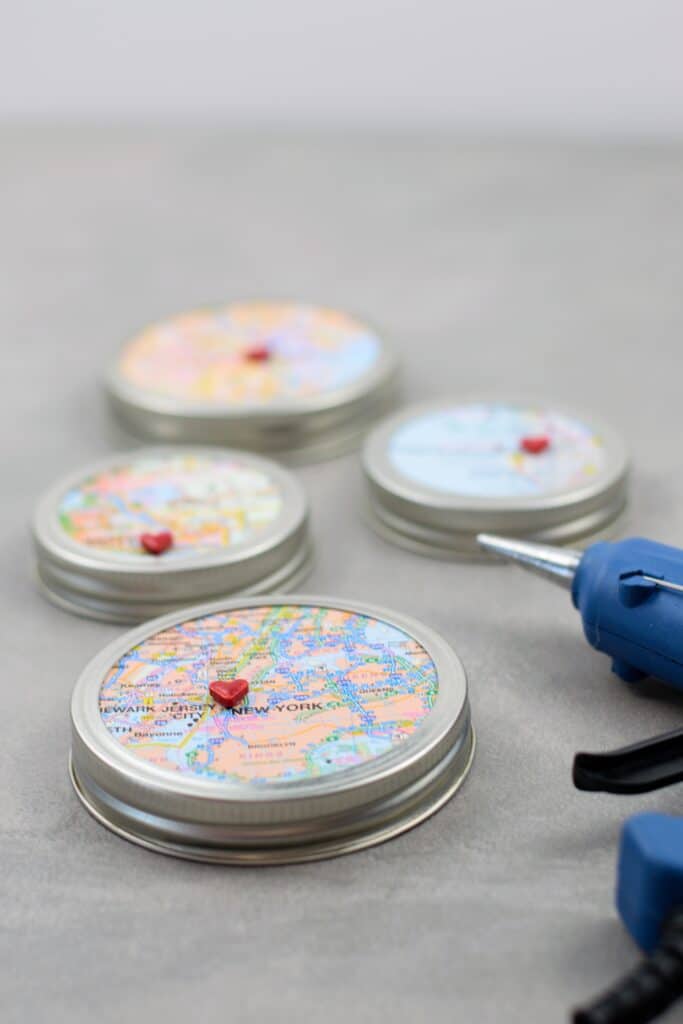
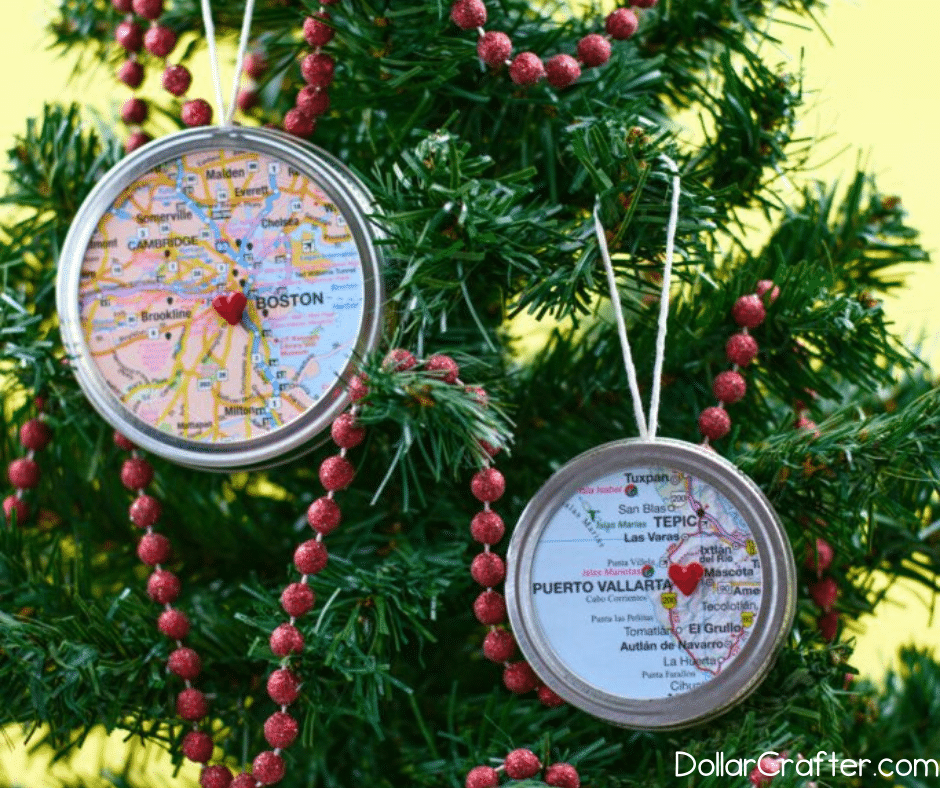
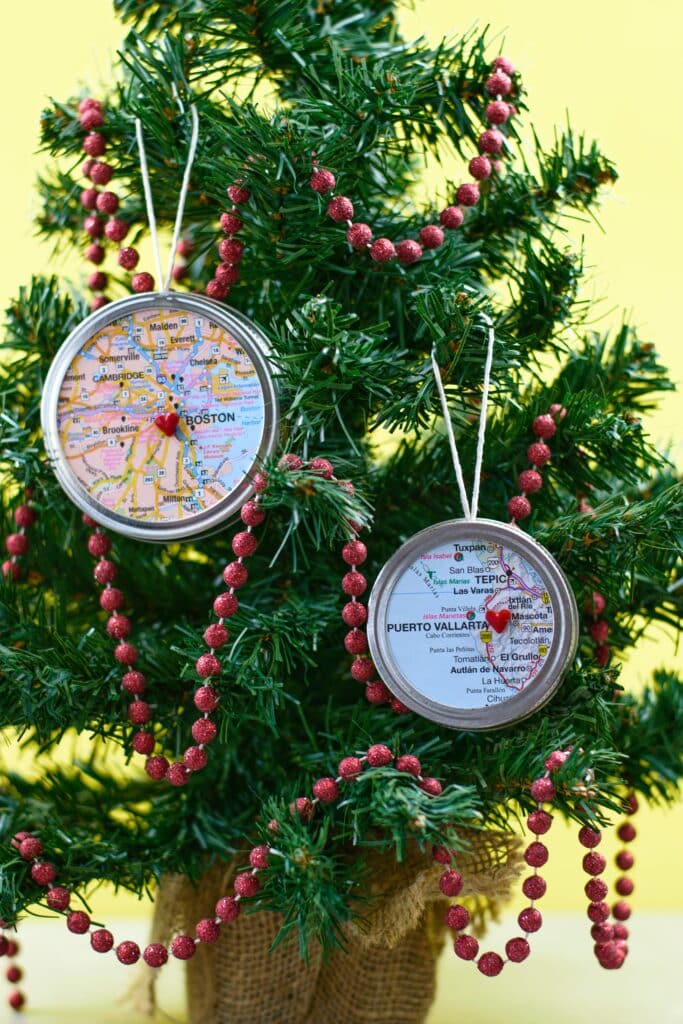
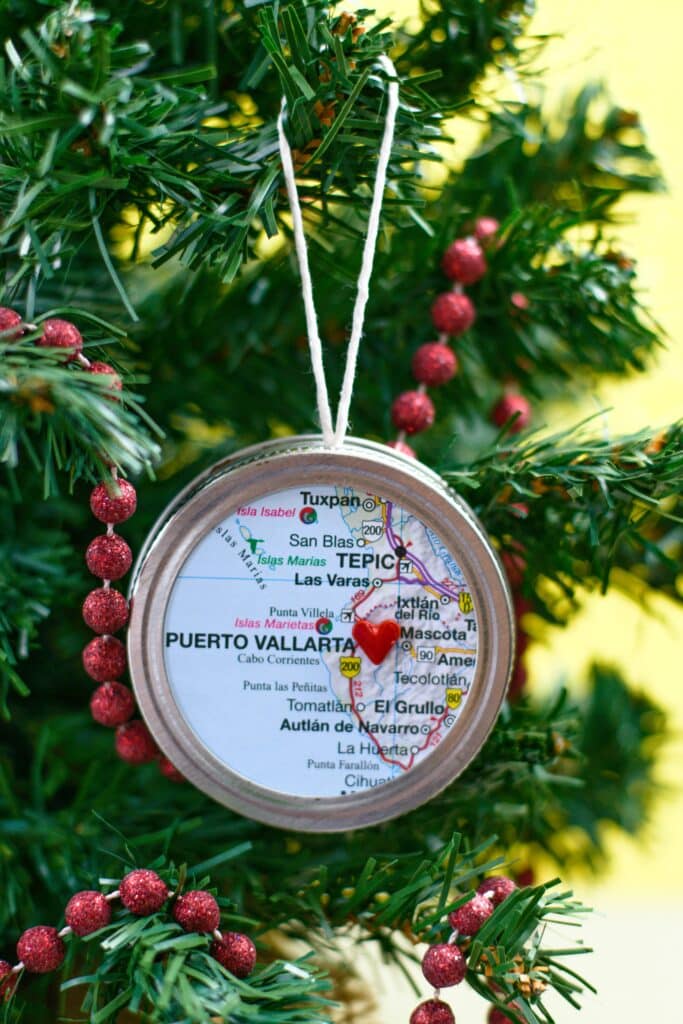
The last thing to do is hot glue your heart-shaped candy or button on your map and let it dry completely. These Easy DIY Map Ornaments will make cute gifts for friends and family. It will also make a great addition to my Travel Christmas Tree.
If you want to make another simple ornament then please check out our Elf Hat DIY Christmas Ornaments.
How to Make a Map Ornament
Ready to get crafting? You will find the full tutorial below!
Easy DIY Map Ornament

I love maps! They're so special to me. Use Google Maps and print off your honeymoon destination, where someone was born, or where you first met your spouse. Any destination that is special to you can be turned into a DIY ornament gift in a flash!
Materials
- World maps/Atlas
- Scissors
- Glue gun and sticks
- Pencil
- Canning jar rings
- Canning jar caps
- String/ribbon/twine
- Tiny Heart trinket (you can use a button, a bead or even a candy heart)
Tools
- Drill & Drill Bit
Instructions
1. Using your maps, locate your preferred destinations.
2. Take your canning jar cap and place it over your desired location making sure the destination is in the center or insides the cap.
3. Using your pencil, trace around the cap and then cut out your circle. Repeat for however many rings and destinations you are planning to make.
4. Take your canning rings and carefully drill a hole in each ring to attach a hanging string.
5. Put your canning rings face down, place your circular map cut outs inside each ring and add the canning cap inserts.
6. Before you start gluing, make sure all is aligned with the hole you drilled at the top and that you can properly see your chosen destination.
7. Once all is aligned, start placing a bead of glue all around the inner rims making sure to leave the hole bare to easily insert your string.
8. Carefully glue your hearts at their desired spots to highlight your meaningful destinations.
9. Finally, once your hearts have set, take your strings and insert them at the top of each completed ornament and tie a knot.
10. Hang your ornaments in your tree and cherish the memories of your destination wedding/ honeymoon/ anniversary/ family vacation
Please Save This to Pinterest
Your shares are how this site grows and I am sincerely grateful. Know a friend who’d like this? Please share it on Facebook or save it to your favorite holiday crafts board on Pinterest.