
Are you a fan of beach-inspired decor? Do you love nautical elements that remind you of sailing on the open sea? If so, this Dollar Tree Nautical Buoy Wreath tutorial is just for you! With some simple supplies from your local Dollar Tree, you can create a charming wreath that adds a touch of coastal flair to your home or office.
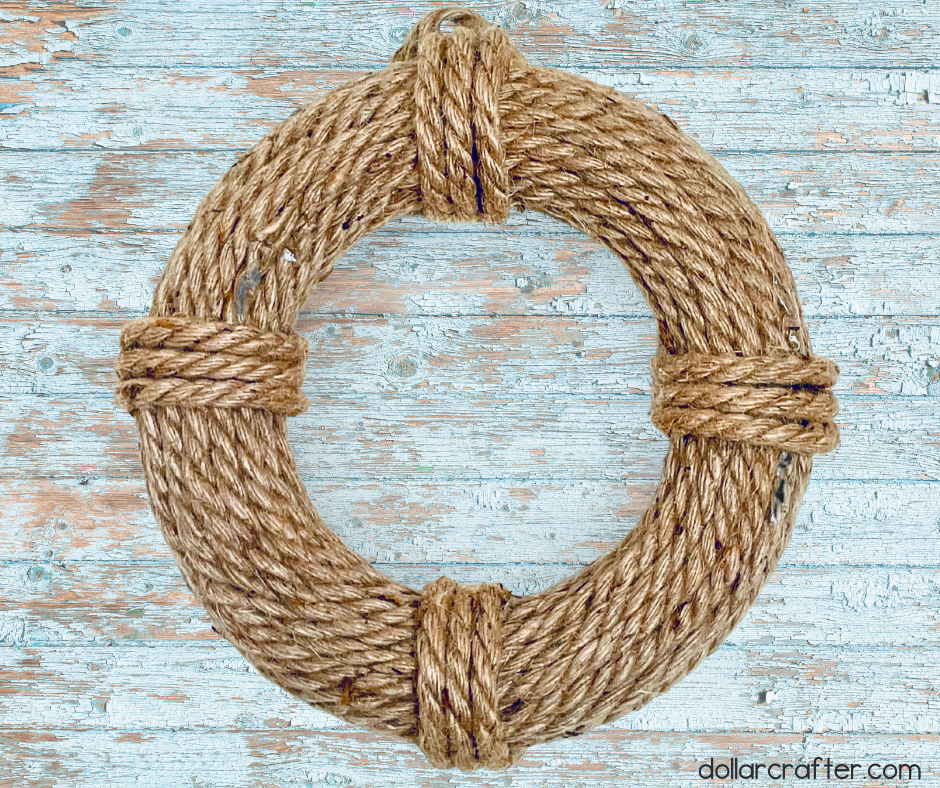
DIY Nautical Rope Buoy Wreath
This wreath is easy to make and requires only a few basic tools, such as a hot glue gun and scissors. In this blog post, we’ll provide step-by-step instructions for creating your own nautical buoy wreath using Dollar Tree supplies. So, set sail with us as we guide you through this fun and budget-friendly craft project!
Supplies:
- Round Green Foam Wreath Form
- Nautical Ropes
- Hot Glue Gun and Glue
- Scissors
So, gather your supplies and let’s get started on this fun and easy DIY craft project!
Tips for Making a Buoy Wreath with Nautical Rope
When creating your Dollar Tree Nautical Buoy Wreath, it’s important to keep a few tips in mind to ensure that your finished product looks great. One key tip is to be generous with the hot glue. To ensure that your nautical ropes stay securely attached to the foam wreath form, it’s important to use plenty of hot glue. Apply a line of glue to the inside of the wreath form and press the nautical rope firmly on top. Add glue to the rope where it will overlap to make sure it adheres well.
Another tip is to wrap the wreath form tightly. As you wrap the nautical ropes around the wreath form, make sure to wrap them tightly and evenly. This will help ensure that your wreath looks neat and professional. If the ropes are too loose, it can result in a messy and unappealing finished product.
To add visual interest to your nautical buoy wreath, consider using different colored ropes or ropes with different textures. This will create a more dynamic look and add depth to your wreath. You can even mix and match different types of rope to create a unique and personalized look.
Experimenting with different knot styles is another great way to customize your nautical buoy wreath. Instead of just wrapping the nautical ropes around the wreath form, try tying different types of knots to create a more intricate design. You can find tutorials for different knot styles online, or you can experiment and come up with your own unique knot patterns.
Once you’ve wrapped your wreath form with the nautical ropes, you can customize it even further by adding additional embellishments. Consider adding seashells, starfish, or other beach-themed items to make your wreath even more special. This is a great way to personalize your wreath and make it truly one-of-a-kind.
Lastly, it’s important to use caution with the hot glue gun. Hot glue can be very hot and can cause burns if it comes into contact with your skin. Always use caution when working with a hot glue gun, and keep it away from children and pets.
How to Make a Nautical Rope Buoy Wreath
Ready to get crafting? You will find the full tutorial below!
Nautical Rope Buoy Wreath
Materials
- Green Foam Wreath Form (Dollar Tree)
- Nautical Rope (Dollar Tree)
Tools
- Hot Glue Gun and Glue
- Scissors
Instructions
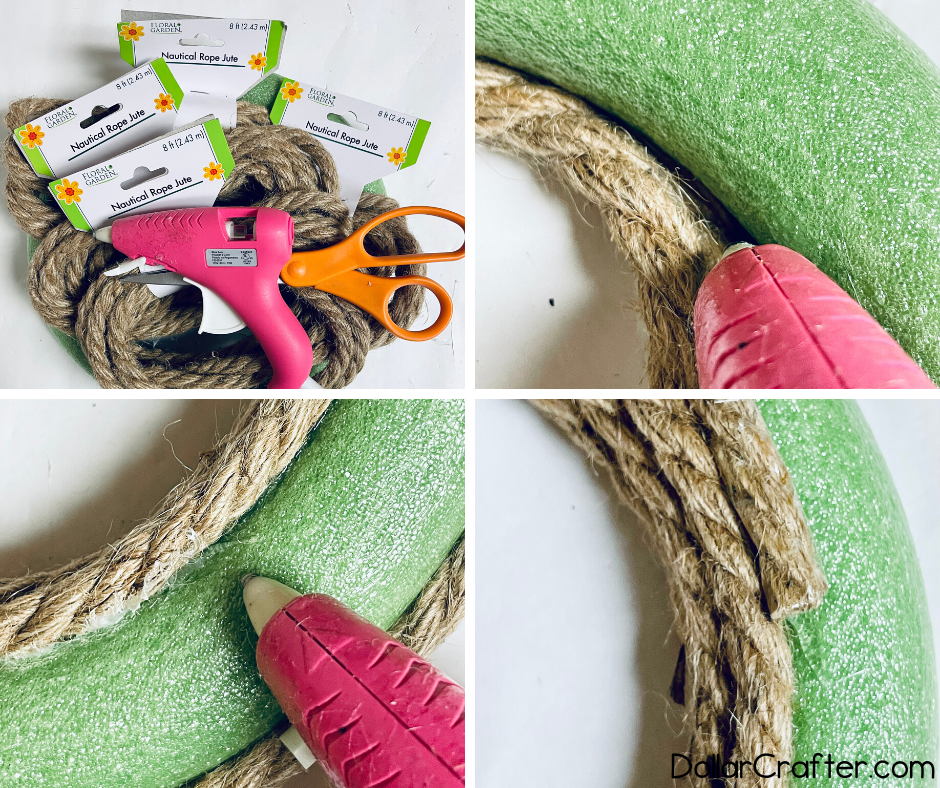
- Gather your supplies.
- Begin by adding a line of hot glue to the inside of the wreath form and pressing the nautical rope firmly on top. It's recommended to lay the wreath form down and then add the glue and nautical rope as it is easier and creates a better ring on the inside that is straight.
- Repeat the previous step through the inside of the wreath, adding glue to the wreath form and some to the rope where it overlaps to make sure it adheres well.
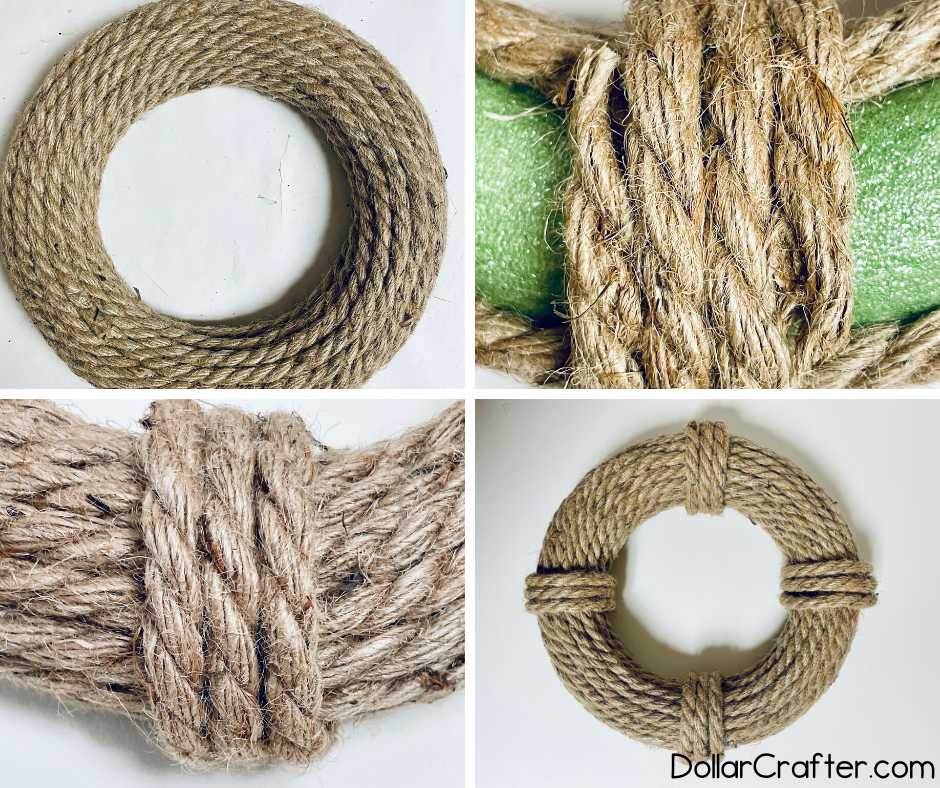
- Continue adding the nautical ropes until you have covered the top and over to the outside edge. Repeat until it hits the side that will touch the wall and then stop as it won't be seen.
- When you reach the end of a rope, start a new one right next to it and continue wrapping until you reach the end of the wreath form.
- Once you have completely wrapped the wreath form to your liking, add some hot glue to the backside of the wreath and wrap the nautical rope around 3 times around and then trim at the end, adding hot glue to secure it. Repeat this 3 more times on the wreath.
- Cut a small piece of nautical rope to use as a hanger and adhere it with hot glue to the backside of the wreath.
- To add additional embellishments, consider adding seashells, starfish, or other beach-themed items to make your wreath even more special.
Notes
For more fun crafts visit DollarCrafter.com
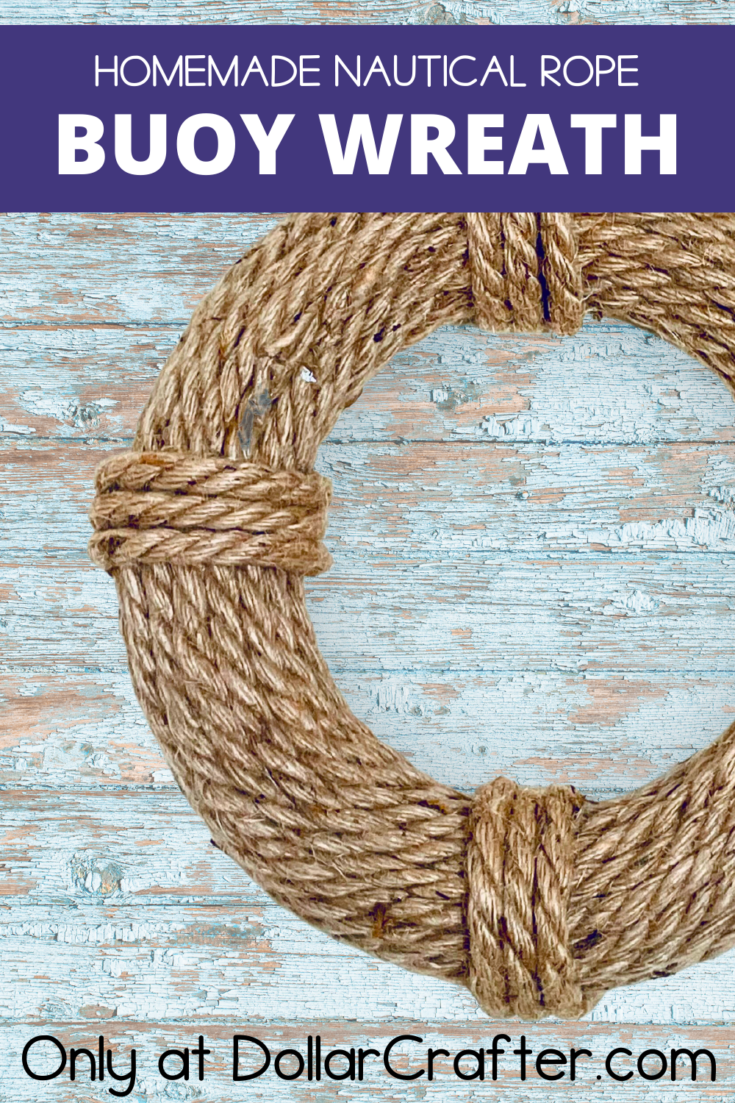
Please Save This to Pinterest
Your shares are how this site grows and I am sincerely grateful. Know a friend who’d like this? Please share it on Facebook or save it to your favorite crafts board on Pinterest.