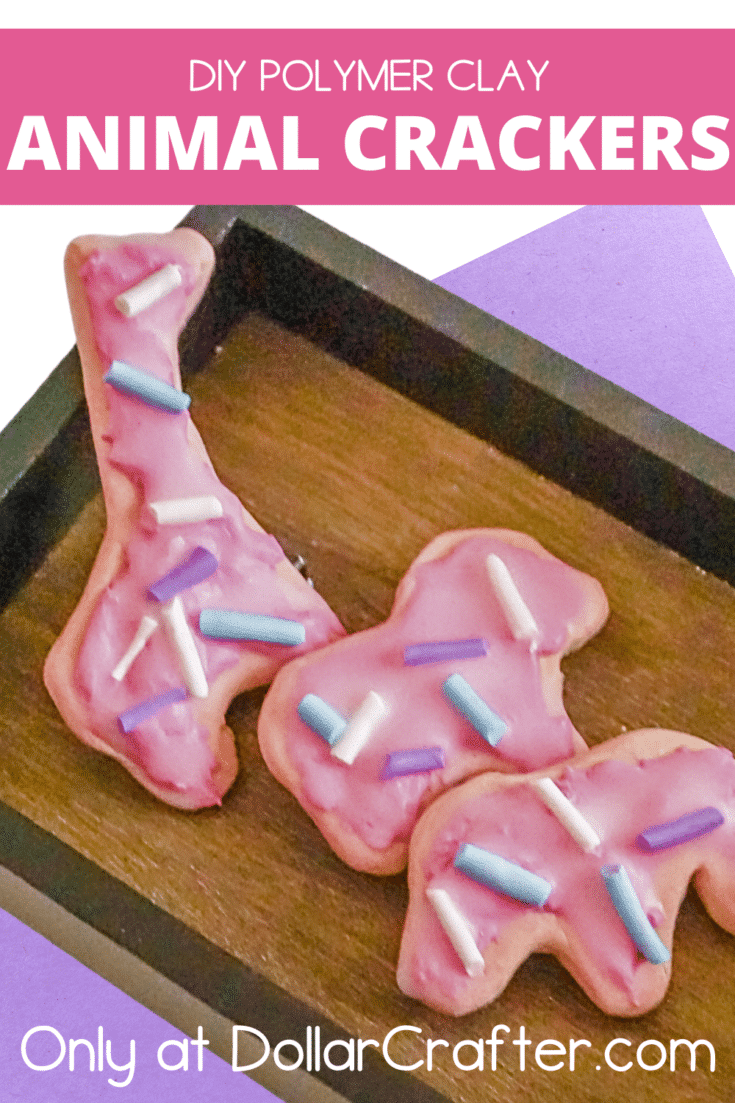
Are you ready for a project that’s cute, quirky, and totally irresistible? We’re talking about making some of the most adorable polymer clay animal crackers you’ve ever seen!
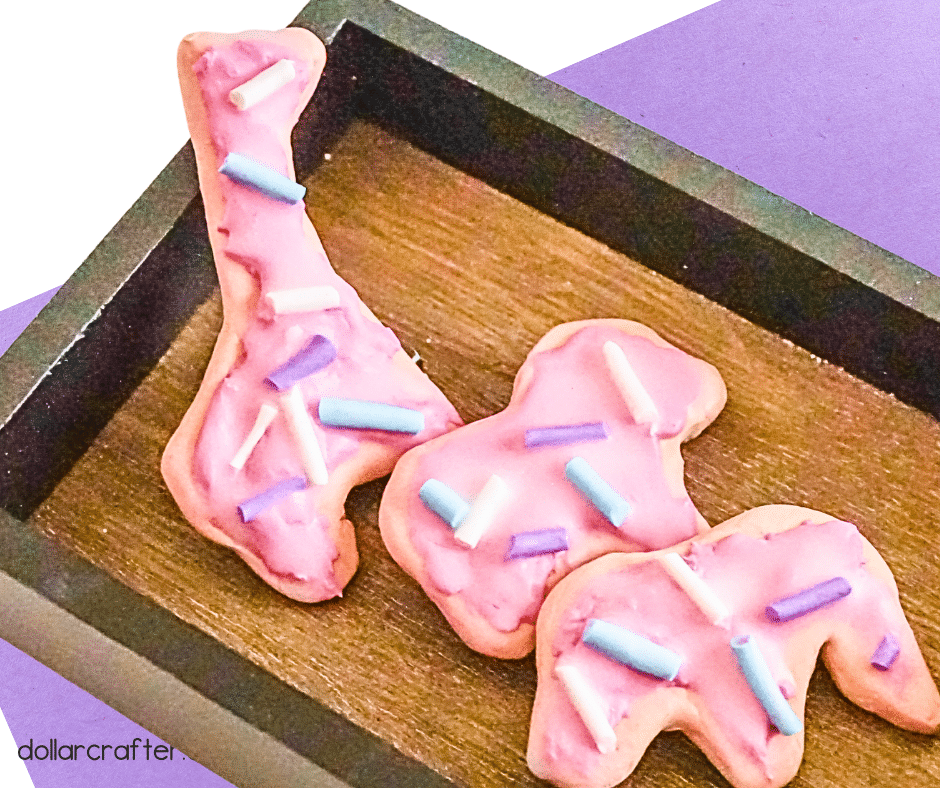
Using polymer clay and a little bit of creativity, we’ll show you how to make an entire menagerie of animals that are perfect for decorating your space or giving as a gift to your fellow animal lovers. These animal crackers may look good enough to eat, but don’t be fooled – they’re strictly for display only! So put on your crafting hat and let’s get started on this fun and playful project.
DIY Polymer Clay Animal Crackers
But before we dive in, let’s gather all the materials we need to create our polymer clay animal crackers.
Supplies:
- Blue Polymer Clay
- White Polymer Clay
- Pink Polymer Clay
- Beige Polymer Clay
- Purple Polymer Clay
- Rubbing Alcohol
- Liquid Sculpey
And here are the tools you’ll need:
- Oven
- Parchment Paper
- Baking Sheet
- Toothpick
- Paintbrush
With all of these supplies on hand, you’ll be well on your way to making some adorable and whimsical animal crackers.
Tips for Making Animal Crackers with Polymer Clay
Now that we’ve got all the serious stuff out of the way, let’s move on to the fun part – creating your own polymer clay animal crackers! But before we dive into the instructions, here are some tips to help you make the most out of your crafting experience:
Work on a clean and flat surface. Polymer clay can easily pick up debris or fibers from your workspace, so it’s important to keep your area clean and free of distractions.
Take your time when sculpting the clay. The beauty of polymer clay is that it’s very forgiving – if you make a mistake, you can always start over. So take your time when shaping your animal crackers, and don’t be afraid to experiment with different techniques.
Use rubbing alcohol to clean up your fingerprints and any smudges on the clay. A little bit of rubbing alcohol on a paintbrush can go a long way in keeping your creations looking neat and tidy.
Keep your work area well-ventilated. Polymer clay can release fumes when heated in the oven, so make sure you’re working in a well-ventilated area to avoid any discomfort.
Experiment with different colors and designs. Don’t be afraid to get creative with your animal crackers – mix and match colors, add different textures, and let your imagination run wild!
How to Make Animal Crackers from Polymer Clay
Ready to get crafting? You will find the full tutorial below!
Polymer Clay Animal Crackers
Materials
- Blue Polymer Clay
- White Polymer Clay
- Pink Polymer Clay
- Beige Polymer Clay
- Purple Polymer Clay
- Rubbing Alcohol
- Liquid Sculpey
Tools
- Oven
- Parchment Paper
- Baking Sheet
- Toothpick
- Paintbrush
Instructions
- Gather your supplies.
- Preheat your oven to the temperature noted on your clay packaging. For my clay, the baking temperature is 230-degrees F.
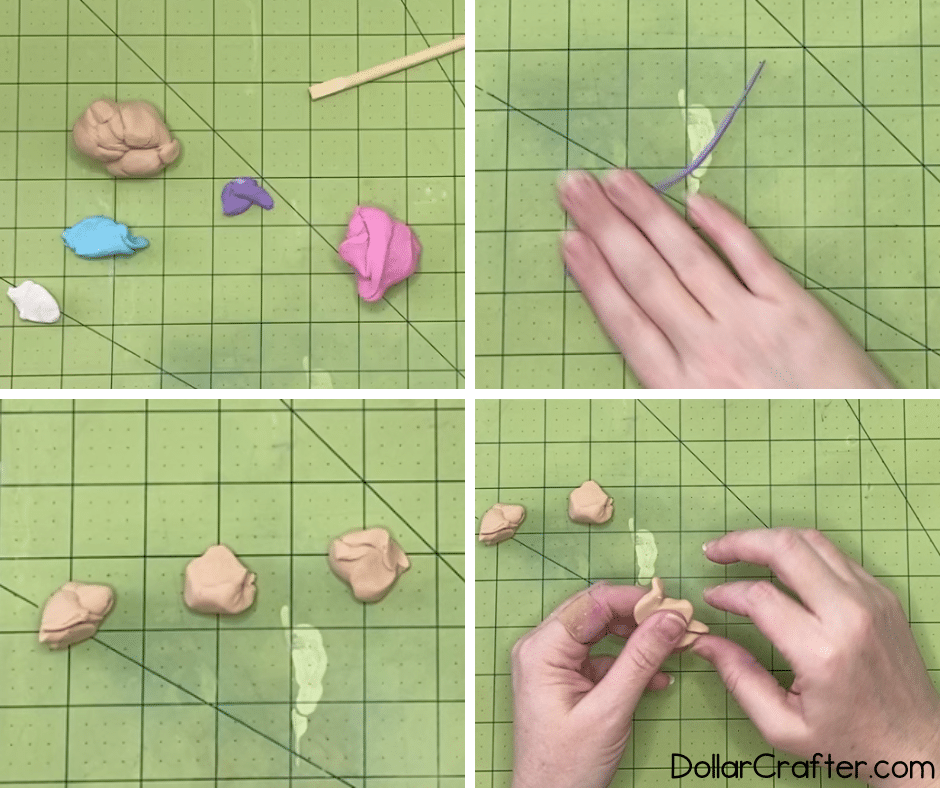
- To make the sprinkles, roll a very small piece of blue, pink, purple, and white clay into very small snakes. Very gently transfer the snakes to the baking sheet and bake for no longer than 10 minutes. If you bake them longer, they can burn because they are so small.
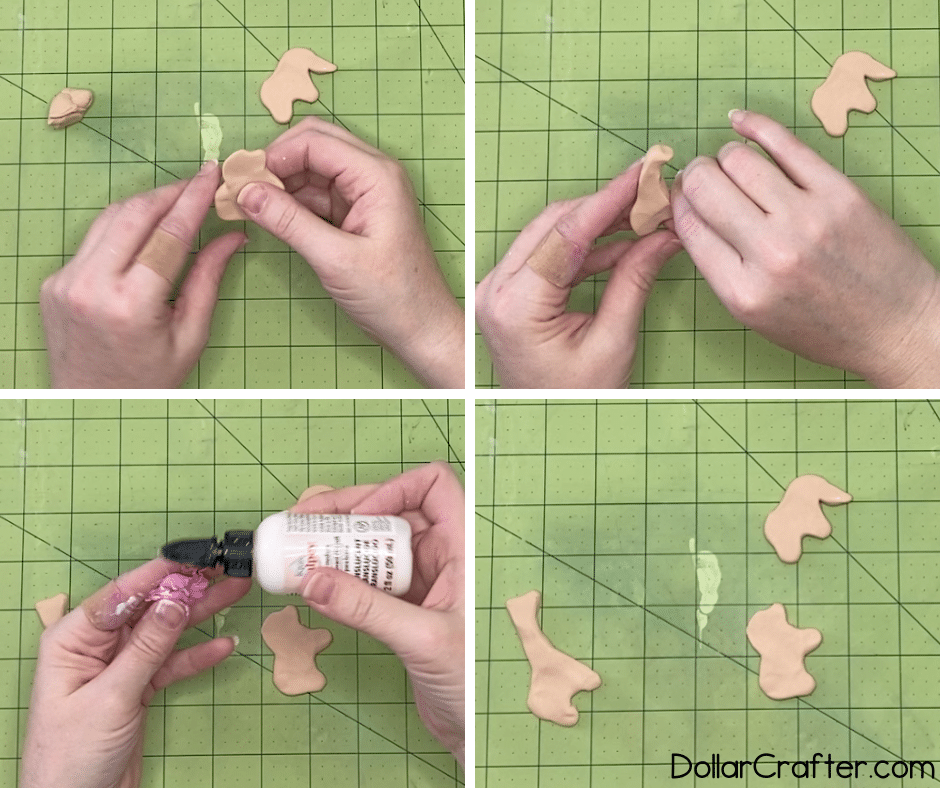
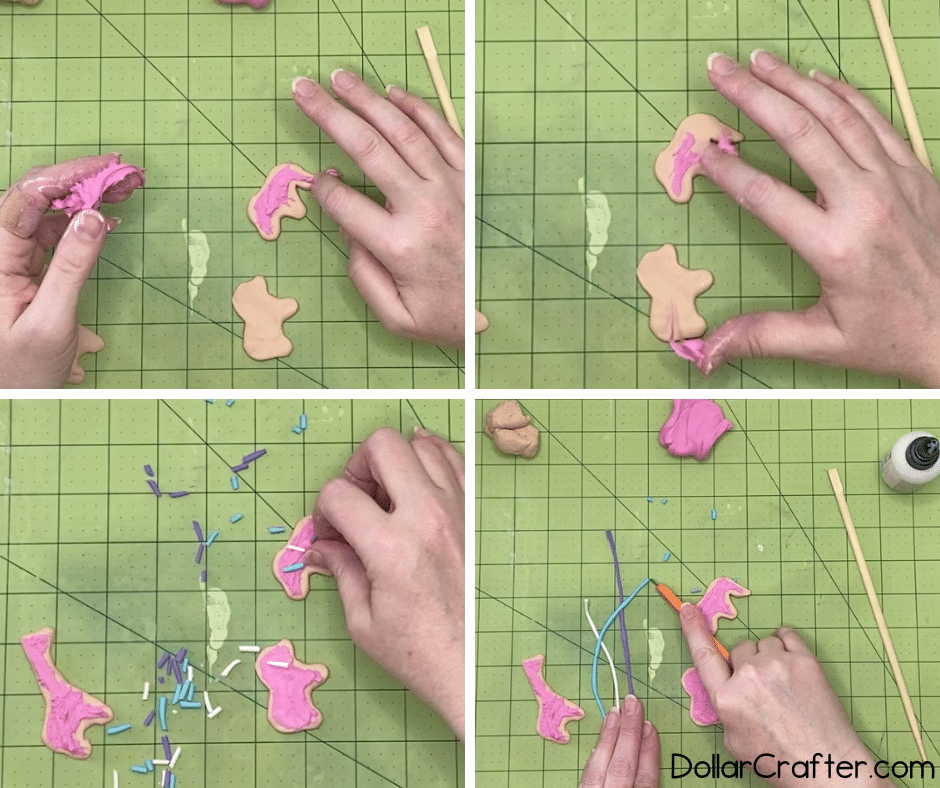
- Roll the beige clay into a nice, neat ball that is very smooth, then flatten it into a roughly 1/8-inch thick blob. Reshape the edges by pushing and pulling to make an elephant shape. Repeat with a second and third piece of beige clay to make other animals such as a giraffe or bear.
- Make the icing by breaking off some pink clay (about 1/4-inch square) and mashing it with about 5-10 drops of the Liquid Sculpey. Once it's a bit more pliable, place the icing shape on top of the base and press it down firmly. Let the icing be as organic as possible.
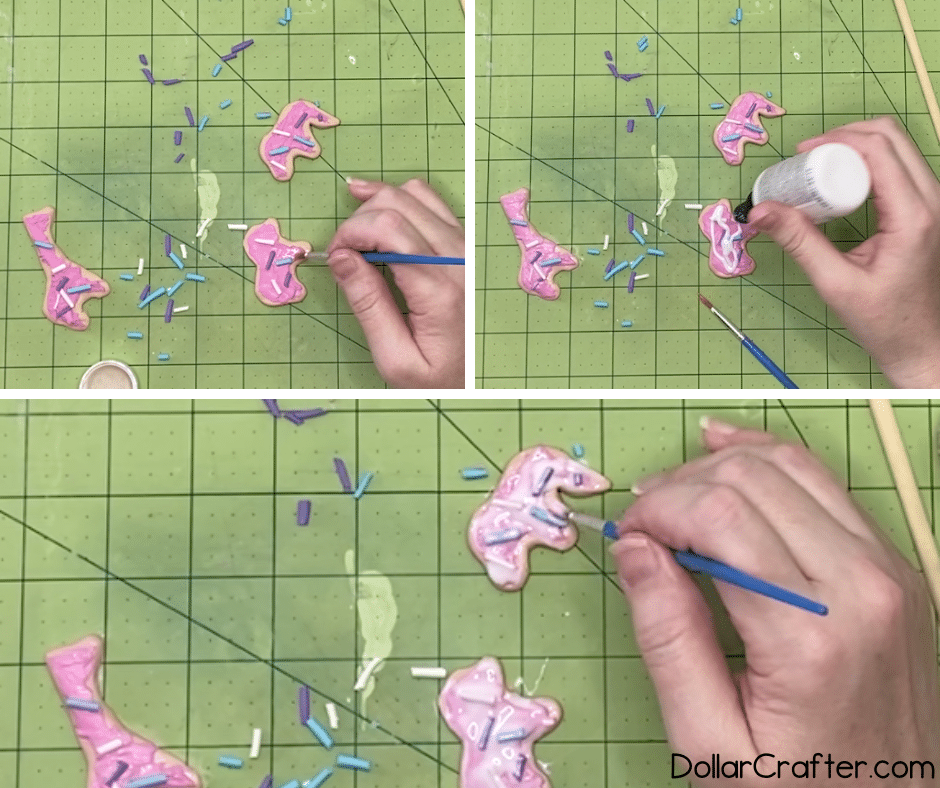
- Add sprinkles in varying colors to the top of the icing, pressing them in firmly.
- Cover the sprinkles with some additional Liquid Sculpey to get the sugared icing look.
- Clean your fingerprints and tiny imperfections from your animal crackers by gently brushing the clay with a paintbrush dampened in rubbing alcohol. This does not have to be super wet with the alcohol, just a little goes a long way. Take care to brush the beige parts first, followed by the other colors so that no colorful clay smears on your beige clay.
- Bake the clay animal crackers per the instructions on your clay packaging. Allow to cool completely before handling.
Notes
For more fun clay crafts visit DollarCrafter.com
Please Save This to Pinterest
Your shares are how this site grows and I am sincerely grateful. Know a friend who’d like this? Please share it on Facebook or save it to your favorite crafts board on Pinterest.