
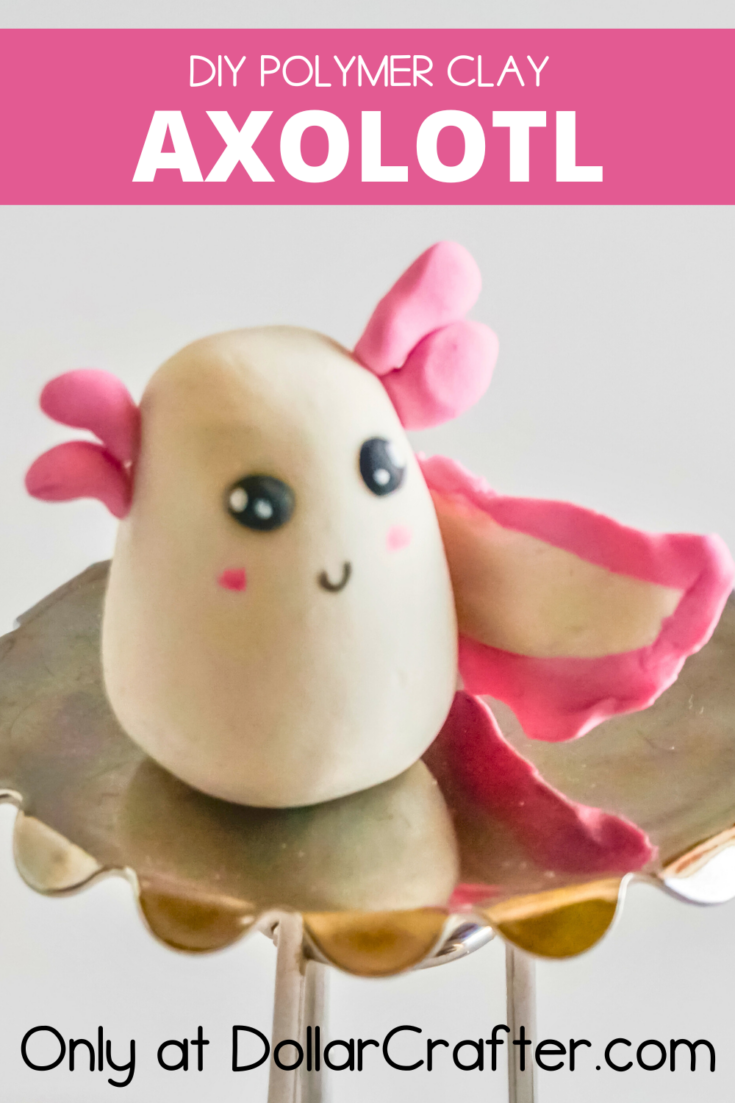
Get ready to add some serious cuteness to your life with this fun and playful DIY project! If you’re a fan of axolotls (and really, who isn’t?), then you’re going to love making these polymer clay axolotl figurines. They’re perfect for adding a pop of color and whimsy to your desk, bookshelf, or anywhere else that needs a little bit of extra adorableness. So, let’s roll up our sleeves, grab some clay, and get ready to create some seriously cute axolotls!
DIY Clay Axolotl
But before we dive into the step-by-step guide, let’s talk materials. We’ve got some seriously fun stuff to work with here!
Supplies:
- Pink Polymer Clay
- Black Polymer Clay
- White Polymer Clay
- Rubbing Alcohol (not for drinking, folks!)
- White Acrylic Paint
- Pink Acrylic Paint
And here are the tools you’ll need:
- Chopstick or ⅛-inch Dowel
- Oven
- Parchment Paper
- Baking Sheet
- Toothpick
- Paintbrush
Now, if you’re thinking “wow, that’s a lot of stuff,” don’t worry! We promise it’s all easy to work with and you’ll have your axolotls done in no time. So, let’s get to crafting!
Tips for Making an Axolotl with Clay
This adorable amphibian is a popular choice among crafters, and for good reason – they’re cute, quirky, and relatively easy to make.
To help you get started, here are some tips for making your own axolotl out of clay:
Keep it clean: You wouldn’t want any pesky dust or dirt to ruin your adorable axolotl creation, so make sure to work in a clean area.
Knead it, baby: Soften up your clay before shaping it by giving it a good kneading. Your fingers will thank you later!
Smooth it out: No one likes rough edges, especially not your axolotl. Use your fingers or a small tool to smooth out any imperfections.
Toothpicks are your friend: When it comes to small details, toothpicks are a lifesaver. They’re perfect for creating those tiny eyes and smile, as well as any indentations or textures you want.
Brush it up: Blend your colors together seamlessly with the help of a small paintbrush. Especially useful for those frilly pink gills on the axolotl’s tail!
Patience is key: Don’t let the fiddliness of polymer clay get you down. Take your time and be patient as you craft your adorable axolotl masterpiece.

Read up: Each polymer clay has its own quirks, so make sure to read the baking instructions on your specific clay package to get that perfect bake.
How to Make an Axolotl from Polymer Clay
Ready to get crafting? You will find the full tutorial below!
Polymer Clay Axolotl Clay
Materials
- Pink Polymer Clay
- Black Polymer Clay
- White Polymer Clay
- Rubbing Alcohol
- White Acrylic Paint
- Pink Acrylic Paint
Tools
- Chopstick or ⅛-inch Dowel
- Oven
- Parchment Paper
- Baking Sheet
- Toothpick
- Paintbrush
Instructions
- Gather your supplies.
- To begin, preheat your oven to the temperature specified on your clay packaging. For my clay, the recommended baking temperature is 230-degrees F.
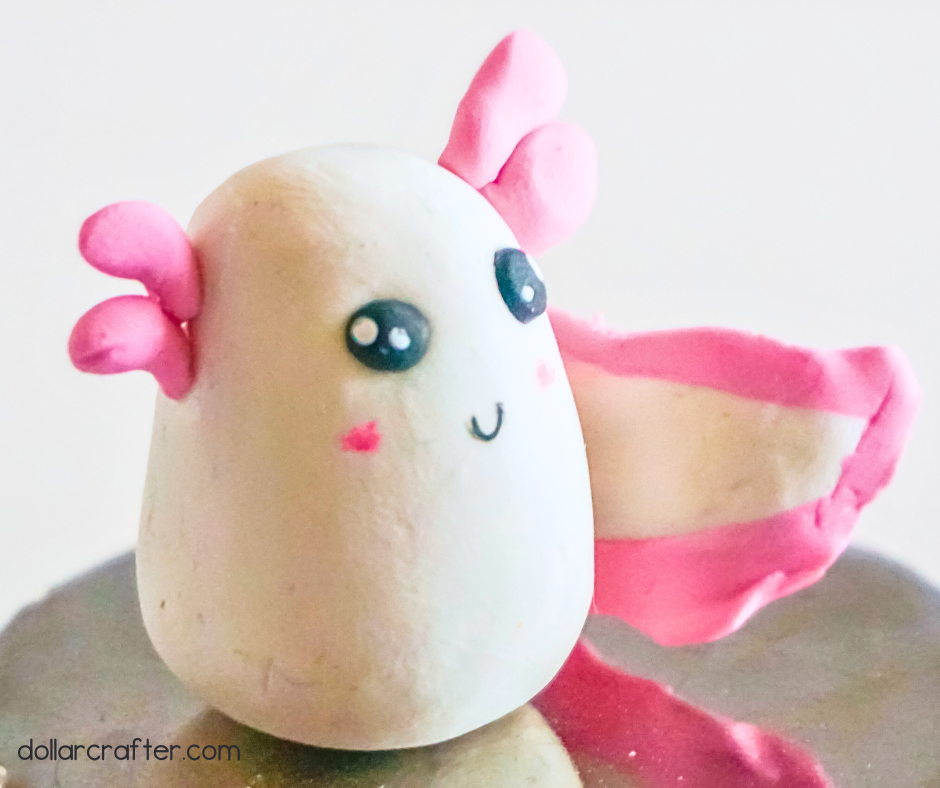
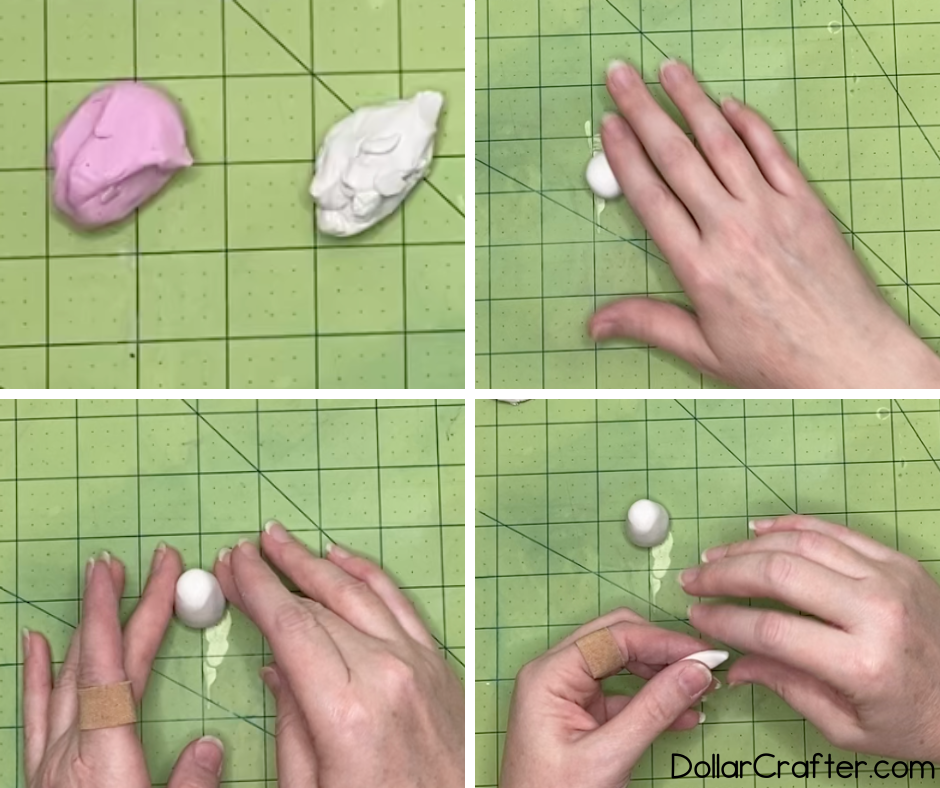
- To create the body of the axolotl, take a small portion of white clay (approximately 1 inch square) and roll it into a smooth ball. Then, shape one end of the ball into a wide-domed cone, making it as rounded and smooth as possible. Flatten the other end of the white clay to create a flat bottom.
- To make the tail, take a small portion of white clay (approximately 1/8-inch by 1/2-inch) and roll it into a short, fat snake shape (about 1/2-inch long). Flatten it and then add a pink frill by taking two small portions of pink clay (approximately 1/8-inch square) and rolling each into a short, fat snake shape (also about 1/2-inch long). Flatten both pink pieces, then gently press the skinny side of each pink piece to the skinny side of the white piece. Press the two pink pieces together around the tip of the white piece, creating a unified tail.
- Attach the tail to the back center of the axolotl body, wrapping it around slightly so that it is visible from the front. Use a paintbrush to help affix the edges of the pink frill to the white.
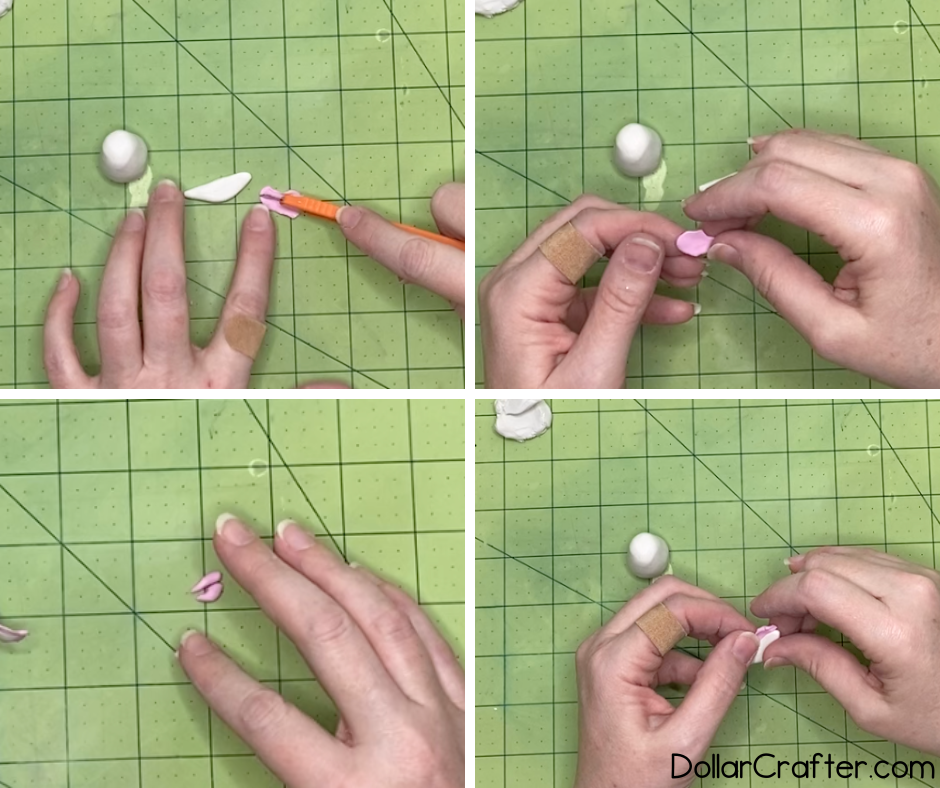
- To create the head protuberances, take four very small pieces of pink clay (about 1/8-inch square each) and roll each into a small snake shape with one fat end. Affix two of the pieces to either side of the top of the white clay. Use a paintbrush to help affix the edges of the pink to the white.
- Add eye sockets by pressing the end of a chopstick twice into the space between the head protuberances and the center of the body, leaving a deep crater where each eye will go.
- To create the eyes, take the tiniest piece of black clay (about 1/16-inch square) and roll it into a neat ball. Repeat to make a second ball and press each into the craters created in the previous step.
- Clean any fingerprints or small imperfections from the axolotl by gently brushing it with a paintbrush dampened in rubbing alcohol. Brush the white parts first, followed by the darker colors to avoid smudging black clay onto the white.
- Bake the axolotl according to the instructions on your clay packaging and allow it to cool completely before handling. Once cool, add a small dot of white paint to the black part of each eye using the end of a toothpick. Under the eyes, add a tiny smile using the same method. Then, using the tip of the paintbrush, add two pink dots to either side of the smile for blush. Allow the paint to dry and then enjoy your finished axolotl creation!
Notes
For more fun clay crafts visit DollarCrafter.com
Please Save This to Pinterest
Your shares are how this site grows and I am sincerely grateful. Know a friend who’d like this? Please share it on Facebook or save it to your favorite crafts board on Pinterest.