
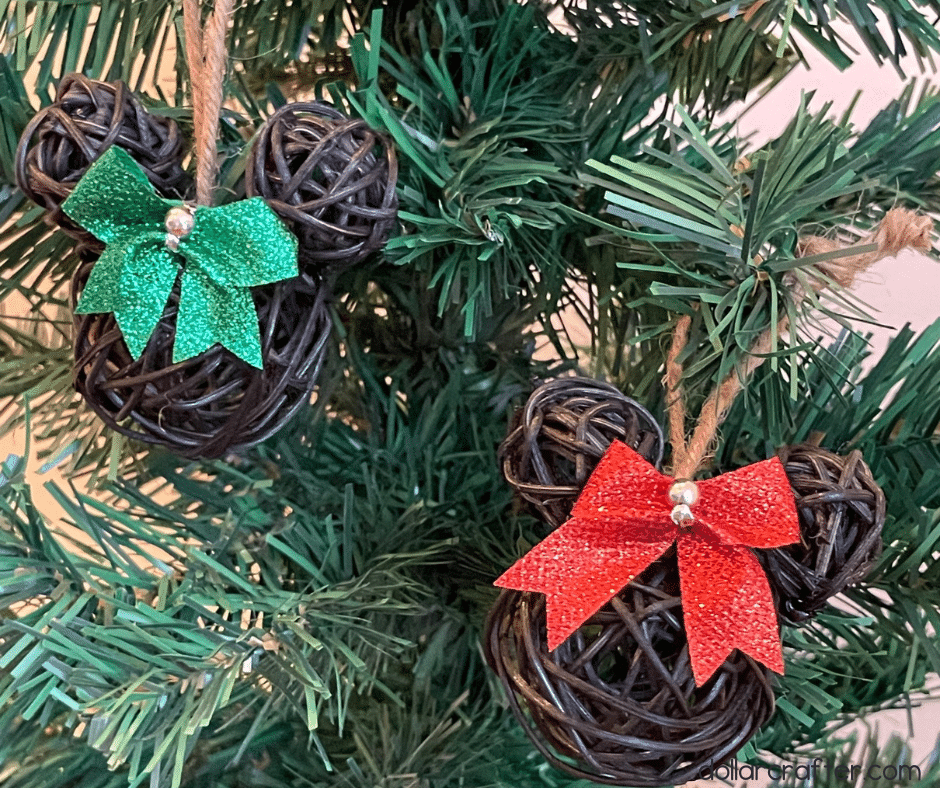
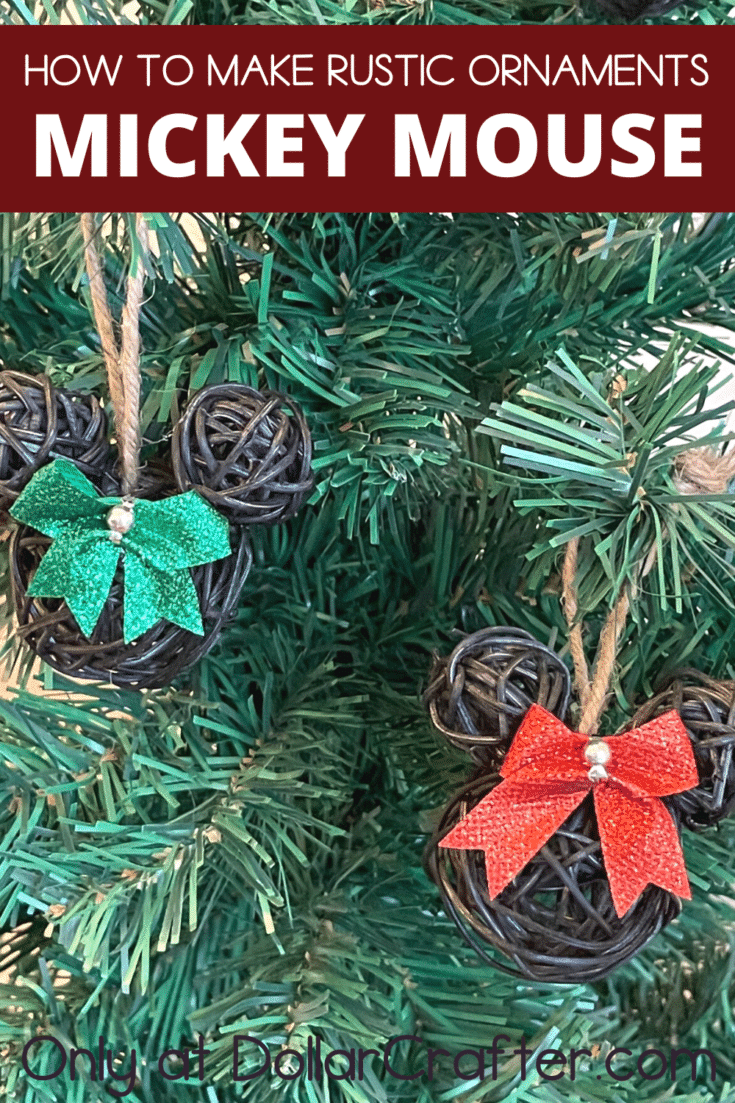
‘Tis the season for all things red, green, and jolly! One of our favorite things to do during the holidays is get crafty and make our own decorations. This year, we’re putting a rustic spin on everyone’s favorite mouse with these DIY Rustic Mickey Mouse Ornaments!
Find all our DIY Christmas Crafts and Ornaments here!
DIY Mickey Ornaments
Supplies:
- 2 Packages of Large Vine Balls (Dollar Tree)
- 2 packages of Small Vine Balls (Dollar Tree)
- Twine (Dollar Tree)
- Black Spray Paint
- Hot Glue Gun
- Scissors
- Mini Bows (Dollar Tree)
Tips for Making Rustic Mickey Mouse DIY Ornaments
Making these Mickey Mouse Christmas ornaments is pretty straight forward – just paint and glue! The hardest part of this entire craft is applying spray paint to the wooden vine balls.
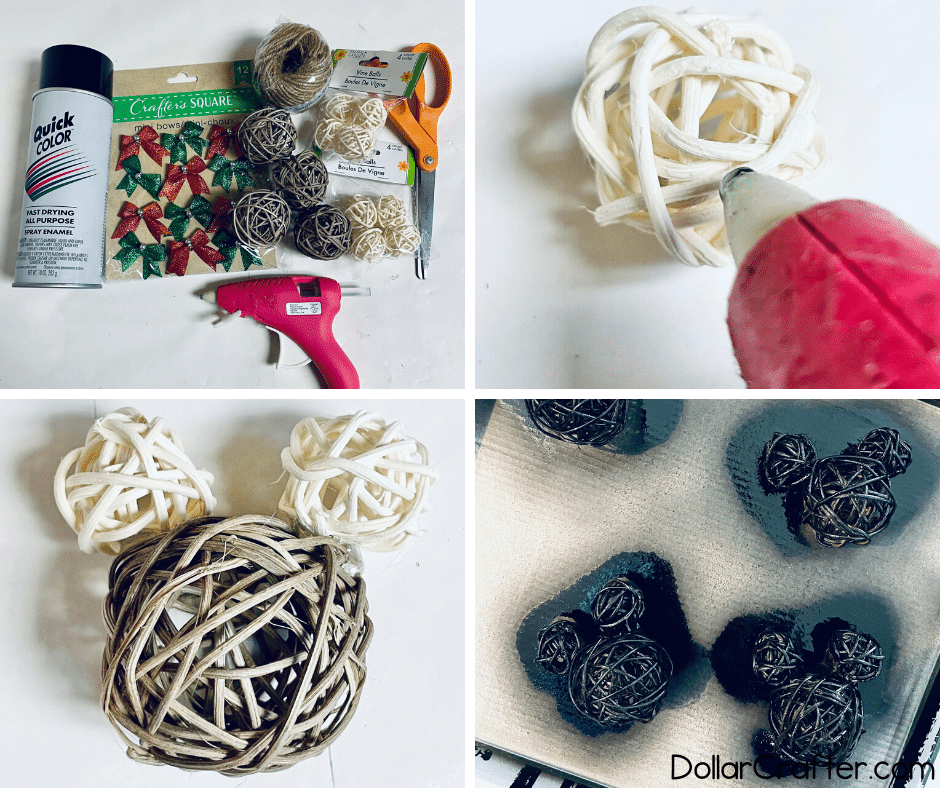
Since grapevine balls tend to be unprimed, the wood can be a tad absorbent. When spray painting apply one coat to each side and allow time to dry before covering the opposite side. Repeat to add additional coats as necessary until you reach the level of coverage you desire. Do not attempt to get a nice solid coverage in one go or you may end up with some visible drips.
I personally love how rustic the light coverage looks!
How to Make DIY Mickey Mouse Ornaments
Let’s get crafting! Below is our written tutorial.
Rustic Mickey Mouse Ornaments
Materials
- 2 Packages of Large Vine Balls, Dollar Tree
- 2 packages of Small Vine Balls, Dollar Tree
- Twine, Dollar Tree
- Black Spray Paint
- Mini Bows, Dollar Tree
Tools
- Hot Glue Gun
- Scissors
Instructions
- Gather your supplies.
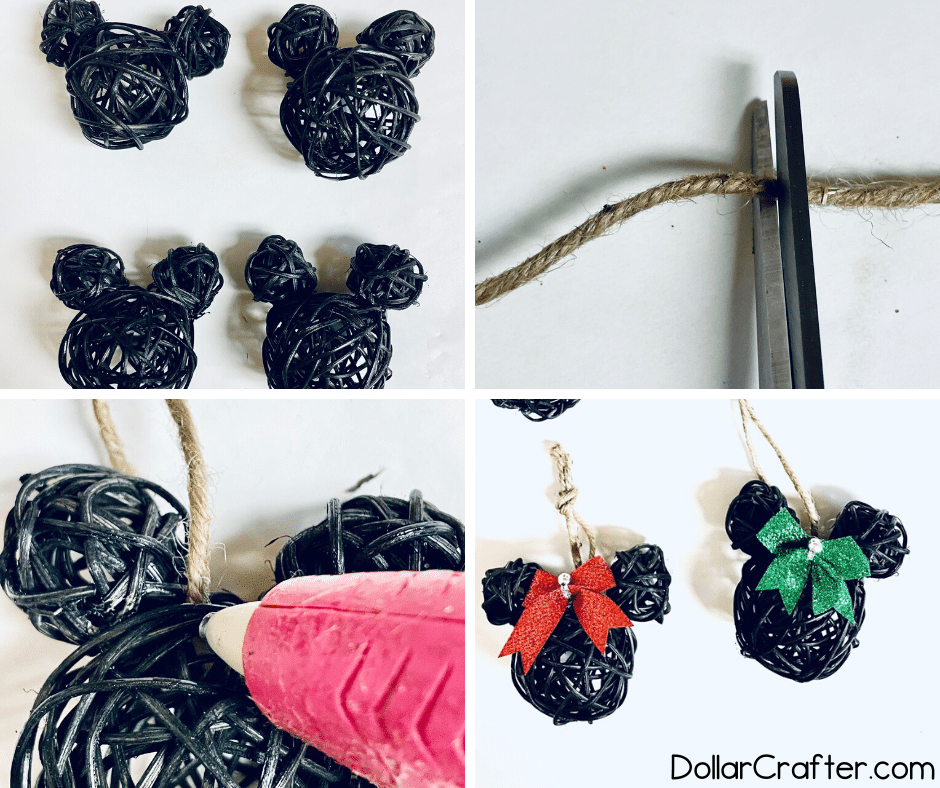
- Start by hot gluing two of the smaller vine balls on each of the large vine balls. Make sure to hold the small vine ball in place until the glue dries
- Next spray paint each of the ornaments. I spray painted the front, let it dry, flipped it over and did the back side. I wanted them to be a bit darker as the vine balls are made of wood they absorb the paint quickly so I applied another coat of paint to the front and backside. Make sure they are fully dry.
- I next cut a piece of the twine about 8 inches long for the ornament to hang on. The length depends on how long you want to hang it down. Cut 3 more pieces the same length.
- I weaved the twine through the vine pieces on the top and then tied a knot at the top
- I then added a dab of hot glue in between the ears and added the bow by pressing firmly.
Notes
For more fun Christmas crafts visit DollarCrafter.com
Please Save This to Pinterest
Your shares are how this site grows, and I am sincerely grateful. Know a friend who’d like this? Please share it on Facebook or save it to your favorite crafts board on Pinterest.