Spring is in the air, and what better way to welcome the season than with some festive DIY décor? If you’re looking for a fun and easy craft to brighten up your home, look no further than the Dollar Tree Carrot Basket. With just a few inexpensive supplies, you can create a charming centerpiece that’s perfect for Easter or any springtime gathering.
We have been having a blast creating Dollar Tree Easter crafts this last month, make sure to swing by and check them all out for more inspiration!
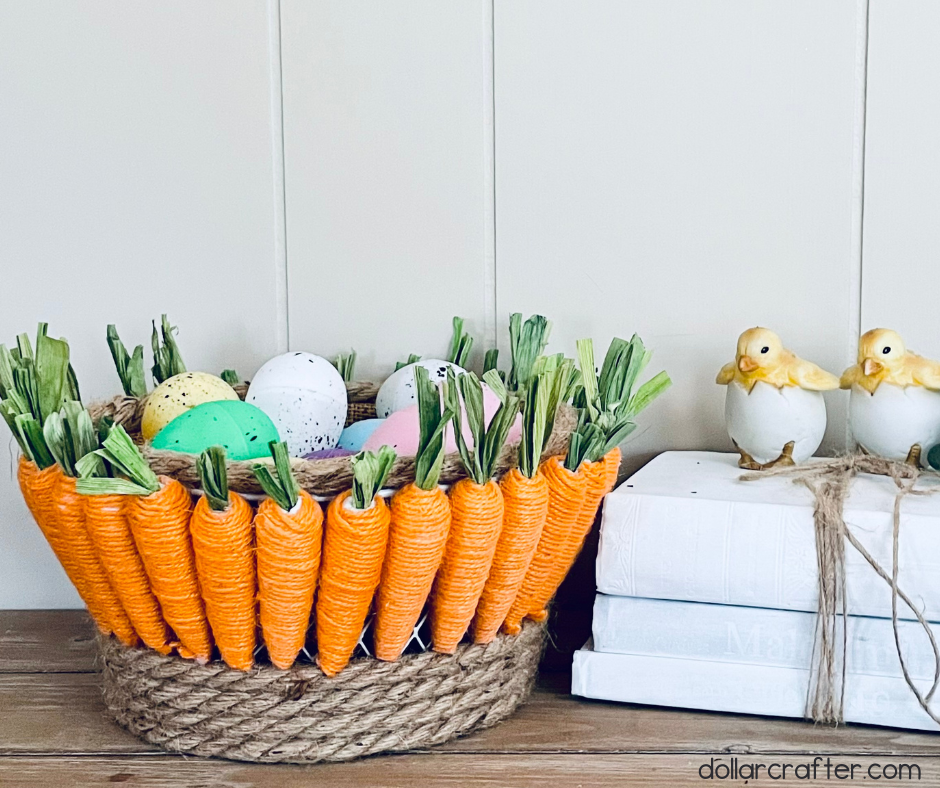
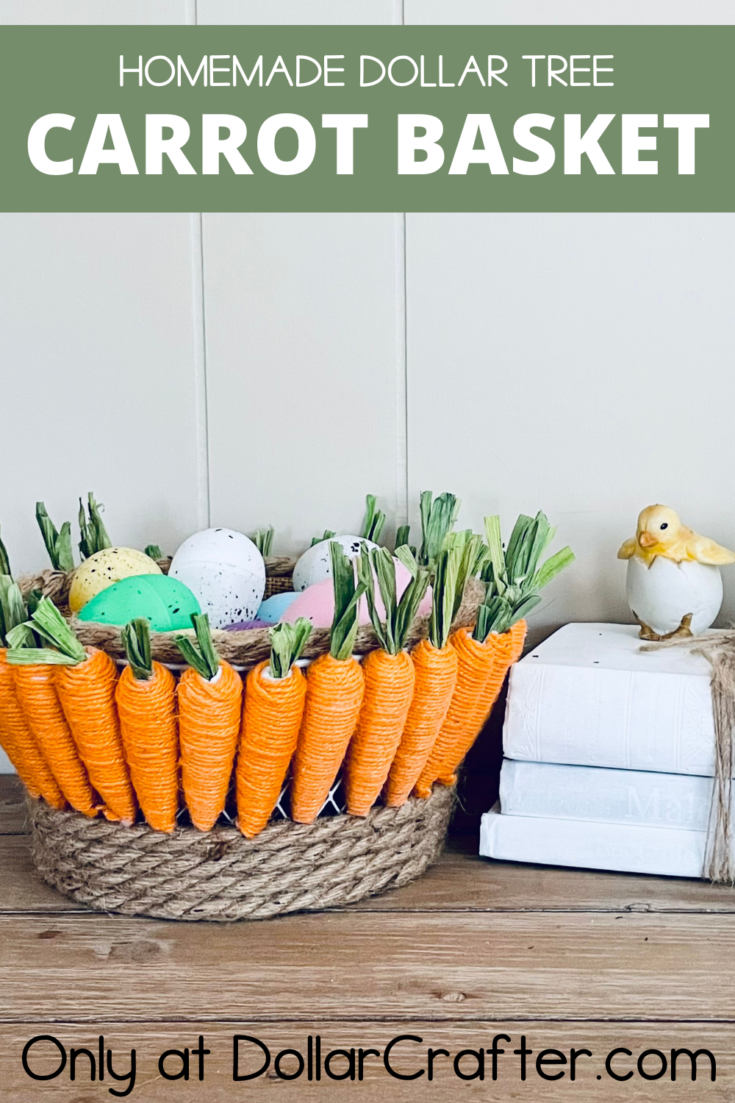
Easy Carrot Easter Baskets
The Dollar Tree Carrot Basket is an incredibly affordable craft that won’t break the bank. You’ll only need a few basic supplies that you can easily find at your nearest Dollar Tree store.
The best part? You don’t have to be a crafting expert to create this adorable decoration. So, let’s dive in and see what you’ll need to bring this project to life!
Supplies Needed:
- 5 Packages of Dollar Tree Carrots
- Dollar Tree Wire Basket
- Dollar Tree Nautical Rope (mine was the 11.4 ft one)
- Hot Glue Gun/ Glue sticks
- Scissors
- Burlap fabric
Tips for Making a Homemade Easter Carrot Basket
Before you start gluing the carrots onto the basket, take a few minutes to plan out your design. Think about the placement of the carrots and how you want them to look. This will ensure that your final product looks balanced and visually appealing.
While hot glue is a great adhesive for this craft, it’s important to use it sparingly. Too much glue can cause the carrots to stick out at odd angles and create a messy look. Just a small dot of glue on each carrot should be enough to hold it securely in place.
It can be tempting to rush through this craft, but taking your time is key to getting the best results. Make sure each carrot is securely attached before moving on to the next one. And remember, crafting should be enjoyable, so take your time and have fun with it!
And lastly – don’t be afraid to get creative with the design! While the classic carrot look is great, don’t be afraid to get creative with the design. Add in some greenery or other Easter-themed elements to make your basket stand out. The possibilities are endless, so let your imagination run wild!
How to Make an Easter Carrot Basket
Ready to get crafting? You will find the full tutorial below!
Easter Carrot Basket
Materials
- 5 Packages of Carrots (Dollar Tree )
- Wire Basket (Dollar Tree)
- Nautical Rope
- Burlap fabric
Tools
- Hot Glue Gun/ Glue sticks
- Scissors
Instructions
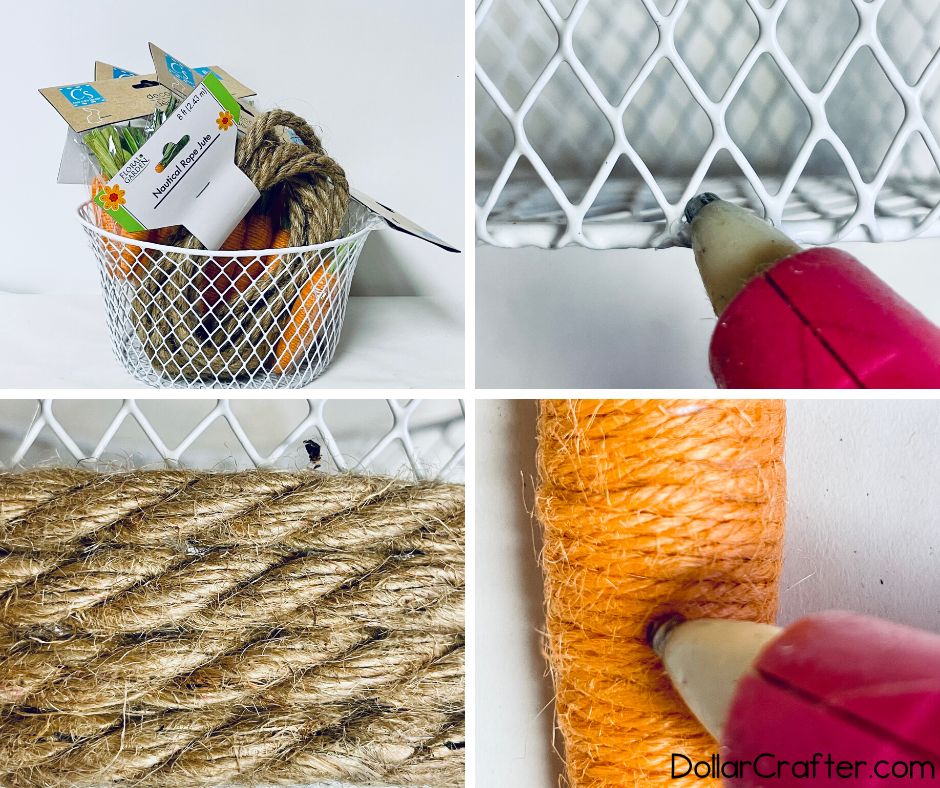
- Gather your supplies.
- To begin, apply a line of glue along the bottom rim of the wire basket. Then, place the nautical rope on top of the glue and repeat this step until the entire rope has been used. I wrapped the rope around the basket approximately four times. Remember to apply glue at the wire sections to ensure that the nautical rope adheres securely to the basket.
- Next add a line of glue down the side of a carrot and press firmly onto the wire basket. Repeat this process until the entire basket is covered with the carrots.
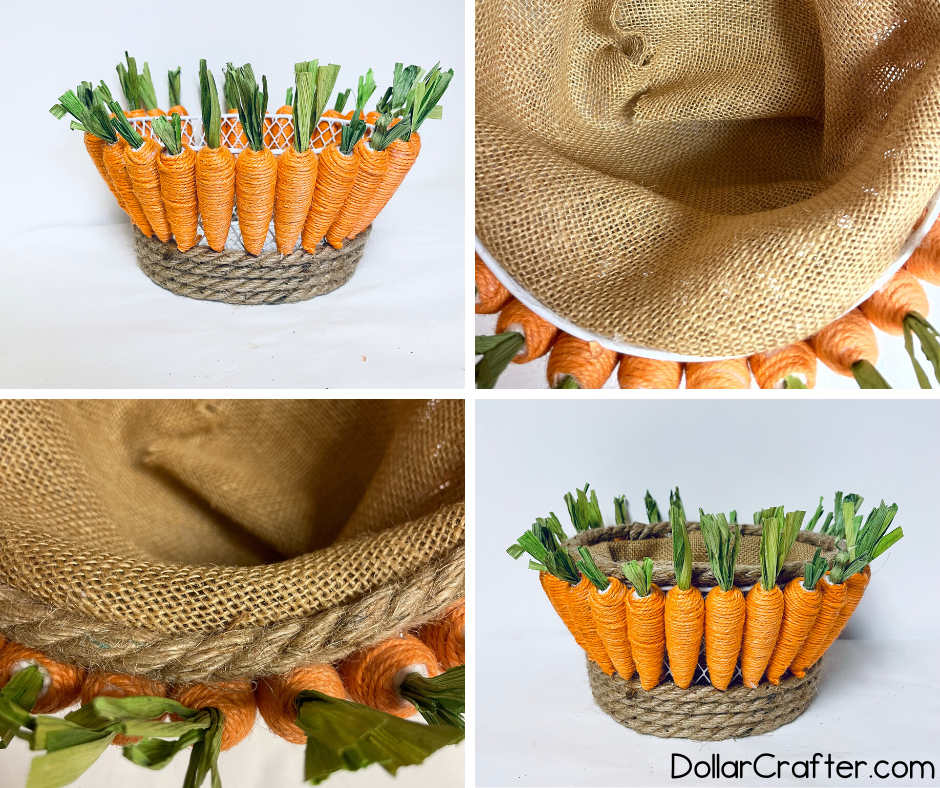
- Next add a line of glue down the side of a carrot and press firmly onto the wire basket. Repeat this process until the entire basket is covered with the carrots. You can also add a pop of color by using patterned fabric instead of burlap.
- To give your Dollar Tree Carrot Basket a finished look, add nautical rope to the top of the basket to seal the burlap seam. Simply apply a line of glue around the top rim of the basket and press the rope onto the glue.
- Then once your Easter basket is dried put it out on display!
Notes
For more fun Easter crafts visit DollarCrafter.com
Please Save This to Pinterest
Your shares are how this site grows and I am sincerely grateful. Know a friend who’d like this? Please share it on Facebook or save it to your favorite crafts board on Pinterest.