
It’s the 4th of July! Time for fireworks, BBQs, and all things red, white, and blue. This year we’ve got a fun new way to add some flair to your photos with patriotic sublimation prints!
Don’t forget the DIY bug spray for your 4th of July party!
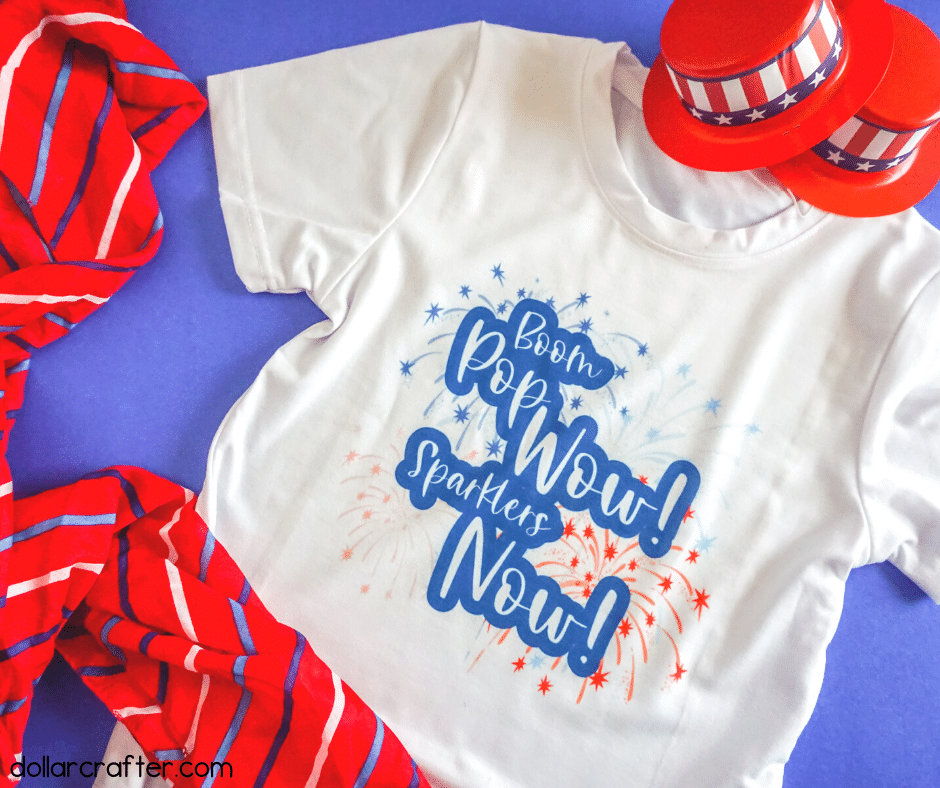
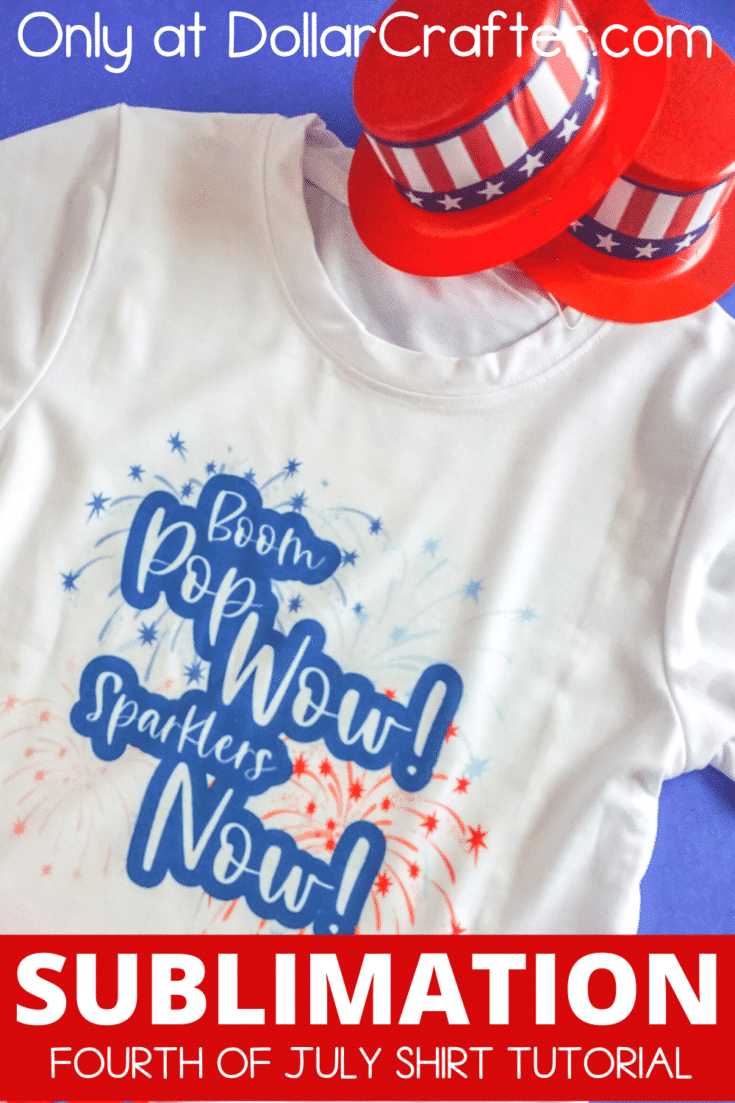
4th of July Sublimation T-Shirt
Supplies:
- 1 Sheet Sublimation Paper
- Boom Pop Wow! Sparklers Now! Sublimination File
- 1 White Polyester Blend T-shirt (the more polyester the better)
- Sublimation Printer
- Cricut Easy Press or Other Heat Press
- Heat Press Mat
- Heat Safe Tape
- Parchment Paper or Butcher Paper
- Lint Roller
- Iron, optional
- Cardboard
Note: if you do not have a sublimation printer, you can order a print from a shop like this one here
Making a patriotic shirt
Design the shirt of your dreams with a sublimation design.
Download and open up the file in your photo editing software, make sure to set it how you want it printed (I had mine at 106%), mirror before printing.
Preheat Easy Press or other heat press on high setting for 60 seconds when ready; dust lint roller across the surface if necessary and use iron to flatten out any surfaces that could cause problems later.
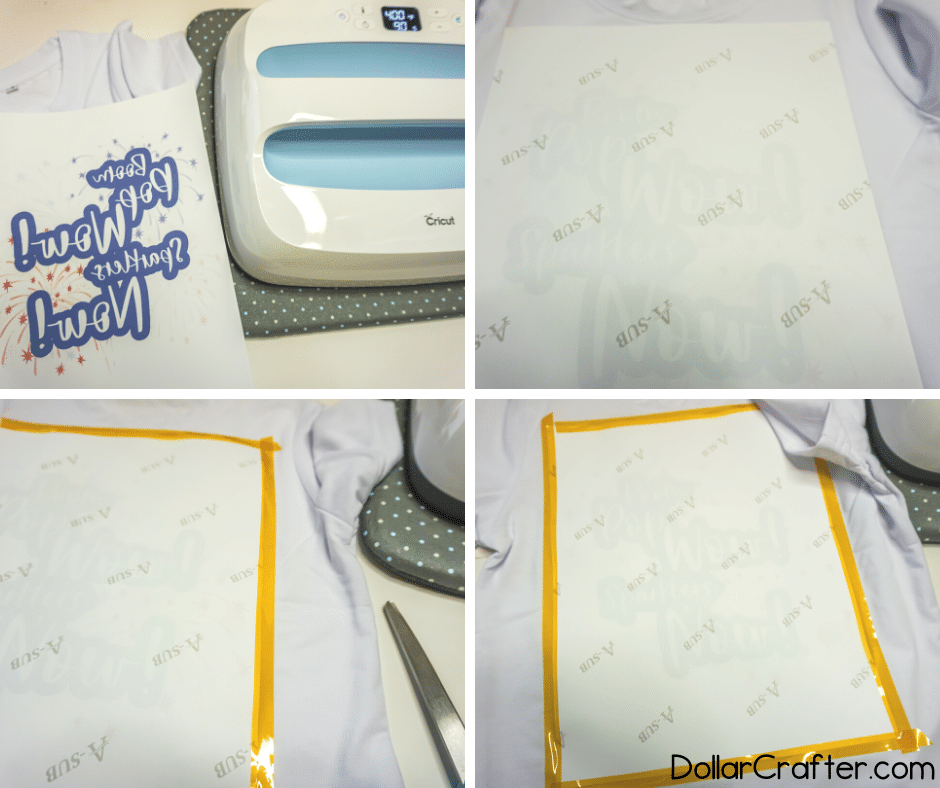
First, slip a piece of cardboard inside the shirt as an extra layer so that ink does not go through from one side of the fabric. Place printed designs face-down on top of some newly dyed t shirts laid out in front or you for easier access while running back and forth between finishing steps such as washing, drying, steaming ironing etc.
Secure them onto place using tape made specifically for these types of purposes since they are easily discarded after printing is complete (depending on how much detail was used). This way there will be no messy residue left behind when finished!
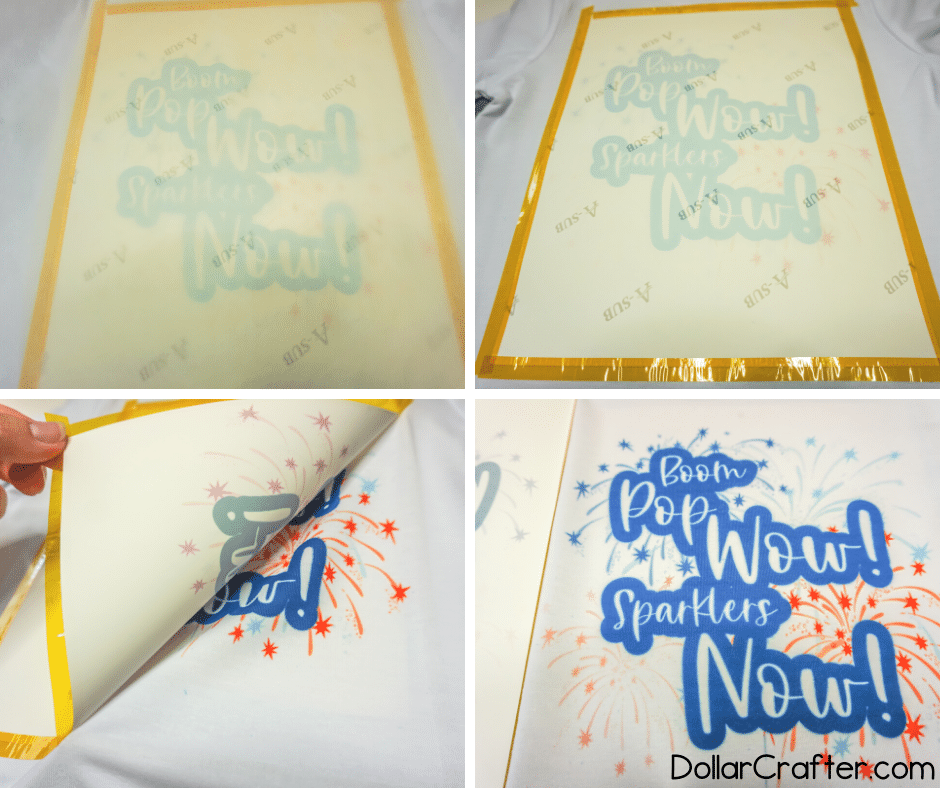
Cover the shirt and design with a sheet of parchment paper. Place an Easy Press on top of the sublimation, make sure it is not blocking any part of your design! Heat for 60 seconds at 400 degrees Fahrenheit to seal in that color.
Remove everything from garment (shirt + transfer), let cool enough so you can handle them without burning yourself then peel off tape & parchment while taking care not to rip or tear anything! Wear immediately or wash- wear again? Still good as new!!
If you’re looking for a way to add more of your favorite images onto clothes, then sublimation printing is one way to do it. Sublimation works by transferring the ink from an image on paper into heat-sensitive material which creates a permanent bond. Follow these steps to make sure you’re taking care of all the details so it will turn out great!
How to Make a July Fourth Sublimation Shirt
Ready to get crafting? You will find the full tutorial below!
July 4th Sublimation T-Shirt: Boom Pop Wow! Sparklers Now!
Materials
- 1 White Polyester Blend T-shirt (the more polyester the better)
- Boom Pop Wow July 4th Themed Sublimation Design
- 1 Sheet Sublimation Paper
Tools
- Sublimation Printer
- Cricut Easy Press or Other Heat Press
- Heat Press Mat
- Heat Safe Tape
- Parchment Paper or Butcher Paper
- Lint Roller
- Iron, optional
- Cardboard
Instructions
- Download the sublimation design file and open it with your default photo software. Set the design to print the full image to your sublimation printer on the sublimation paper. For my software and printer this was at 106%. Make sure the design is mirrored before printing.
- Preheat your Easy Press or other heat press to 400 degrees and prep the timer for 60 seconds.
- Dust the shirt with a lint roller and iron it, if necessary, to make sure the shirt is flat and clean. You can use your heat press to iron the shirt, if desired.
- Slip a piece of cardboard inside the shirt to protect the back of the shirt from the ink going through the shirt’s front, then lay the shirt flat on the heat press mat.
- Place the printed sublimation design face-down on the shirt and position it where you’d like it to be.
- Using the heat-safe tape, secure the sublimation design in place.
- Cover the shirt and design with a sheet of parchment paper.
- Place the Easy Press on top of the sublimation design, with light pressure, at 400 degrees for 60 seconds.
- Remove the Easy Press and parchment paper.
- Allow the heat-safe tape to cool enough to be handled, then peel it from the shirt along with the sublimation transfer sheet. Your shirt is complete and can be worn immediately or washed then worn.
Notes
For more easy holiday crafts and designs visit DollarCrafter.com
Please Save This to Pinterest
Your shares are how this site grows and I am sincerely grateful. Know a friend who’d like this? Please share it on Facebook or save it to your favorite crafts board on Pinterest.