Are you looking for an easy decor idea for the holiday season? Check out this DIY Christmas Framed Floral Arrangement. I love when I can reuse items that I have around the house.
It’s easy and fun to make, and it looks great on any shelf or wall. Please use the step-by-step instructions to create as many of these as you want because they make beautiful gifts too!
Find all our DIY Christmas Crafts and Ornaments here!
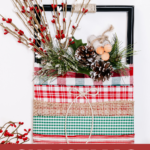
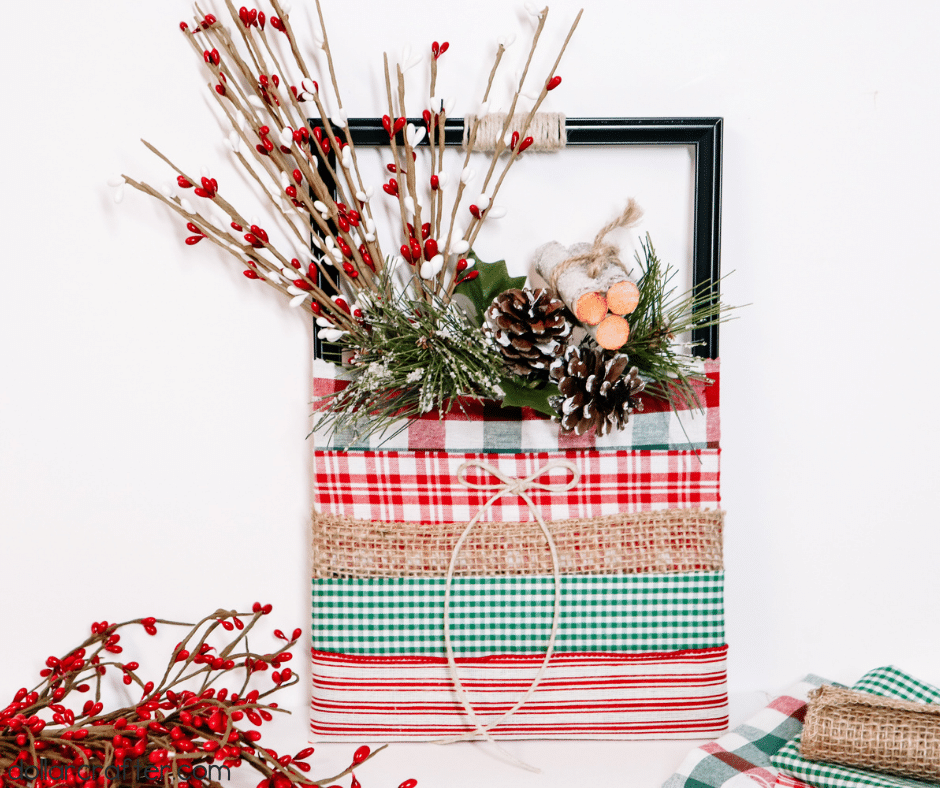
Christmas Framed Floral Fabric Craft
This Christmas Framed Floral Fabric Craft will make your house look festive and beautiful. It’s easy to do, too! All you need is some simple supplies from around the house like fabric, ribbon, scissors, glue, embellishments, and a frame.
You can even use an old frame that you already have lying around or pick one up at a thrift store if you don’t want to buy anything new. This project is great because it only takes about 30 minutes of work but looks beautiful when it’s finished!
Once completed, this arrangement will be sure to impress all of your friends and family members with its beauty. Plus, they won’t believe how easy it was for you to create such an impressive piece of art! If anyone asks how long it took or what materials were used in making this masterpiece – just tell them “30 minutes” and “stuff I had laying around my house.” They’ll never know the difference!
Supplies:
- Frame
- 3 Different Christmas Color Fabric Pieces
- Burlap Ribbon
- Red and White Striped Ribbon
- Twine
- Red and White Pip Berries
- Decorative Sprigs (pinecones, pine needles, wood bundles, etc)
- Ruler
- Hot Glue and Glue Gun
- Scissors
- Pinking Sheers
Tips for Making Christmas Framed Floral Wall Décor
Can I reuse a frame?
Heck yes! Go ahead and find a frame you’re not using because reusing items is the best way to go. Plus, it makes you feel better that you are using it than sitting in a box or junk pile.
Where do I get the fabric?
Any fabric store, plus Walmart has fabric too. Sometimes if you are lucky, you might find something at the dollar store.
What I do is right after Christmas, I buy up materials like fabric, ribbons, embellishments, and anything I think I might use on crafts for next year. Heck, I even stock up on glue and glue sticks after the holiday.
All the craft stores have a sale, so you can save so much money buying after the season.
What if I can’t find these exact fabrics?
It’s okay; use what you have or buy. Of course, you don’t have to match these fabrics and ribbons exactly but try to match your decor. I always keep simple green, red, and white patterns on hand for projects like this.
Get creative with your embellishments, too– you don’t have to use exactly what I did but pinecones, cinnamon sticks, tiny logs, berries, sprigs, and if you come across frosted items- oh, get those, they will look amazing on this project.
This frame will look amazing by our DIY Dollar Tree Snow Globe another real simple craft.
How to Make This Christmas Fabric Frame at Home
Let’s get crafting! Below is our written tutorial.
Christmas Framed Floral Arrangement

Materials
- Frame 7 1/2” x 12”
- 3 Different Christmas Color Fabric Pieces
- 2' Burlap Ribbon
- Red and White Striped Ribbon
- Twine
- Red and White Pip Berries
- Decorative Sprigs (pinecones, pine needles, wood bundles, etc)
Tools
- Ruler
- Hot Glue and Glue Gun
- Scissors
- Pinking Sheers
Instructions
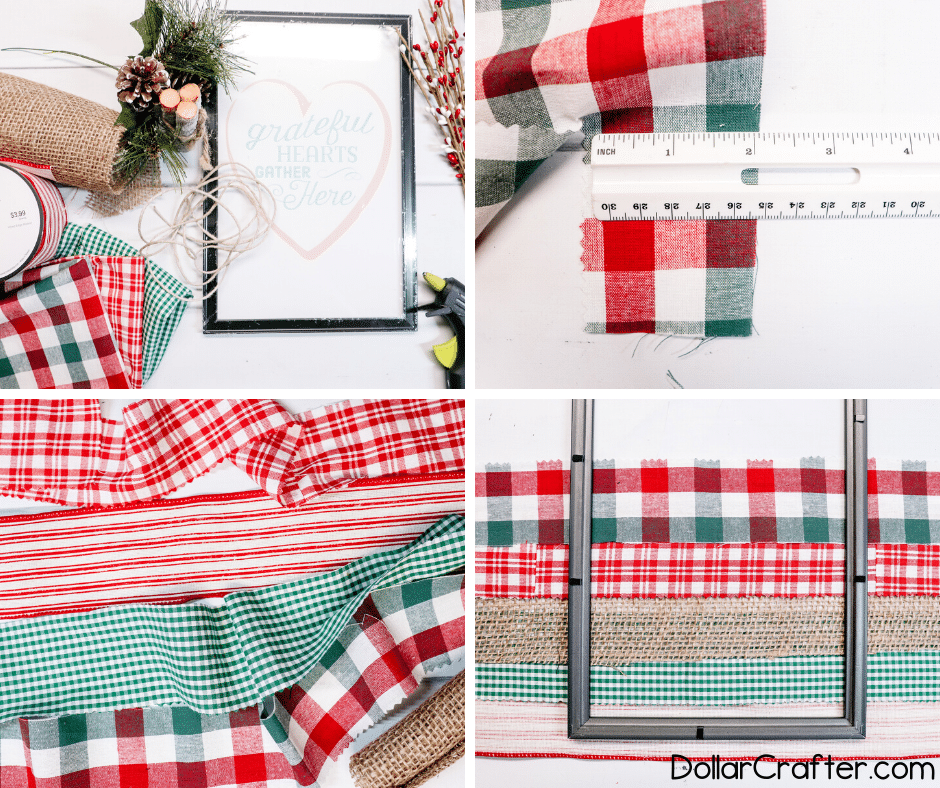
- Take glass out of frame and carefully discard.
- Cut fabric into lengths of 6” x 2” with 3 lengths per fabric color. Using pinking sheers makes a real nice edging when putting these together.
- Hot glue the lengths together so that each color will be 18”x2” long.
- Place the fabric lengths on the table, overlapping in the order you'd like, with your preferred side of the fabric faced down.
- Place the frame on top of the fabric. The fabric should come ¾ of the way up the frame and the bottom fabric piece should overlap the bottom of the frame to create a base for the pocket that holds the florals.
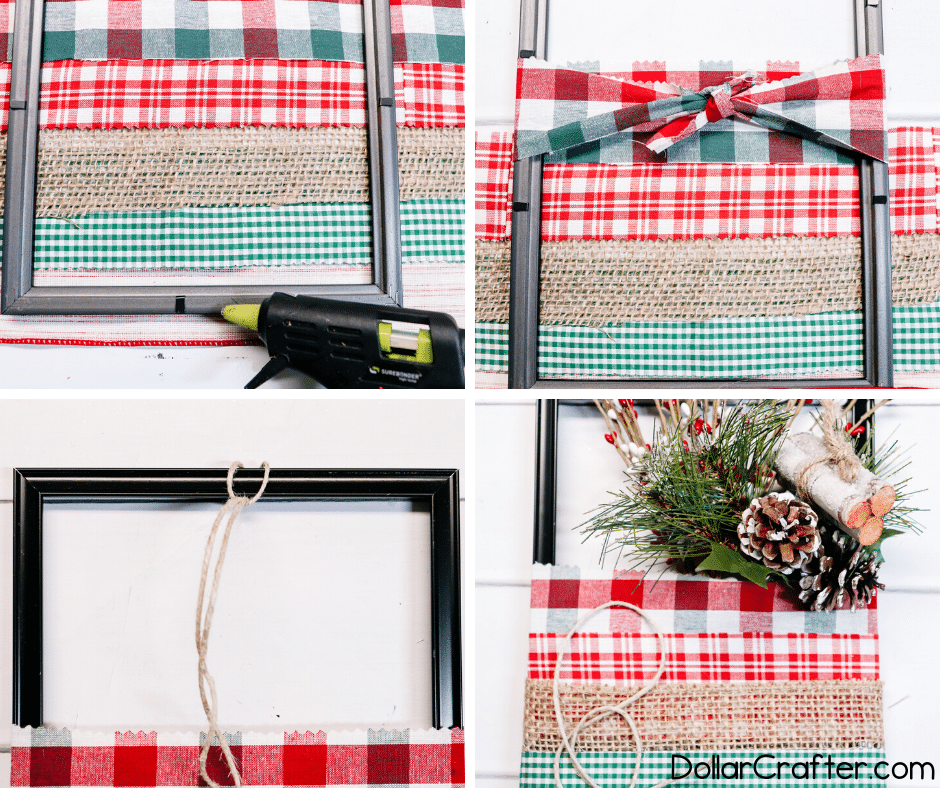
- Tie the fabric strips in a knot on the back of the frame, starting at the top.
- The bottom piece should be hot glued to the back of the frame before tying in place.
- Tuck your pip berries or florals into the pocket, trimming and separating stems if needed.
- Wrap twine around the center top of the frame, creating a handle if you will.
- Take a length of twine and create a bow for the front of the frame. I did small loops and long “ribbon”.
- Set out for display or give as a gift
Notes
For more fun Christmas Crafts visit DollarCrafter.com
Please Save This to Pinterest
Your shares are how this site grows, and I am sincerely grateful. Know a friend who’d like this? Please share it on Facebook or save it to your favorite crafts board on Pinterest.