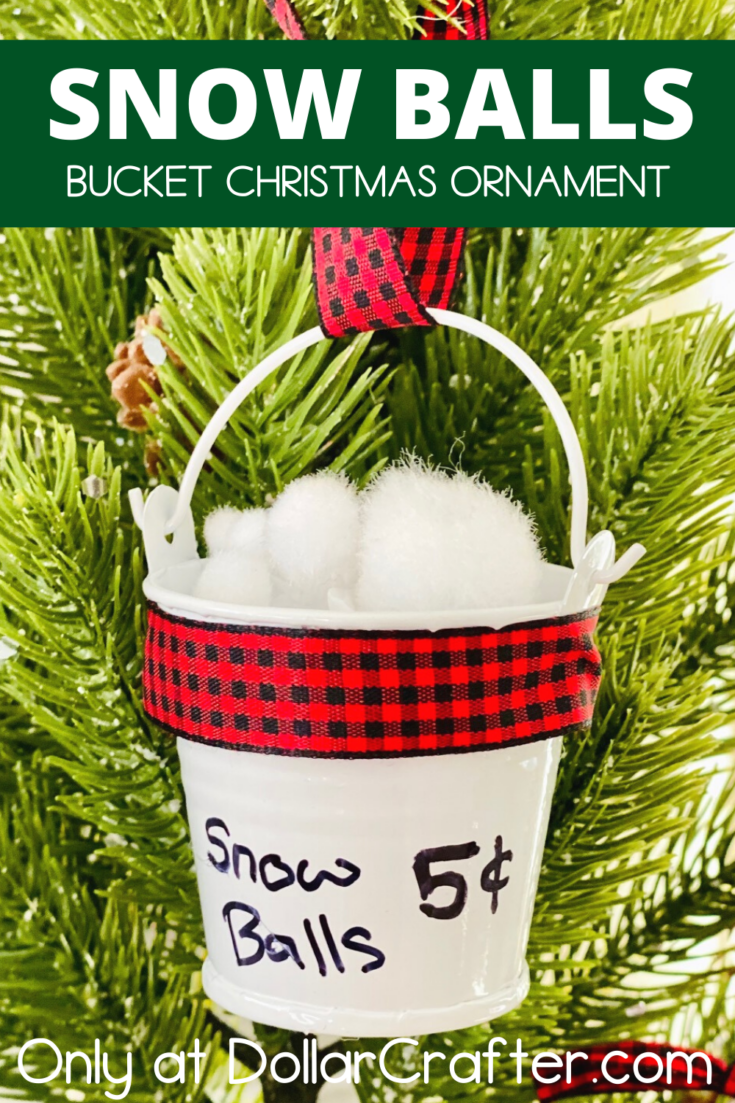
One of the best things about Christmas is getting to decorate your home with all sorts of festive decorations. If you’re looking for a unique and (dare we say) quirky decoration for your tree this year, why not try your hand at making a DIY bucket of snowballs ornament? This craft is easy, fun, and perfect for anyone who loves snow.

Find all our DIY Christmas Crafts and Ornaments here!
Bucket of Snowballs Christmas Ornament
Supplies:
- Christmas Pom Poms, Dollar Tree
- Black Sharpie
- Tissue Paper, Dollar Tree
- Red and Black Checkered Ribbon, Dollar Tree
- 2 White Mini Buckets, Dollar Tree
- Scissors
- Hot Glue Gun and Glue Sticks
Tips for Making This Bucket of Snowballs Ornament
First things first, you’ll need to gather all of your supplies. You can find most of these items around your house—with the exception of the styrofoam balls, which can be found at any craft or dollar store. Once you have everything you need, it’s time to start crafting!

This craft is super simple and doesn’t require any complex crafting skills. You could even take it up a notch by putting your Cricut machine to work instead of hand lettering the writing. I personally love how the sharpie looks like a child’s writing, but Creative Fabrica has some fun handwritten fonts if you would rather use vinyl.
How to Make This Snowball Ornament at Home
Let’s get crafting! Below is our written tutorial.
Bucket of Snowballs Ornament
Materials
- Christmas Pom Poms, Dollar Tree
- Black Sharpie
- Tissue Paper, Dollar Tree
- Red and Black Checkered Ribbon, Dollar Tree
- 2 White Mini Buckets, Dollar Tree
Tools
- Scissors
- Hot Glue Gun and Glue
Instructions
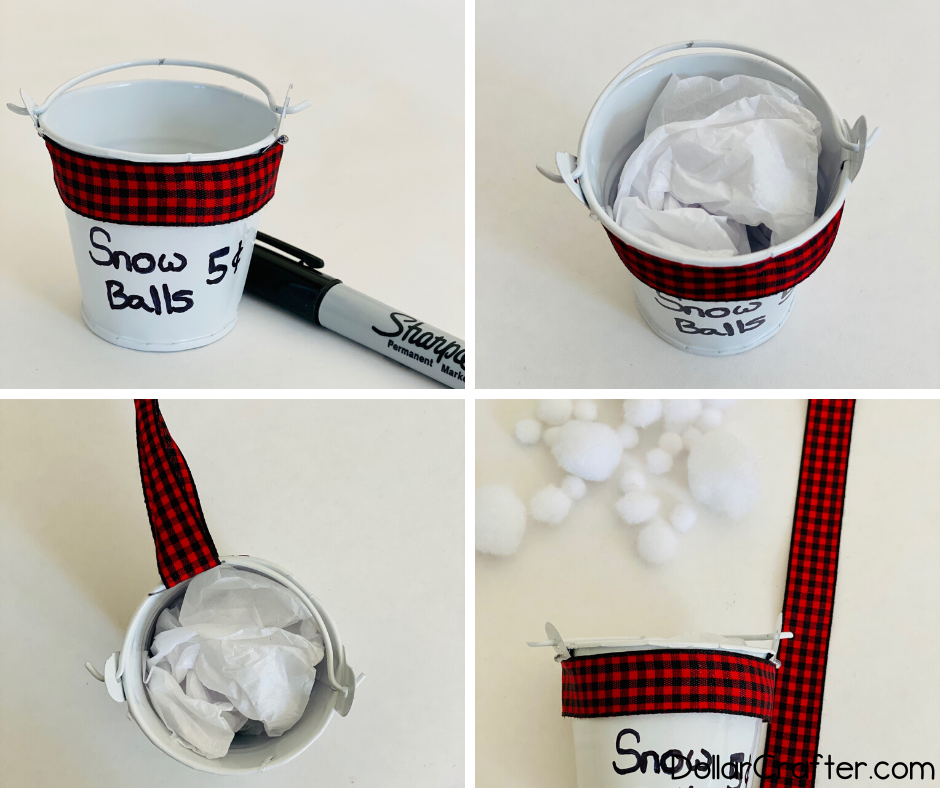
- Start by wrapping the checkered ribbon around the outside of the bucket and then trimming with scissors.
- Add a dab of hot glue to the side of the bucket and add the ribbon.
- Using the sharpie, add the lettering.
- Add some tissue paper to the bottom of the bucket to add some filler space.
- Next cut a 5 inch section of the checkered ribbon and tie to the handle of the bucket.
- Next add multiple sizes of the white pom poms to the top of the bucket. I did not glue them down but it would be more stable.
Please Save This to Pinterest
Your shares are how this site grows, and I am sincerely grateful. Know a friend who’d like this? Please share it on Facebook or save it to your favorite crafts board on Pinterest.