Are you dreaming of a coastal escape but can’t get away just yet? Bring the beach vibes to your front door with this easy DIY Coastal Shell Wreath! With just a few supplies from Dollar Tree and a little bit of creativity, you can create a stunning wreath that will remind you of the ocean breeze and the sound of the waves.
Not only is this wreath affordable and fun to make, but it also makes for a beautiful statement piece to welcome guests into your home. So, let’s get started and create your very own beach-inspired wreath that will add a touch of summer to your front door all year round!
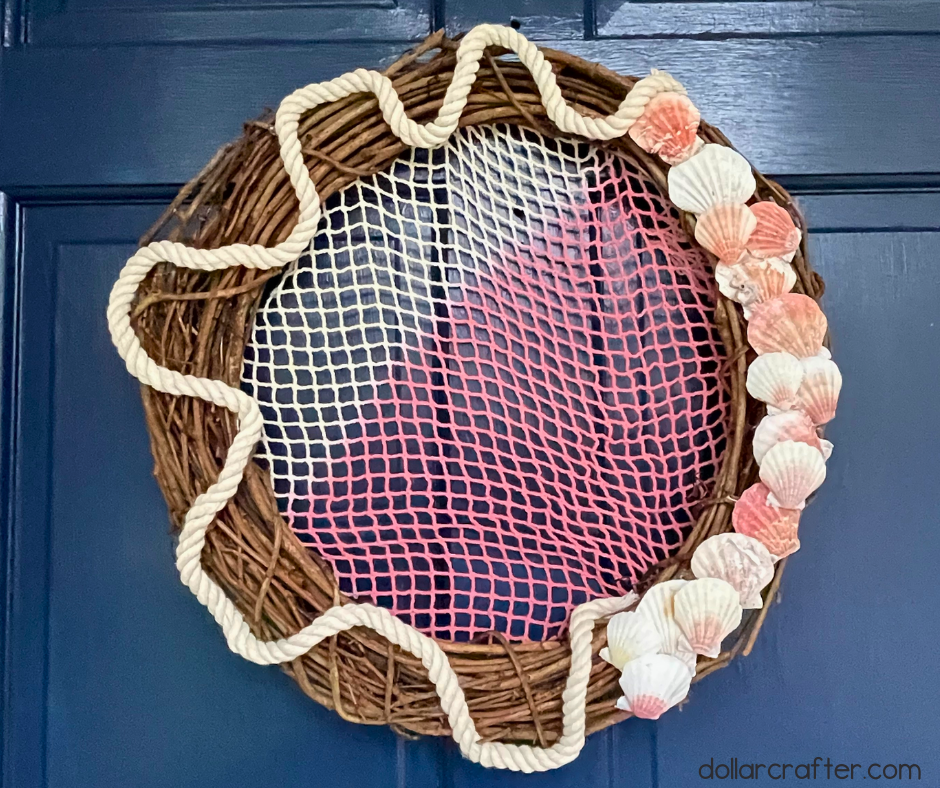
DIY Coastal Shell Wreath
Before we dive into the step-by-step instructions, let’s make sure we have all the supplies we need to make this beautiful Coastal Shell Wreath. The good news is that you don’t need a lot of materials or tools to get started. In fact, you can find most of the supplies at your local Dollar Tree store, and the total cost will be under $10. So, let’s gather the materials and get ready to bring the beach to your front door!
Supplies:
- 18-inch Grapevine Wreath
- 5 Zip Ties
- Nautical Rope (Dollar Tree)
- Seashells
- Ombre Netted Tote Bag (Dollar Tree)
- Hot Glue Gun and Glue
- Scissors
Tips for Making a Coastal Shell Wreath
When it comes to creating a beautiful Coastal Shell Wreath, there are a few tips and tricks that can help you achieve the perfect result. Here are some tips to help you create a wreath that you can be proud of:
First and foremost, it’s important to choose a grapevine wreath that’s the right size for your front door or wall. An 18-inch wreath is a good size for most doors, but you can adjust the size based on your personal preference.
When cutting the ombre tote bag handles off, make sure to cut as close to the top of the bag as possible to maximize the amount of netting you have to work with. This will help you get the most out of your supplies and create a more full and visually interesting wreath. If you cannot find the ombre bag at your local Dollar Tree you can use any type of netting material available to you, just make sure to measure it beforehand to make sure it will fit the inner part of your wreath.
Before securing the netting to the grapevine wreath with zip ties, stretch it out to make sure it will fit smoothly over the wreath. This will also give you an idea of where to place the zip ties for the most secure hold.
When gluing the shells onto the wreath, start with the larger shells first and fill in any gaps with smaller shells. This will create a more balanced and visually appealing wreath.
Lay the nautical rope out onto the grapevine wreath to plan your design before gluing it on. This will help you determine how much rope you need and where to place it for the best effect.
Use a hot glue gun to attach the nautical rope to the wreath. Be sure to apply enough glue for a strong hold, but not so much that it oozes out around the rope.
How to Make a DIY Coastal Seashell Wreath
Ready to get crafting? You will find the full tutorial below!
DIY Coastal Seashell Wreath

Materials
- 18 inch Grapevine Wreath
- 5 Zip Ties
- Nautical Rope (Dollar Tree)
- Seashells
- 1 Ombre Tote or Netting (Dollar Tree)
Tools
- Hot Glue Gun and Glue
- Scissors
Instructions
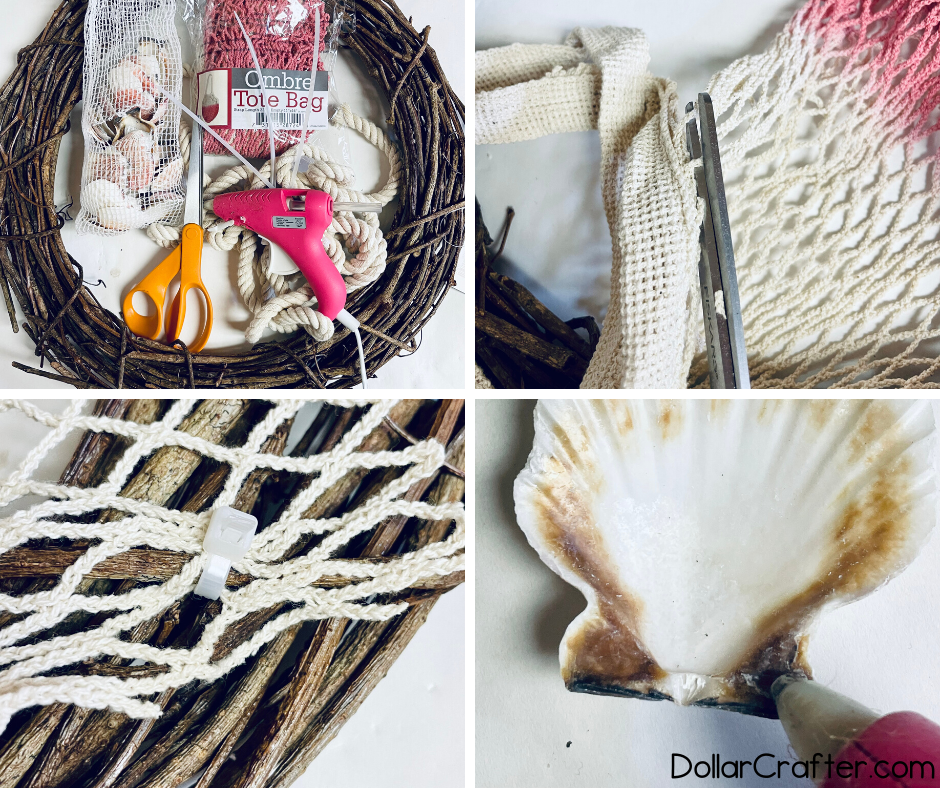
- Gather your supplies.
- Cut the ombre tote bag handles off so you just have the netting. Trim it so that it stretches to fit inside of the grapevine and secure with zip ties. Trim the ends of the zip ties.
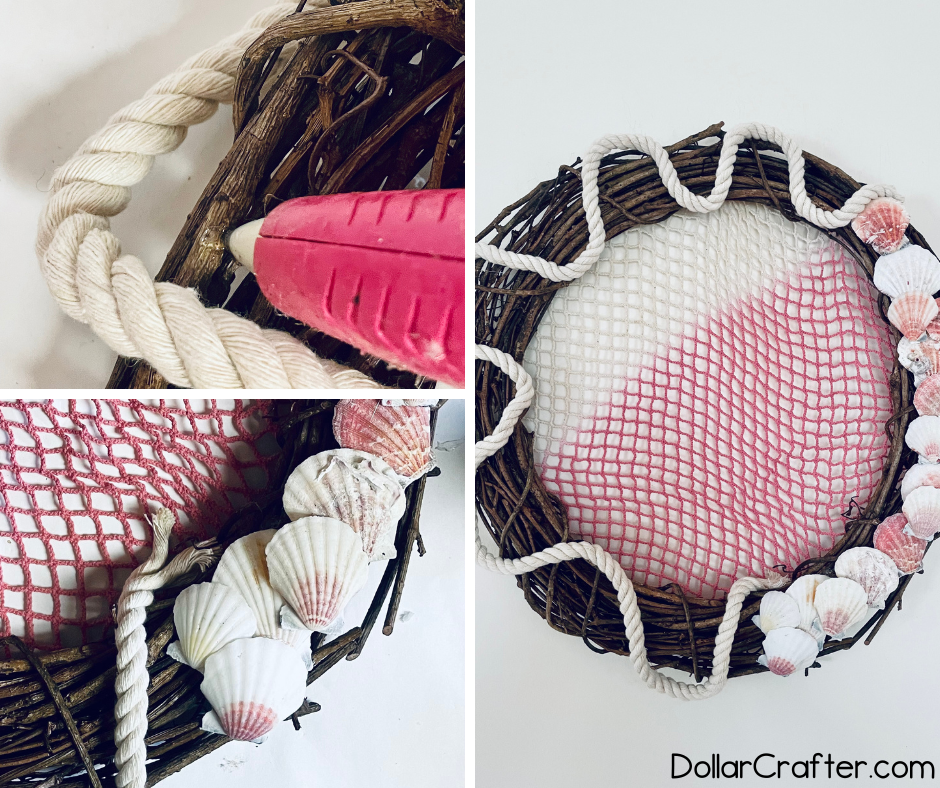
- Using the hot glue gun, attach the shells to the grapevine wreath. Apply hot glue to the grapevine wreath where you will be adding the shell, as well as to the back of the shell for extra security.
- Lay out the nautical rope onto the grapevine wreath to see exactly how much you will need. Trim the end off and attach the nautical rope to the grapevine wreath using the hot glue gun.
- Once the nautical rope is attached, add additional shells to the wreath to fill in any gaps and create a balanced look.
- Allow the hot glue to dry completely, then hang your Coastal Shell Wreath on your front door or wall for a beautiful beachy touch to your decor.
Notes
For more fun crafts visit DollarCrafter.com
Please Save This to Pinterest
Your shares are how this site grows and I am sincerely grateful. Know a friend who’d like this? Please share it on Facebook or save it to your favorite crafts board on Pinterest.