
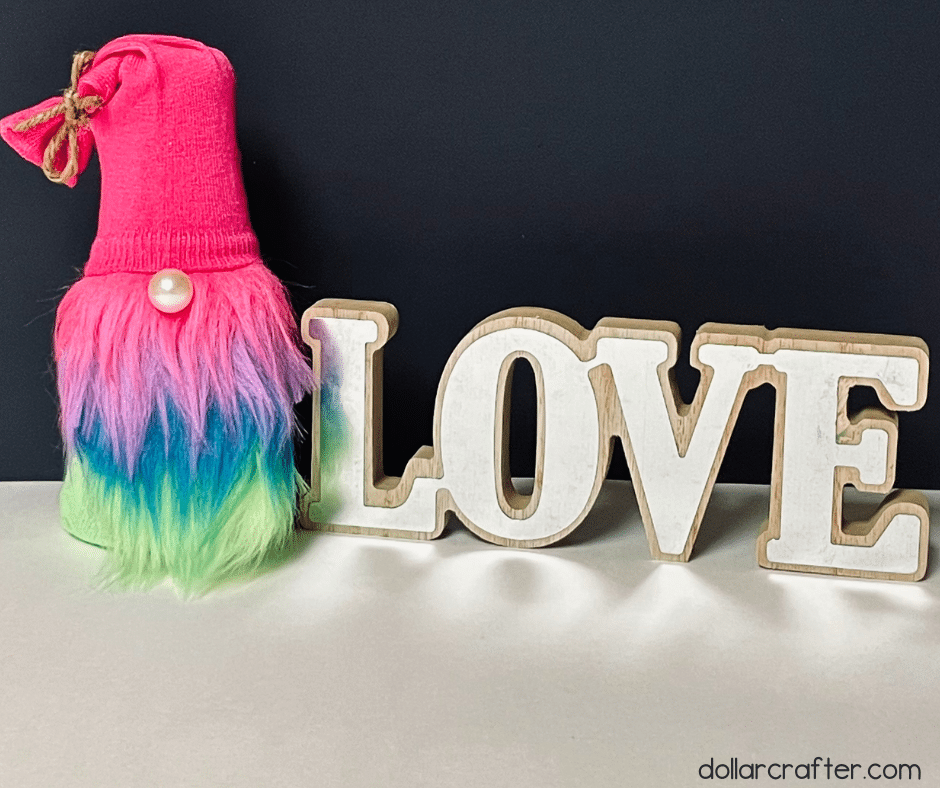
Looking for a fun and budget-friendly craft project? Look no further than the Dollar Tree! With just a few inexpensive supplies from this popular discount store, you can create your very own whimsical rainbow gnome.
DIY Rainbow Gnome
This adorable decoration is perfect for brightening up any room in your home, and it’s easy to make even if you’re not a crafting expert. So grab your hot glue gun and let’s get started!
Supplies:
- Twine (Dollar Tree)
- 1 Green and 1 Pink Neon Sock (Dollar Tree
- Foam Cone (Dollar Tree)
- Fuzzy Pen (Dollar Tree)
- Pearl Bead (Dollar Tree)
- Hot Glue and Gun
- Scissors
Tips for Making a Rainbow Gnome
When making your budget-friendly rainbow gnome, it’s important to take your time and be patient with the process. Rushing can lead to mistakes, which can affect the overall look of your finished gnome.
Use the right amount of hot glue when attaching the materials, as too much or too little glue can impact the appearance and stability of your gnome. Don’t be afraid to experiment with different colors and patterns to make your gnome unique and personalized.
Keeping a clean workspace can help you stay organized and avoid losing track of supplies. Most importantly, have fun!
Crafting should be an enjoyable and relaxing experience. Don’t stress too much about getting everything perfect – embrace any imperfections and enjoy the process of creating something with your own two hands!
How to Make a Rainbow Gnome Using Dollar Tree Supplies
Ready to get crafting? You will find the full tutorial below!
Rainbow Gnome Craft
Materials
- 1 Neon Pink Sock
- 1 Neon Green Sock
- Foam Cone
- Pearl Bead
- Twine
- Rainbow Fuzzy Pen or Rainbow Faux Fur
Tools
- Scissors
- Hot Glue Gun and Glue
Instructions
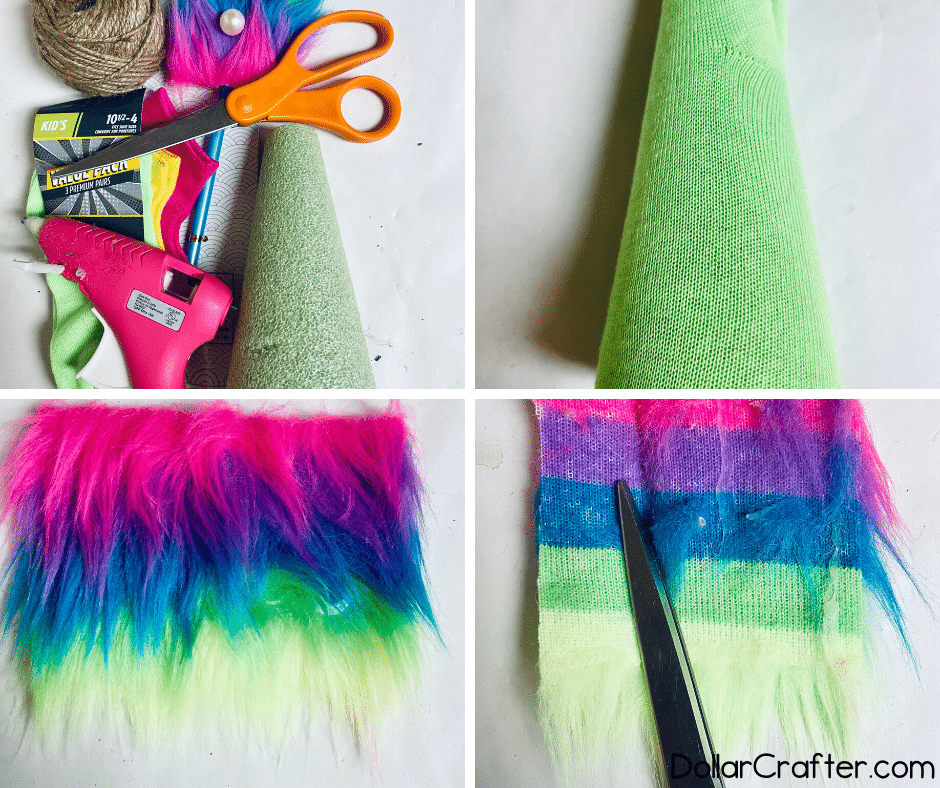
- Gather your supplies.
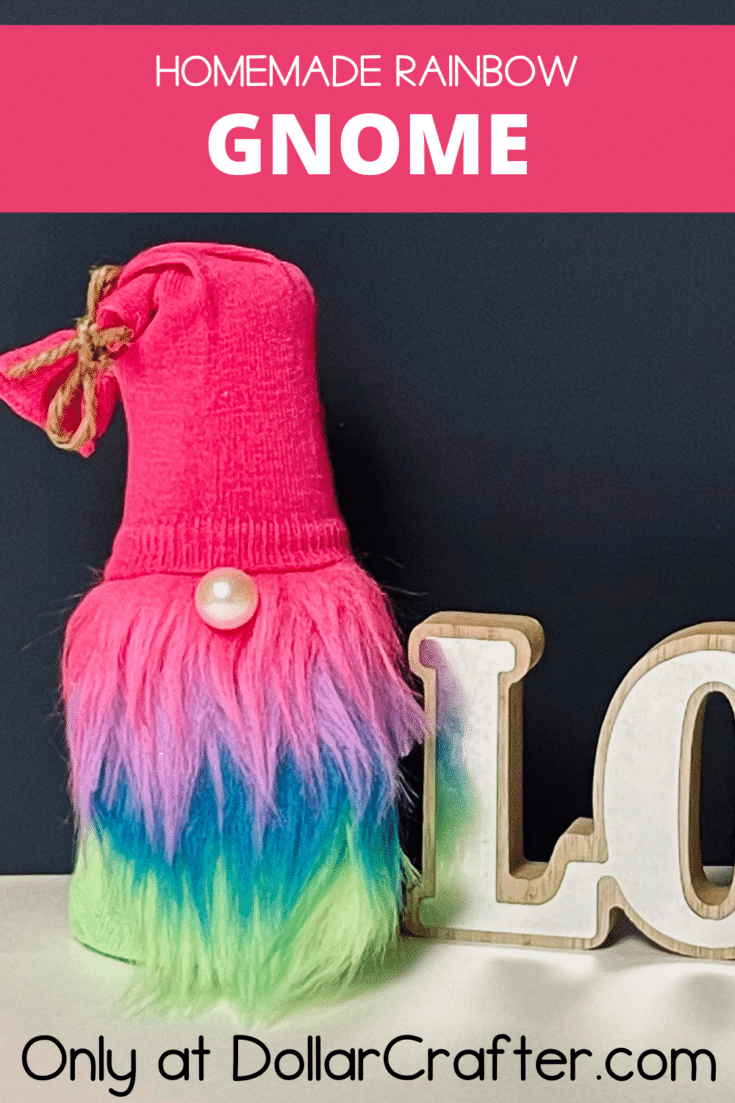
- Take the neon green sock place the foam cone inside of it. We used the Dollar Tree kids neon sock set.
- Cut down the side of the fuzzy pen with scissors and remove the fuzzy part from the pen. This will be used as the gnome's beard.
- Trim the beard down to the size that you want it and to fit the cone. A size of about 3x3 inches should work well.
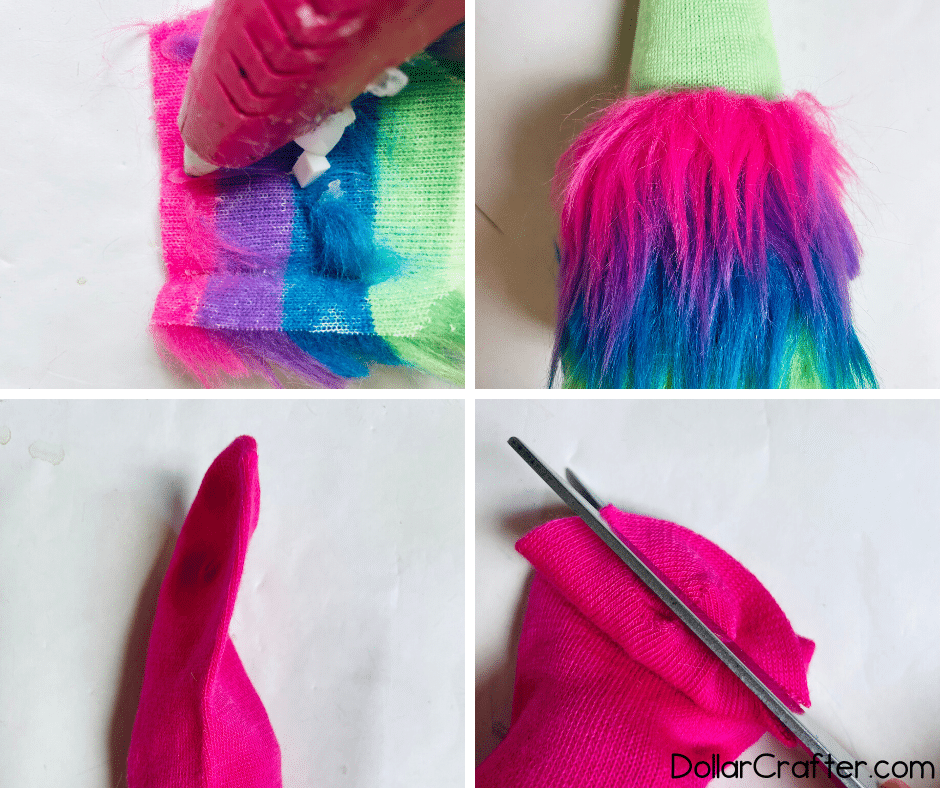
- Use the hot glue gun to add a line of glue to the backside of the fuzzy fur, then press it firmly onto the cone where you want it, with some of the fur hanging down on the bottom. This will be the beard of your gnome.
- Take the hot pink sock and place it over the top of the cone to create the hat.
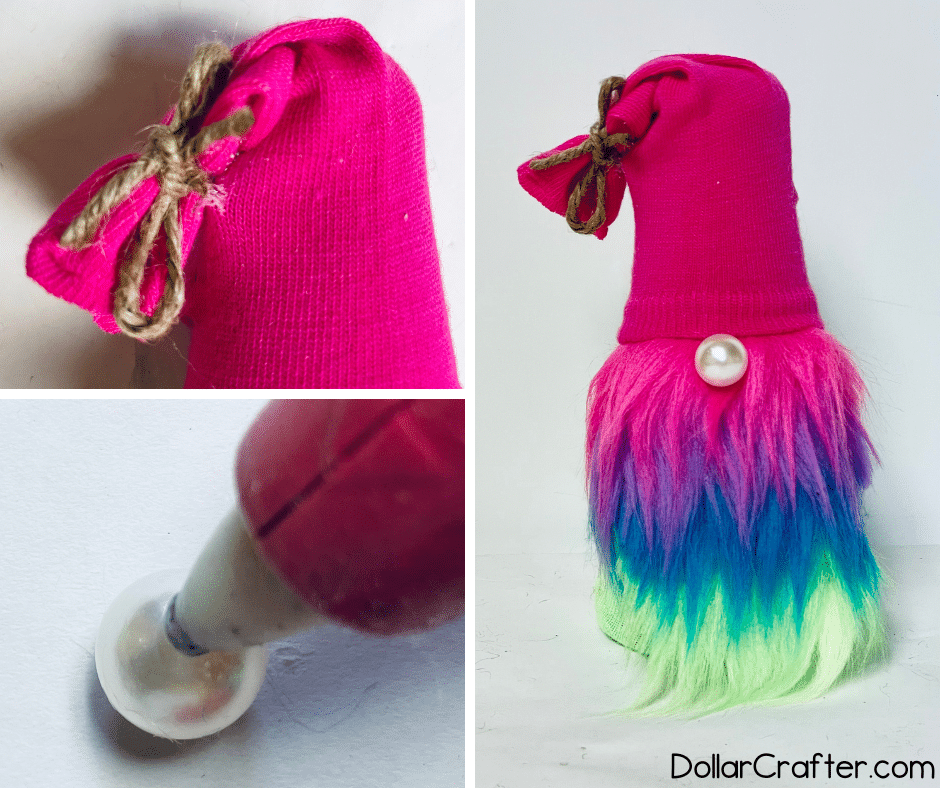
- Trim the end of the hat and cut a 5-inch section of twine. Use the twine to create a bow around the end of the hat and then trim the ends of the twine.
- Add a dab of hot glue to the pearl bead and place it onto the fuzzy fur right under where the pink sock meets the fur. This will be the nose of your gnome.
- Your budget-friendly rainbow gnome is now complete! Display it proudly in your home or give it as a gift to a friend or family member.
Notes
For more fun crafts visit DollarCrafter.com
Please Save This to Pinterest
Your shares are how this site grows and I am sincerely grateful. Know a friend who’d like this? Please share it on Facebook or save it to your favorite crafts board on Pinterest.