
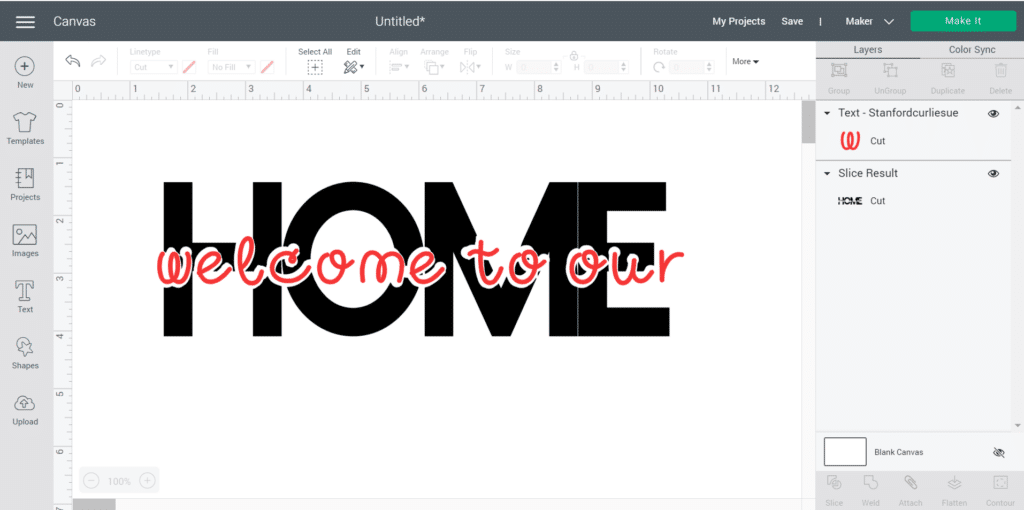
A knockout is where you superimpose letters or an image on another word. There are multiple different styles of knockout designs that can be done. In this tutorial, we will be focusing on how to make a knockout design of two texts with the top text outlined in white.
Knockouts are a fun way to personalize just about anything. I personally love using the design to make signs.

Creating Knockouts in Cricut Design Space
1. Create the Background Word
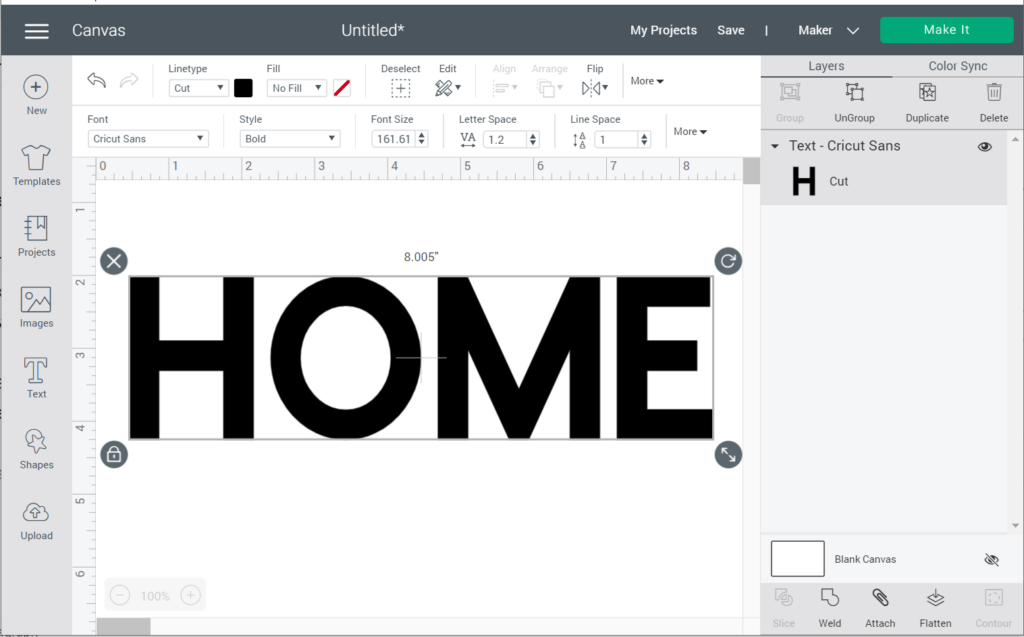
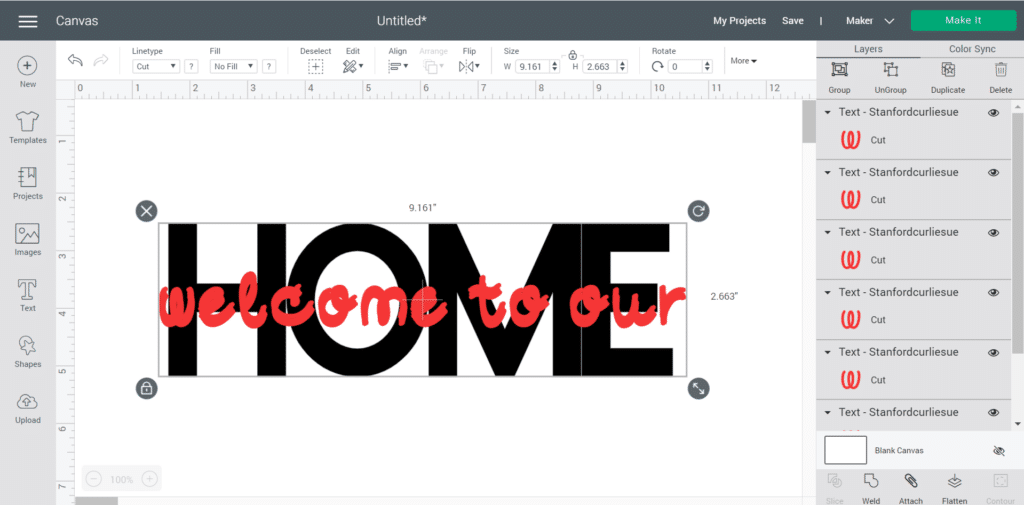
Before you start know the size of the text you will be needing to use. Then create your text. To do this, click on the text on the left hand side and type in your background word in all capital letters.
Make sure to pick out a big, bulky, and bold style text. For our background text, I used “Cricut Sans Bold’ which is the free default text in Design Space.
2. Adjust the Letter Space
Play around with the letter spacing until you have something that you like. Remember that this word is for the background so keeping the letters fairly close to better is the best option for getting that big bold look.
Note: If your letters aren’t kerning properly, go ahead and click Advanced > Ungroup to Letters and manually adjust them. Just be sure to select all of your letters and Weld when you’re done.
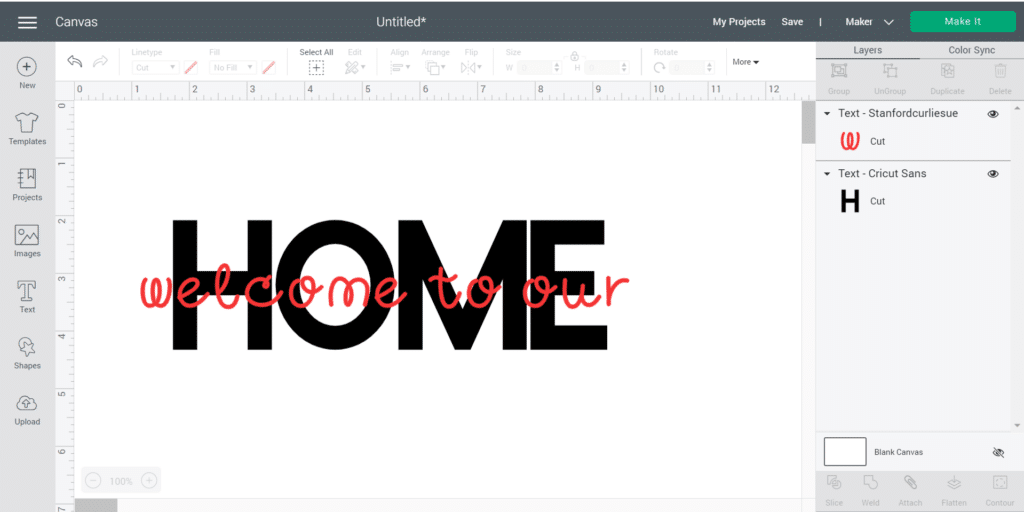
3. Add the Accent Word
Next, you will need to add the word or phrase that is on the forefront of your design. For this text, I used “Stanford Curlie Sue” which is a commercial font I uploaded to my system. For this font, you are going to want to pick a script style font for the best effect.
I made our font red so it was easy to see in this tutorial, however you can make your font whatever color you desire.
After you have added your accent word/phrase resize the text box so that it is about the same size as the background text. You can also make your accent word/phrase longer by adding special characters. And then select all and align center.
Tip: If your accent words/phrase is about the same height as your background word, you can make your background word taller so it extends beyond the forefront words. To do this, click the Unlock icon in the lower left corner of the background word and resize to make the word taller.
4. Time to Knock Things Out!
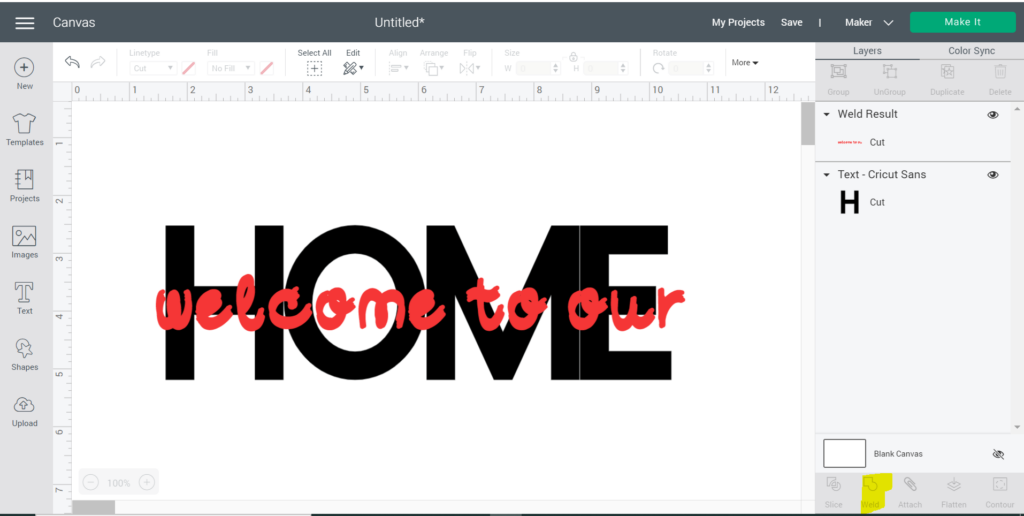
Once you have your elements laid out where you want them the next step is creating the actual knockout. To do this you are going to select all (copy and paste so you have a oops! design in case you mess up) and then click “Slice” in the lower right hand corner. Make sure you have deselected your oops! copy and moved it out of your work space before slicing.
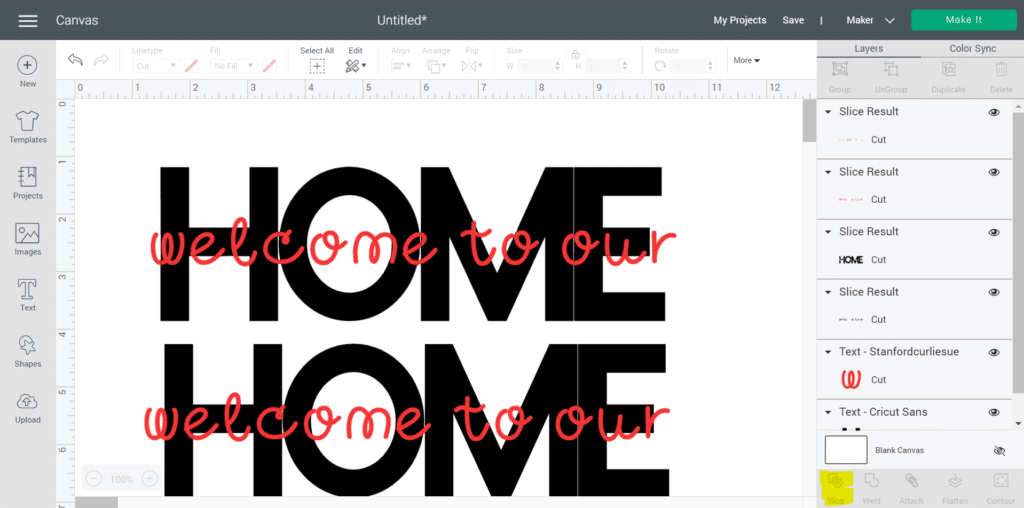
This is going to give you a whole bunch of extra bits. Select the pieces you do not need and delete everything except the big bold word.
Then delete the extra background text on your oops! design so that you are left with the cut out background design and an accent font.
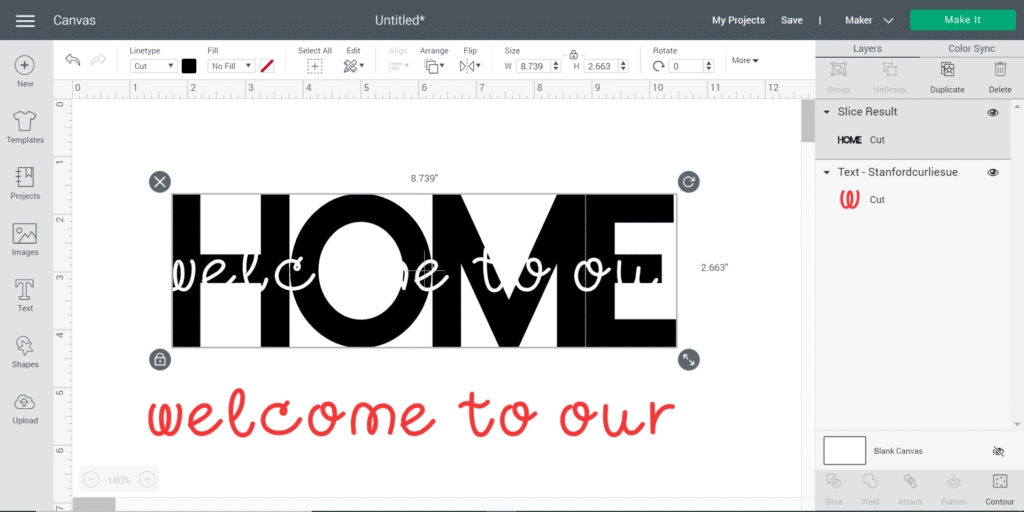
At this point you can move the accent text up over the cut out and create your project, however, it is not the big bold white outline that knockouts are known for. This is the basic knockout.
If you want this to really pop, you need the outline around it. The easiest way to do this is in Design Space takes a little patience, but I promise you it’s worth it.
To start, you need to go back to your original design of the background text and accent text.
Then you are going to duplicate your accent text multiple times, offsetting it just a bit each time. I usually do about 5-6 duplicates. You will get this big jumbled mess.
Then select all of the accent text layers and weld them together by clicking “Weld” in the lower right hand corner.
Now select the background text and the accent bubble and click “Slice” in the lower right hand corner. Delete all the bits and pieces that you do not need which will leave you with a decent white space.
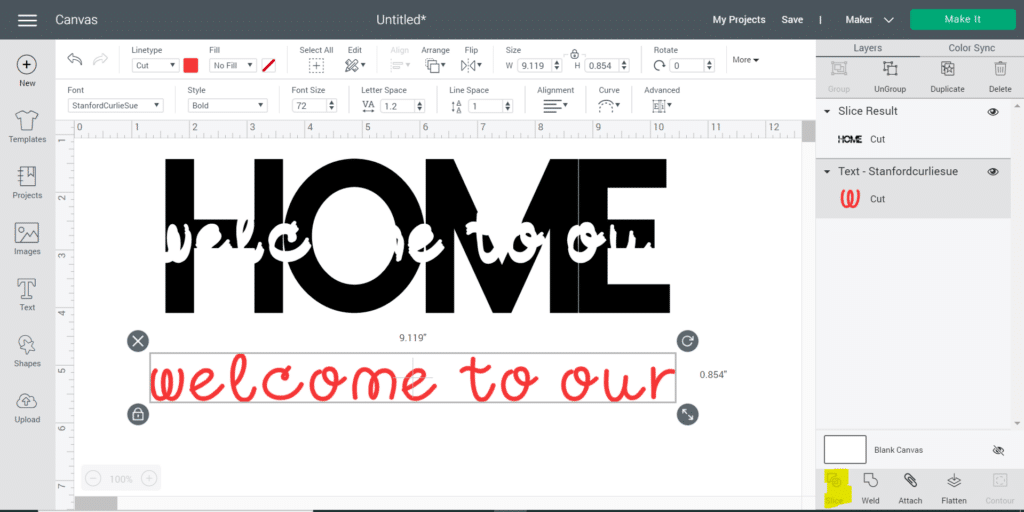
Then pull up your accent text from your oops! duplicate and delete the background from the oops! duplicate.
At this point it is pretty choppy. You can keep on duplicating the accent text, welding, and slicing until you fill in all the gaps, or you can also use the shape tools.
To do this you will create and resize a circle. Then use that circle to fill in any bumps that you have in the outline.
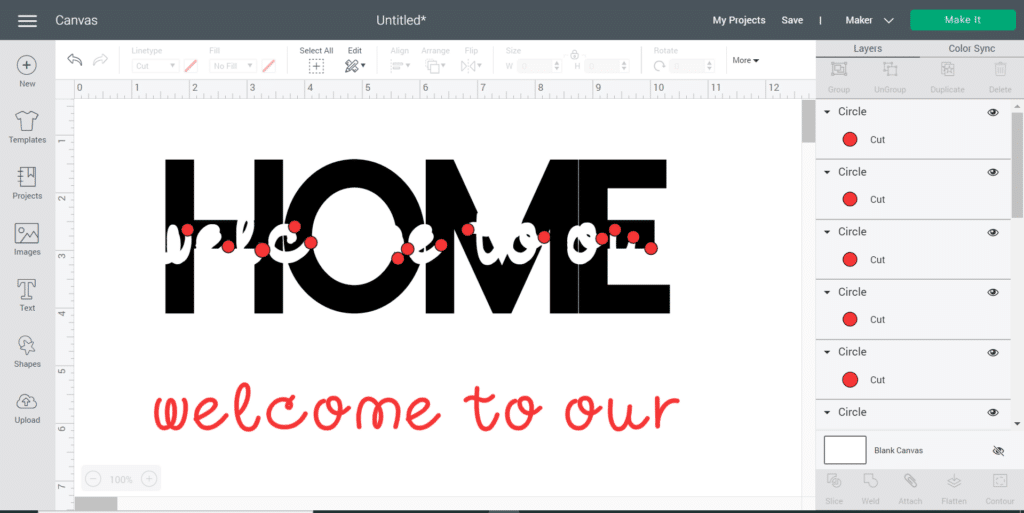
Weld all the circles together. And then select the circles and the background text and click “Slice”. Continue to touch up in this manner. While touching up keep in mind that it does not have to be perfect. Once you cut, all the smaller bumps will not be noticeable, especially if you are using anything with a textured surface like wood.
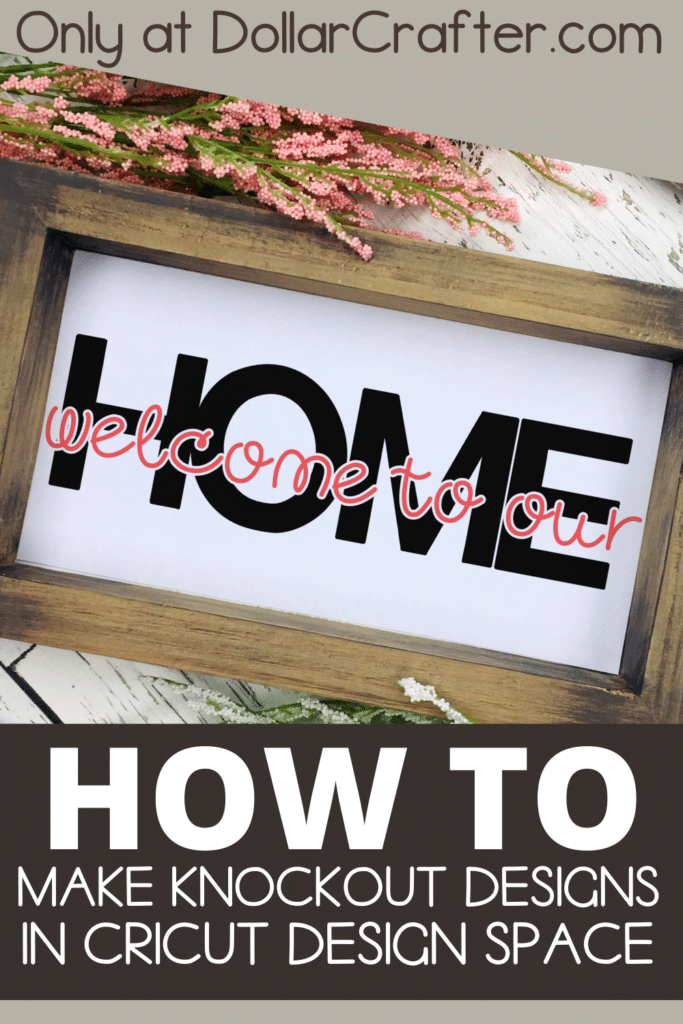
And there you go – you have a knockout design done!
Please Save This to Pinterest
Your shares are how this site grows and I am sincerely grateful. Know a friend who’d like this? Please share it on Facebook or save it to your favorite homemade beauty board on Pinterest.