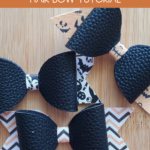
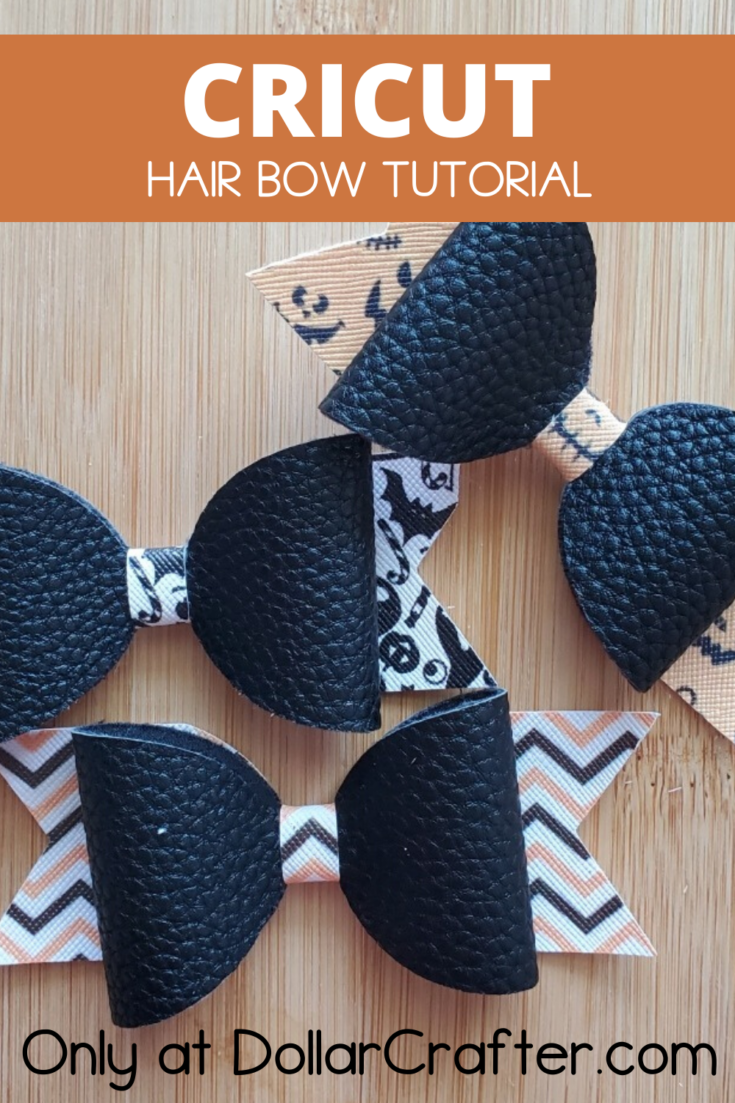
These Halloween Hair Bows are so cute! They’re perfect for any occasion and very simple to make. Did you know that Cricut machines can cut out hair bows? You could turn your machine into a full-time bow maker with the proper accessories -and much cheaper than buying pre-made ones.
DIY Cricut Hair Bow
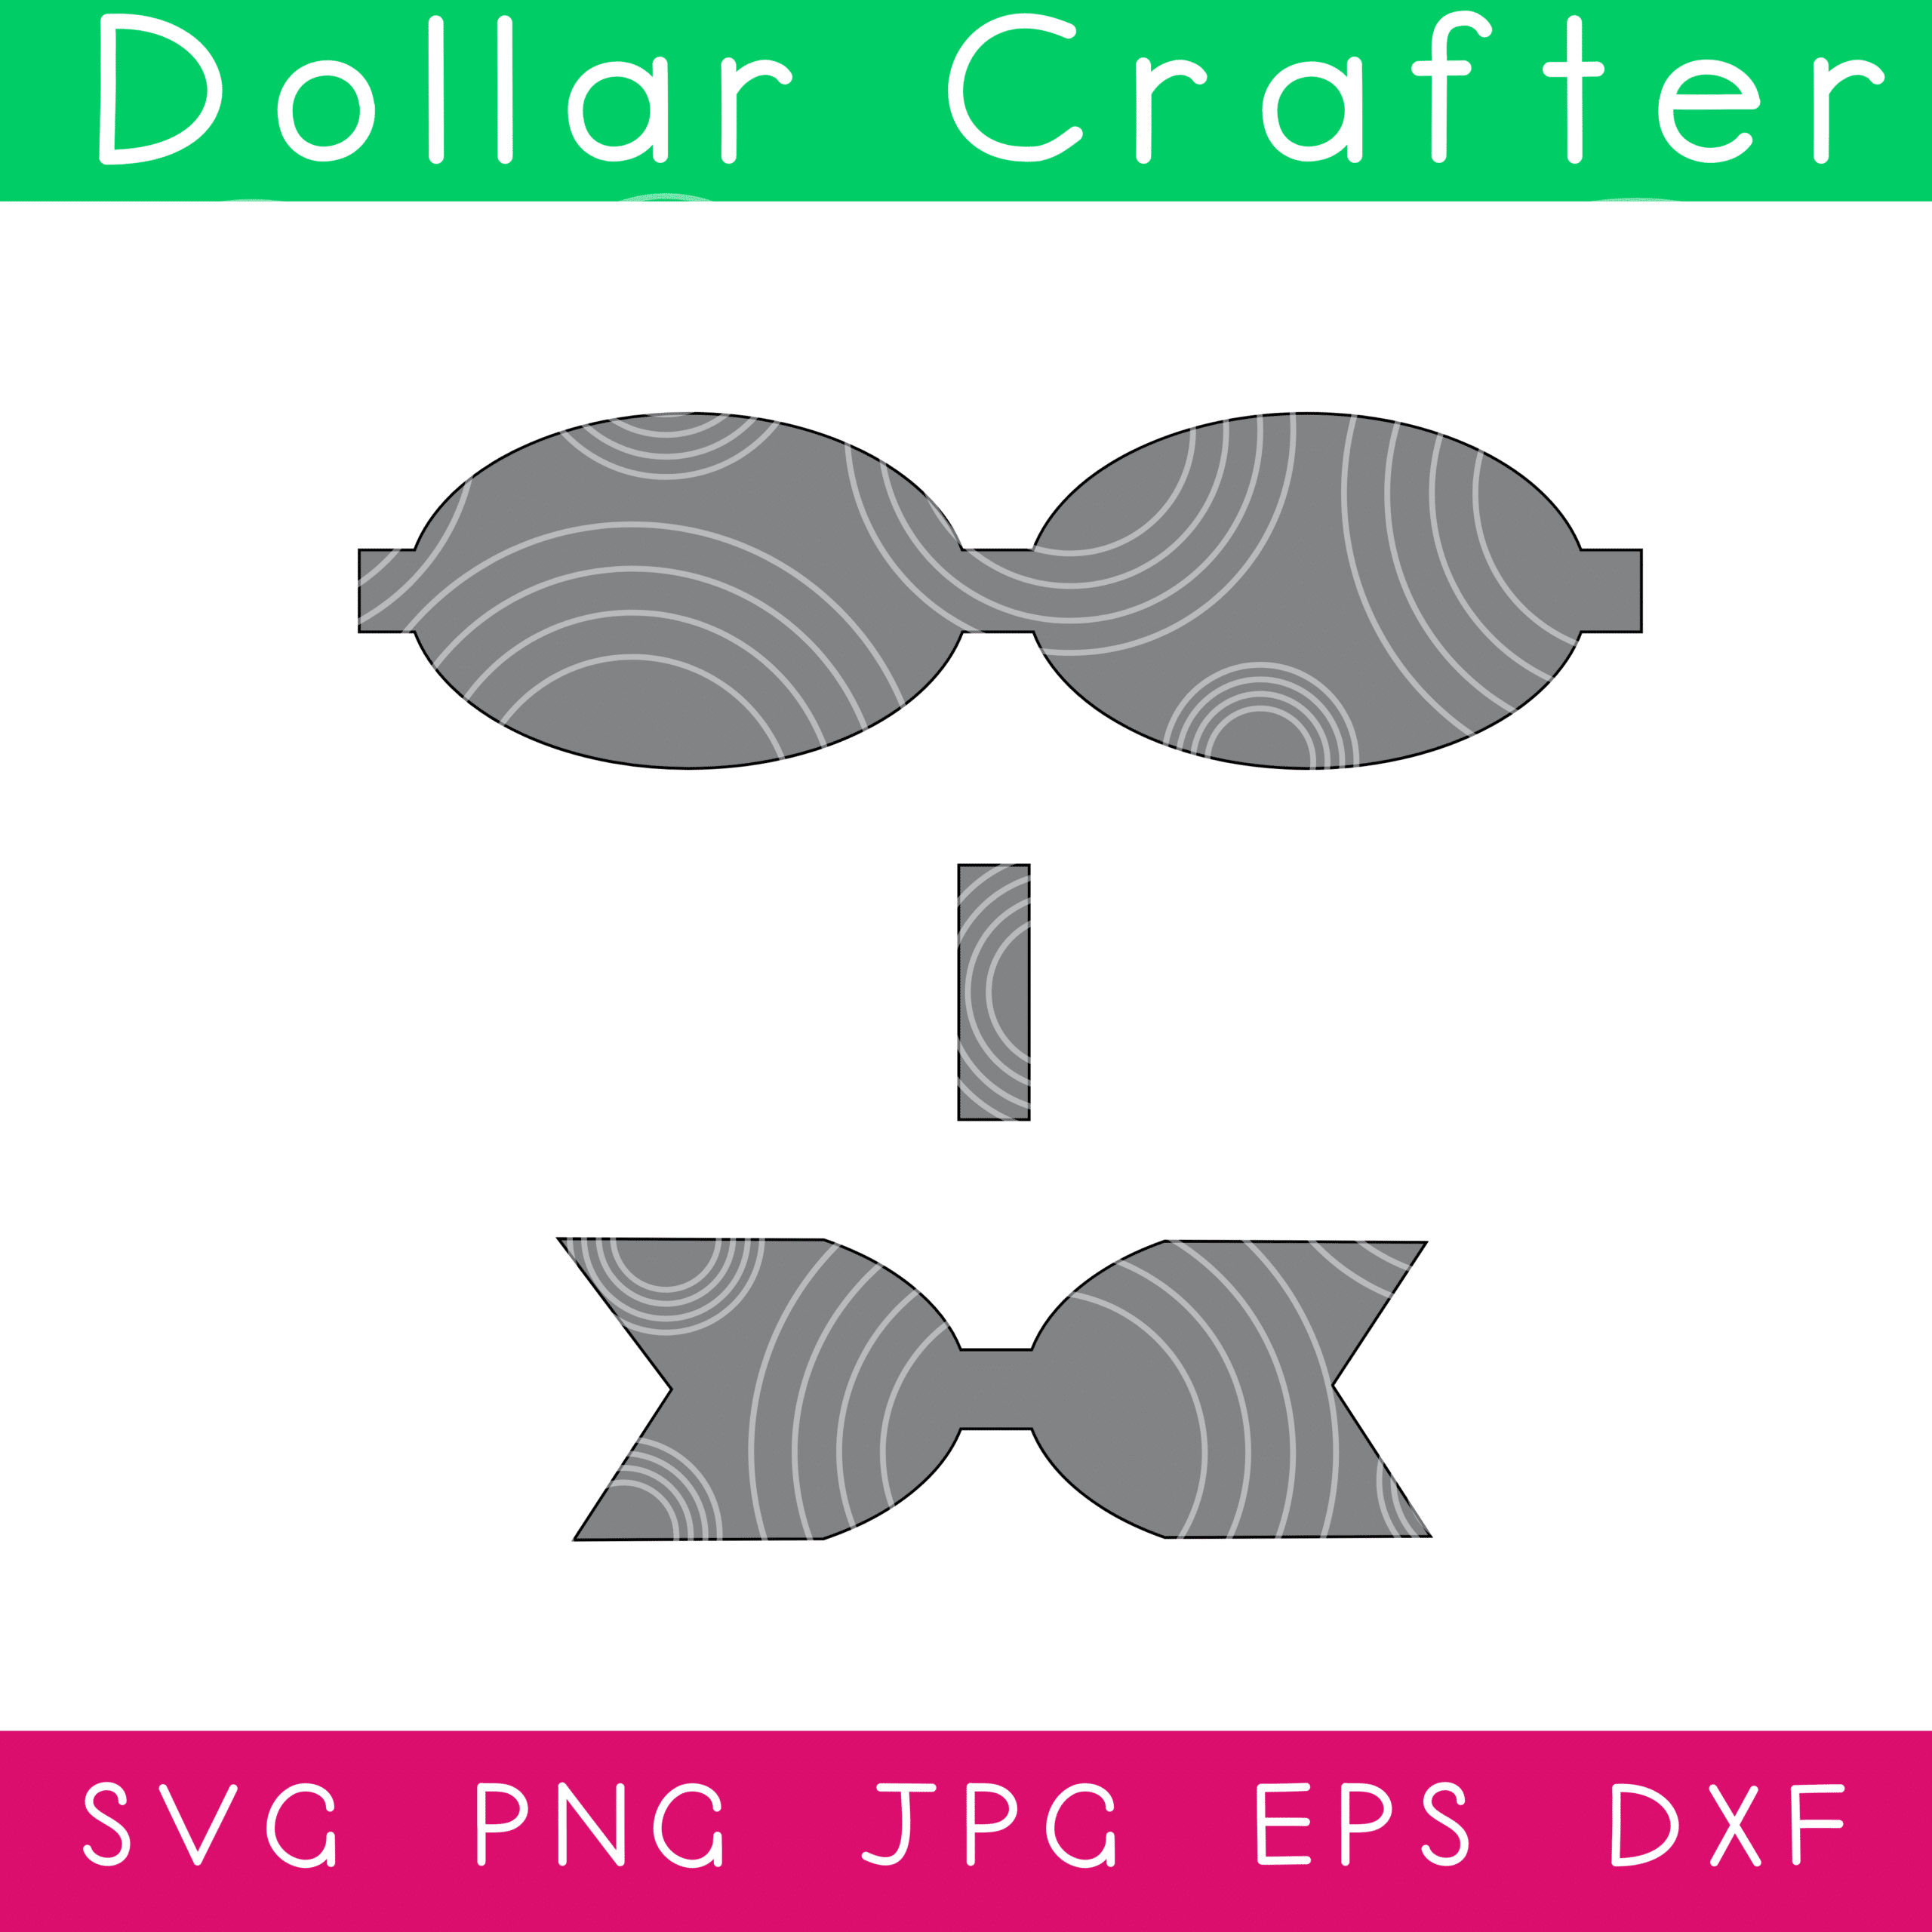
Make sure to use the Hair Bow SVG Template below because it will make this process so much easier.
Supplies:
- Faux Leather Sheets
- Alligator Clip
- Hair Bow SVG Template
- Cricut Maker
- Standard or Strong Grip mat
- Fine Point Blade
- Hot Glue/Glue Gun
Tips for Making a Leather Hair Bow
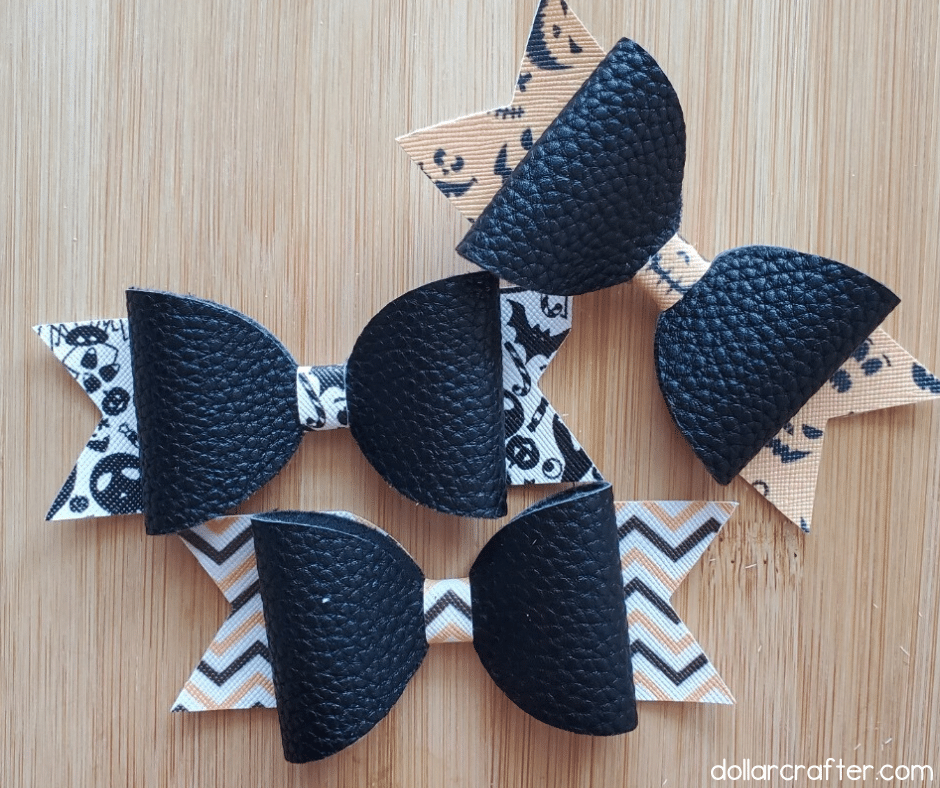
I would use the patterned leather as a backing. The solid color should be used for the front piece to make it pop!
Don’t forget to place your leather pretty side down and secure all 4 sides with masking tape. This keeps the leather from sliding around on your mat.
Work with each piece separately, then you will attach them with hot glue.
Once you make one of these cute leather hair bows, you’ll get hooked! Next thing you know, your friends and family will be asking for them. Maybe even start an Etsy store to sell them?
How to Make Leather Bows at Home
Let’s get crafting! Below is our written tutorial.
Cricut Leather Hair Bow
Materials
- Faux Leather Sheets
- Alligator Clip
Tools
- Cricut Maker
- Standard or Strong Grip mat
- Fine Point Blade
- Hot Glue/Glue Gun
Instructions
Upload the hair bow cut file into design space.
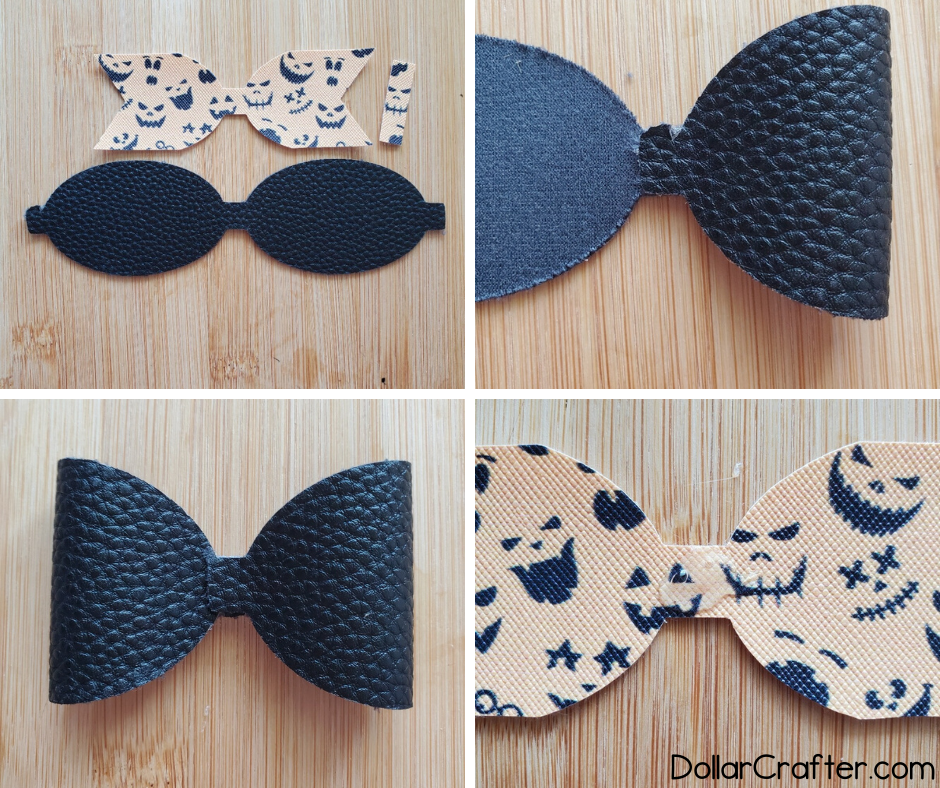
You will want to cut the main bow piece with your solid leather and your backing/middle piece with your patterned leather. Remember to place your leather pretty side down and secure all 4 sides with masking tape. This keeps the leather from sliding around on your mat. Cut all of your pieces using these settings in design space.
Run your cuts.
We will work with the main piece first. Take the first side and line it up with the middle. Secure it with a drop of glue or hot glue.
Do the same with your second side, making sure to line it up with the first before securing.
The put glue on your back piece and secure the bow on top. Make sure to line it up correctly, hot glue seals fast.
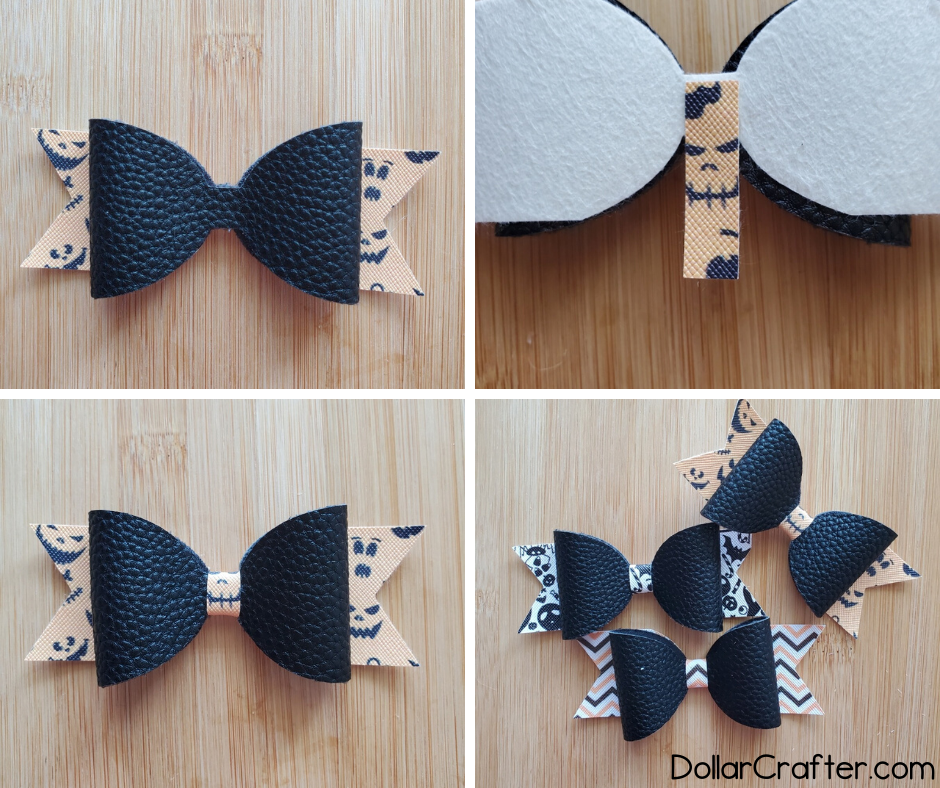
Now we want to add our middle piece. Flip your bow over and attach the first end to the bow in the middle.
Wrap it all the way around and secure it in the back with another drop of glue.
Attach the alligator clip to the back and you are finished.
Notes
For more fun Cricut crafts visit DollarCrafter.com
Recommended Products
As an Amazon Associate and member of other affiliate programs, I earn from qualifying purchases.
Please Save This to Pinterest
Your shares are how this site grows, and I am sincerely grateful. Know a friend who’d like this? Please share it on Facebook or save it to your favorite crafts board on Pinterest.