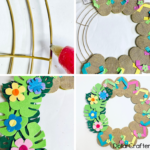
Summer is almost here, and it’s time to get your home ready with some fun and festive decor. If you’re looking for a creative and affordable way to add a touch of summer to your front door, then look no further than this DIY flip-flop wreath.
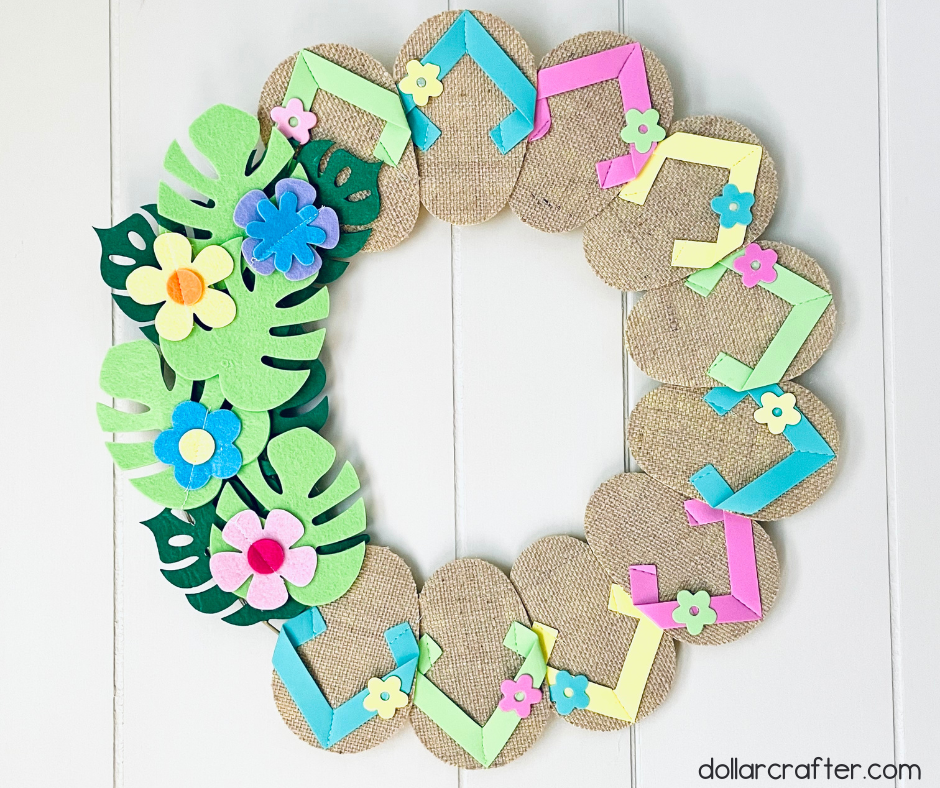
DIY Flip-Flop Wreath
Made entirely from items purchased at the Dollar Tree, this wreath is not only easy to make but also won’t break the bank. So grab your glue gun and some glue sticks, and let’s dive into the supplies you’ll need to create this fun and festive summer sandal wreath.
Supplies:
- 14 inch Wire Wreath Form
- 3 packages of Dollar Tree Sandal Coasters (each package has 4 in it and you will end up using 10 flip-flops)
- 2 packages of Leaf Coasters from Dollar Tree
- 1 package of a Felt Flower Garland from Dollar Tree
- Hot Glue Gun and Glue
Tips for Making This Sandal Wreath
Before you start gluing the flip-flops onto the wreath form, plan out the design you want to create. You can create a pattern, alternate colors, or mix and match to create a more eclectic look.
When gluing the flip-flops to the wreath form, apply the glue sparingly to avoid making a mess. You only need a thin line of glue on each section of the wreath where you’ll be attaching the flip-flops.
Stagger the leaves when attaching the leaf coasters to the wreath form to create a more natural and organic look. This will also help to fill in any gaps between the flip-flops.
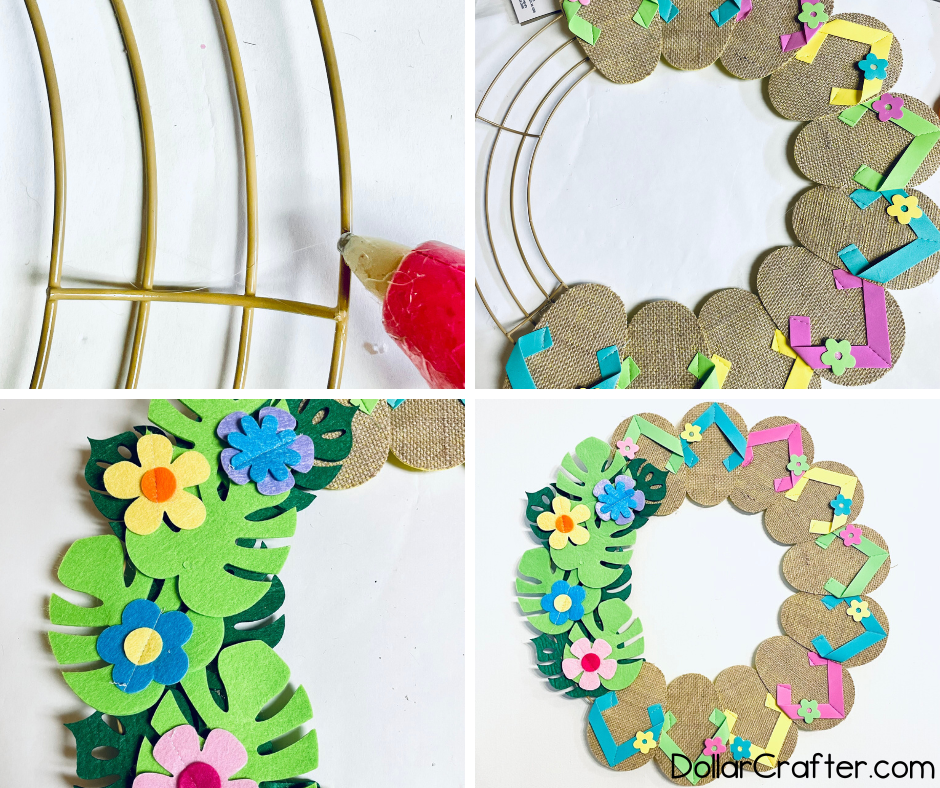
The felt flower garland can be cut into individual flowers, so experiment with different placements to find the design that works best for you. You can also add additional flowers or other embellishments to the wreath for more visual interest.
Once you’ve completed the wreath, make sure to hang it securely on your front door or wherever you plan to display it. You can use a wreath hanger or ribbon to hang it, but make sure it’s attached firmly so it doesn’t fall off and get damaged.
While felt wreaths can be used for indoor and outdoor decor, it’s important to take some precautions when hanging them outside such as hanging your wreath in a protected location, using a protective coating such as a fabric spray designed to against water and UV damage, and bring it inside during harsh weather.
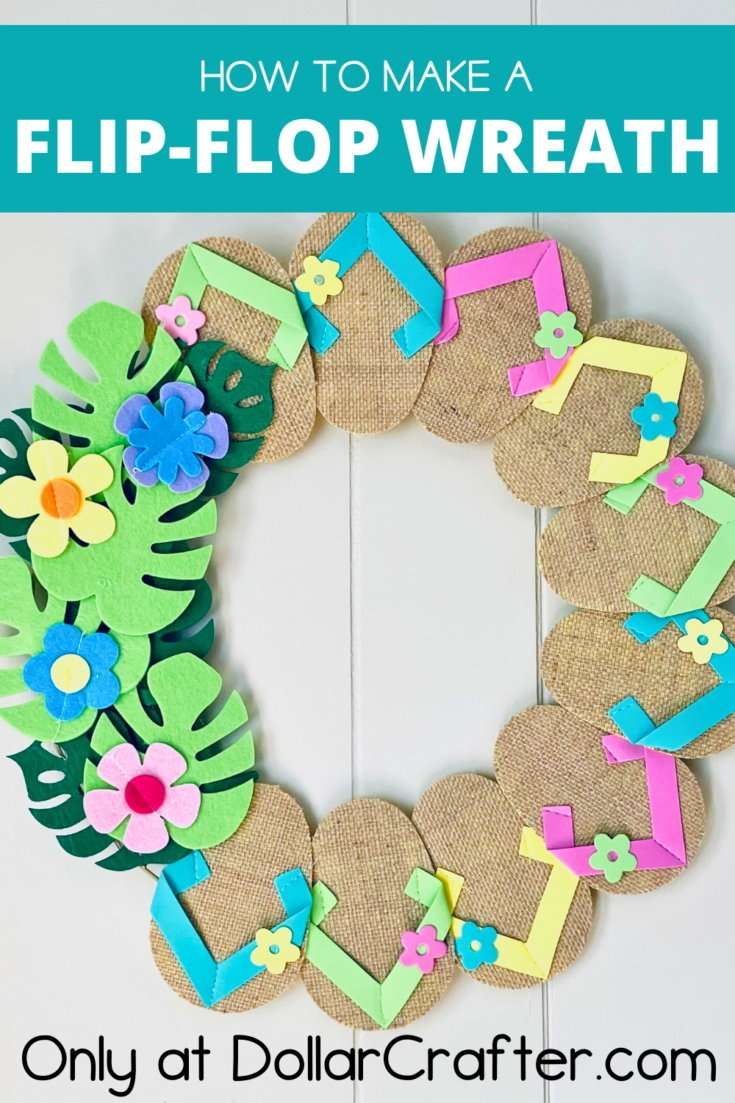
How to Make a Flip-Flop Wreath at Home
Ready to get crafting? You will find the full tutorial below!
DIY Flip-Flop Wreath
Materials
- 14 inch Wire Wreath Form
- 10 Flip-Flop Coasters (Dollar Tree)
- 2 packages of Leaf Coasters (Dollar Tree)
- 1 package of a Felt Flower Garland (Dollar Tree)
Tools
- Hot Glue Gun and Glue
Instructions
- Gather your supplies.
- Begin by applying a thin line of glue to the outer and inner sections of the wire wreath form, about 2 inches at a time. Press the flip-flop coasters onto the glue, making sure they adhere well. Repeat this process until you have attached 10 flip-flops to the wreath form. Space them evenly around the wreath.
- Once the flip-flops are securely attached, add the leaf coasters to the wreath. Apply a small amount of hot glue to the back of each leaf coaster and press it onto the wreath form. Stagger the leaves to create a more organic look and fill in any gaps between the flip-flops.
- Next, cut the felt flower garland into individual flowers. Apply a small amount of glue to the back of each flower and attach it to the wreath form where desired. You can experiment with different placements and color combinations to create the look you want.
- Once you have attached all the flowers, check the wreath for any loose pieces or areas that need more glue. Add more glue as needed to make sure everything is securely attached.
- If you are planning to hang your flip-flop wreath outside, treat it with Scotchgard Fabric Protector or another fabric weather protectant.
- Finally, add a hanger to the wreath. You can use a wreath hanger or ribbon to hang it on your front door or wherever you plan to display it.
Notes
For more fun crafts visit DollarCrafter.com
Please Save This to Pinterest
Your shares are how this site grows and I am sincerely grateful. Know a friend who’d like this? Please share it on Facebook or save it to your favorite crafts board on Pinterest.