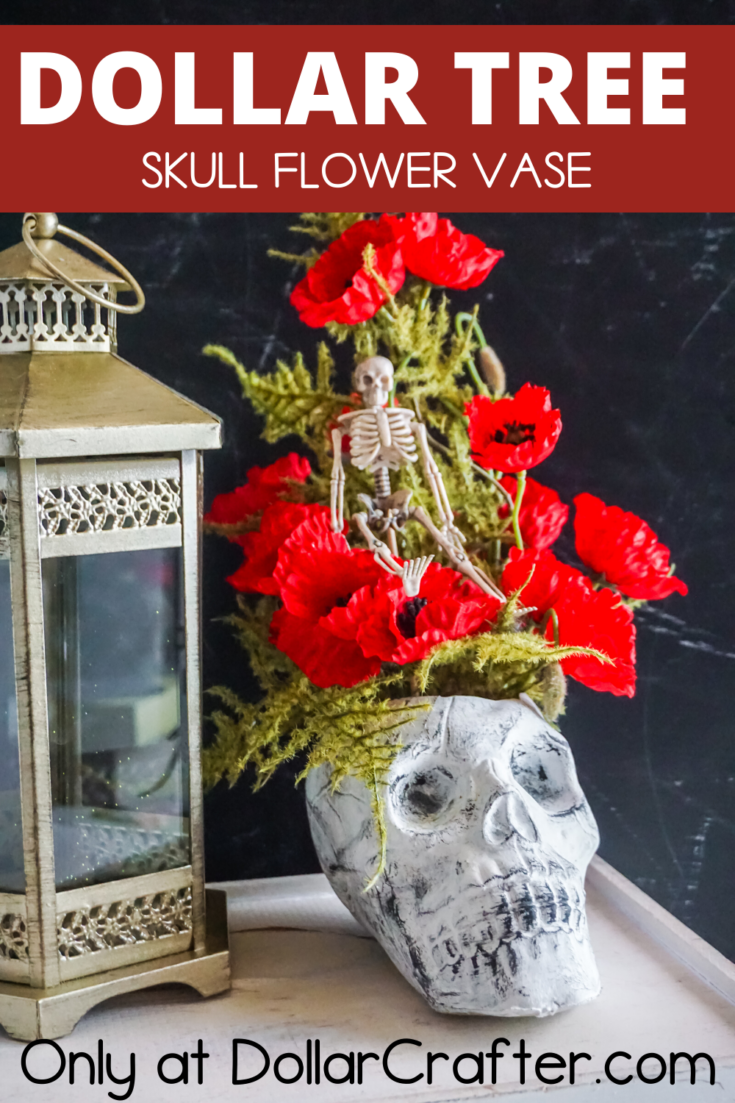
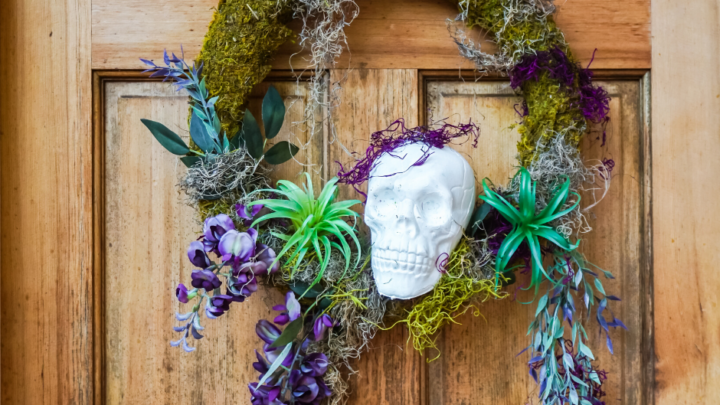
If skulls are your thing, you should try this fun and easy DIY skull flower vase. It’s a great project for Halloween or Day of the Dead! The best part is that most of the supplies can be found at your local Dollar Tree store. The smaller skeleton is the star though, look at how cute he is!
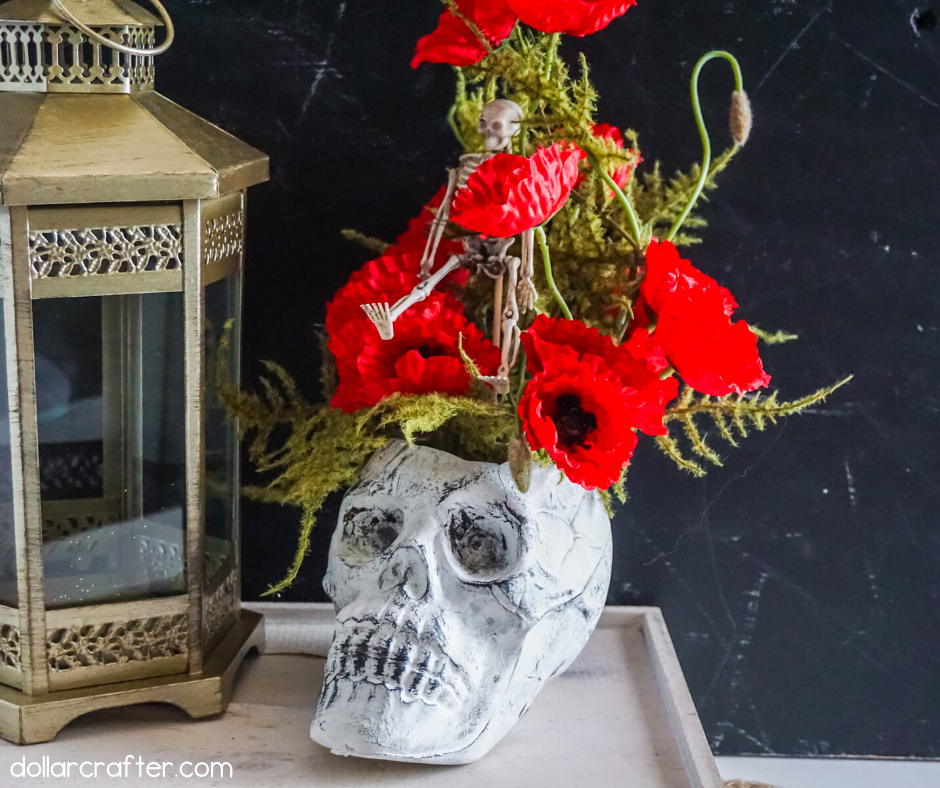
We have been having a blast creating Dollar Tree Halloween crafts this last month, make sure to swing by and check them all out for more inspiration!
Dollar Tree Skull DIY Vase
Supplies:
- Hollow Plastic Skull (I got mine at Dollar Tree)
- Chalk Paint in White
- Acrylic Paint in Black
- Craft Sealant, optional
- Tiny Skeleton (I got mine at Dollar Tree)
- ¼-inch or smaller Dowel
- Floral Foam
- Faux Flowers (I used poppies and some fern moss thing)
- Marker
- Circle Form to Trace (I used a tape roll for heat safe tape – just anything the same size as the skull top)
- Craft Knife or Box Knife
- Paint Brushes
- Hot Glue Gun and Glue
Tips for Making a Skull Flower Vase
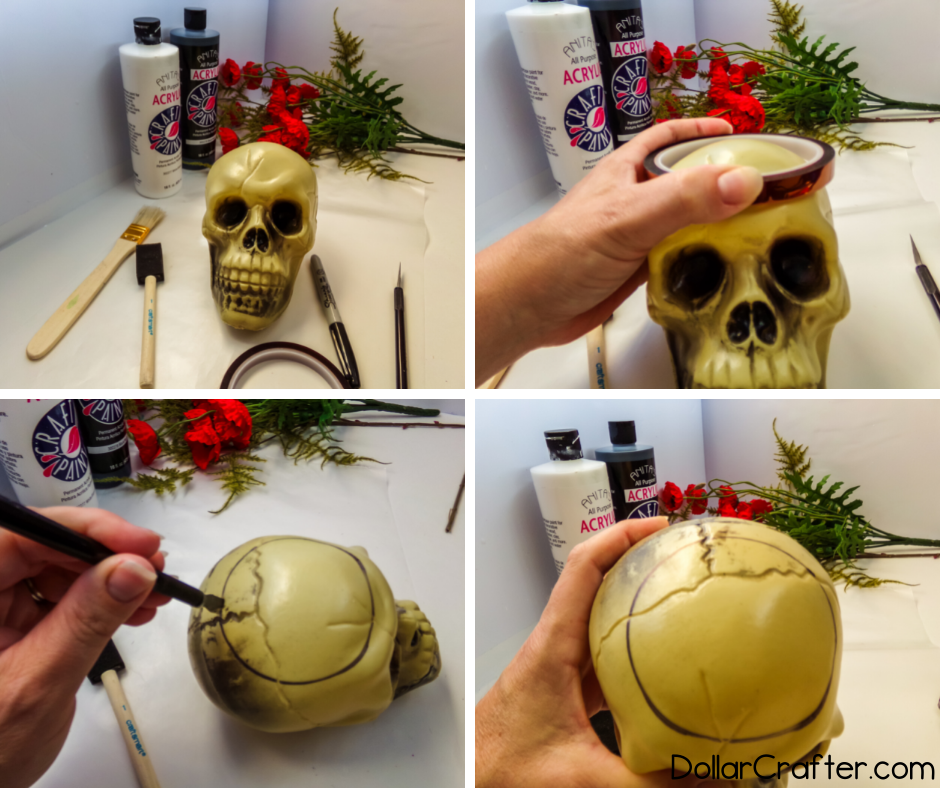
To make things super easy, use a tape roll to measure how big to cut the top of the skull.
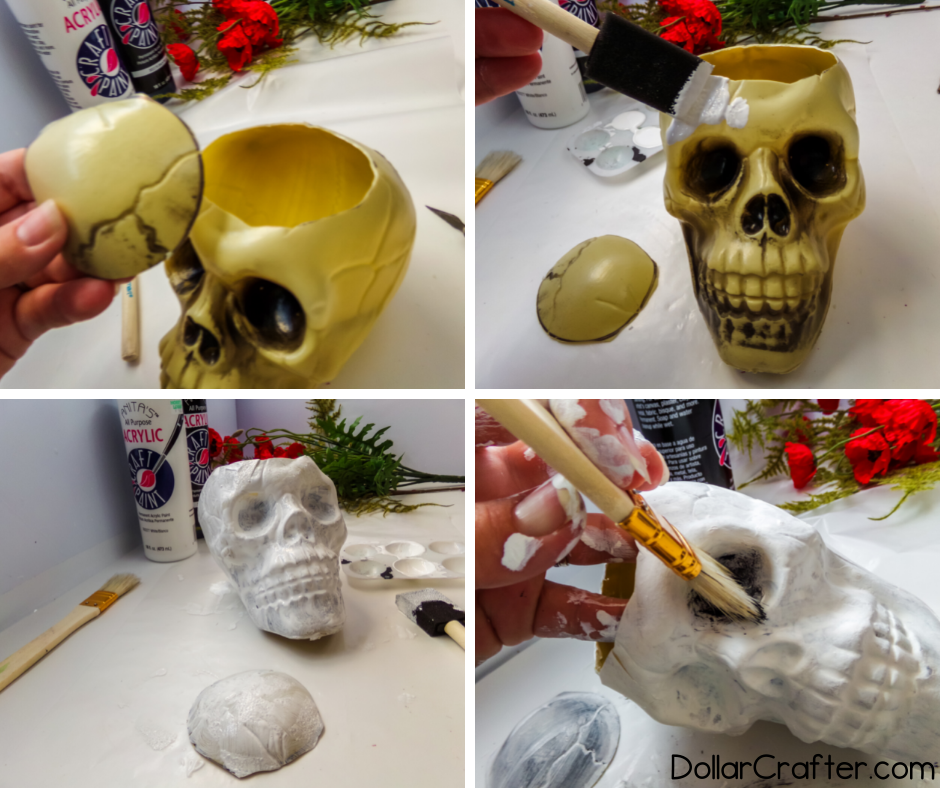
You will want to paint the entire skull in white chalk paint, and please allow the paint to dry completely. I have found with this craft that chalk paint works a lot better than just regular acrylic. If you plan on using normal acrylic make sure you seal afterwards to prevent chipping.
The next step is to dry brush with the black acrylic paint. To do this, apply a small amount of black paint onto your dry brush (no water at all) before painting it on in quick swipes across the skull’s surface. Letting each layer set for 15 minutes will help ensure that paint dries thoroughly so you can proceed to the following steps without worrying about smudging. Dry brushing gives a cool textured look.
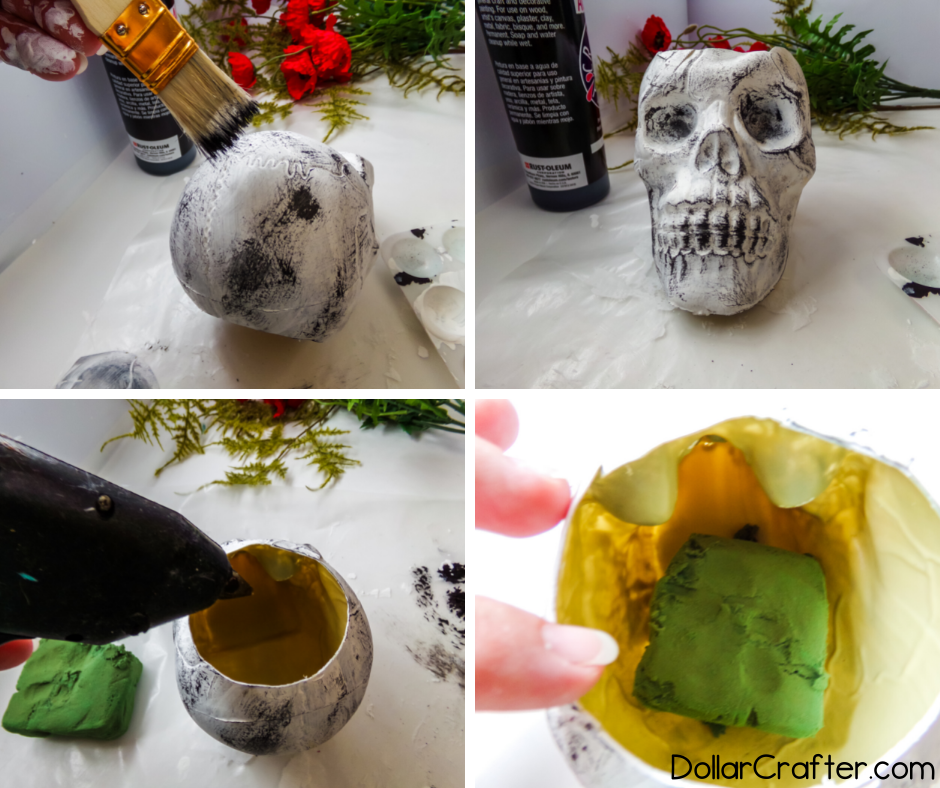
After hot gluing the floral foam inside your skull, then it’s time to add in some flowers and foliage. Make sure you push those stems down as far into the flower because you don’t want this guy toppling over if his head is too heavy!
Full instructions are below, and this Skull Flower Vase can be used all year long- change out the flowers to represent each holiday or season.
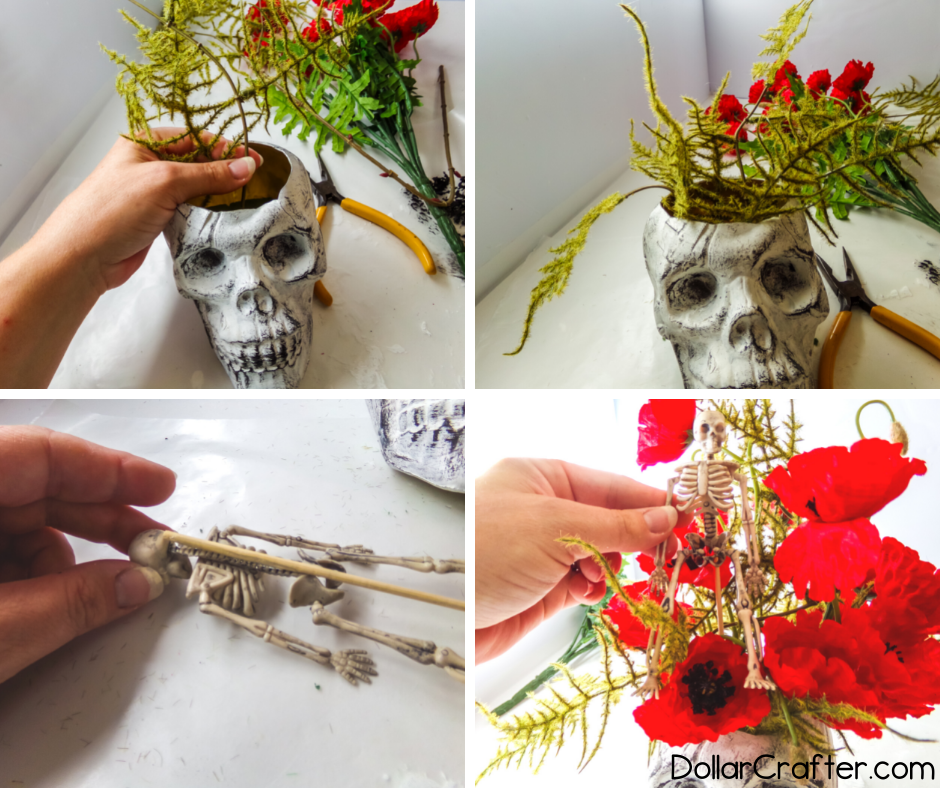
How to Make a Skull Flower Vase at Home
Skull Flower Vase
Materials
- Hollow Plastic Skull
- Chalk Paint in White
- Acrylic Paint in Black
- Craft Sealant, optional
- Tiny Skeleton
- ¼-inch or smaller Dowel
- Floral Foam
- Faux Flowers
Tools
- Marker
- Circle Form to Trace
- Craft Knife or Box Knife
- Paint Brushes
- Hot Glue Gun and Glue
Instructions
- Clean the skull as much as possible, then place the circle form on top of the skull head.
- Trace the circle form onto the skull head, then cut it out with the craft knife.
- Remove the cut-off portion of the skull.
- Paint the skull with white chalk paint and allow the paint to dry completely.
- Dry brush the skull with the black acrylic paint, taking care to make each of the skull’s fun figuring pop. Allow the paint to dry completely.
- Add hot glue to the bottom of the skull, then fit the floral foam into the skull, getting it as low into it as you can to reduce tippage.
- Fit the faux floral elements into the floral foam inside the skull.
- Hot glue the skull of the tiny skeleton to the end of a dowel then stick the dowel into the floral foam, making the little skeleton dance and you’re done.
Notes
For more fun Halloween crafts visit DollarCrafter.com
More Fun Halloween Crafts You Will Love!
Please Save This to Pinterest
Your shares are how this site grows, and I am sincerely grateful. Know a friend who’d like this? Please share it on Facebook or save it to your favorite crafting board on Pinterest.


This looks so amazing! Thank you so much for sharing your idea! Will surely use this again!
I love this! Thanks for sharing on Happiness is Homemade at LifeasaLEOWife.com! I’d love for you to share on Traffic Jam Weekend as well. It runs Thursdays at 5pm CST thru Sundays. Your post will be my feature on Sunday’s Happiness is Homemade.